Android Tricks 4 All: Tablet
News Update
Loading...
Showing posts with label Tablet. Show all posts

Tuesday, June 9, 2020

The ultimate guide for installing the Google Play Store on Amazon Fire tablets Updated for the Fire HD 8 10th Gen

The ultimate guide for installing the Google Play Store on Amazon Fire tablets Updated for the Fire HD 8 10th Gen

Amazon's Fire tablets are incredibly popular, mostly because they're incredibly cheap. However, none of them come with access to the Google Play Store, which is how most Android devices download and install applications. Instead, Fire tablets come bundled with the Amazon Appstore, which has a much smaller library and lacks any Google-made apps and services. No YouTube, no Chrome, and so on.
The good news is that it's not incredibly difficult to install the Play Store on a Fire tablet, and the whole process can take as little time as 10 minutes. This complete guide for installing the Play Store on Fire tablets has detailed instructions for every model produced since 2014, with added troubleshooting steps if you run into issues.

IMPORTANT INFO

  1. Remove your tablet's microSD card if you have one installed. If you don't, the Play Store and its required may be automatically installed to the microSD card, which can cause issues. You can put the card back in once you're done.
  2. There is no way to manage a Fire tablet through Google Family Link, even after the Play Store is installed.
  3. Apps installed through the Play Store might not work with Amazon FreeTime app management. I haven't personally tested this, but that's what many people have reported in the comment section.
  4. Some apps hide themselves from the Play Store on Fire tablets, because Fire tablets are not SafetyNet-certified by Google . Netflix is one app that does this. For those applications, you can try finding them on the Amazon Appstore .

Enable installation from unknown sources

The first step in this process is to enable apps to be installed from outside the Amazon Appstore. This allows you to open and install applications from downloaded APK files, which is how we'll get the Play Store running.
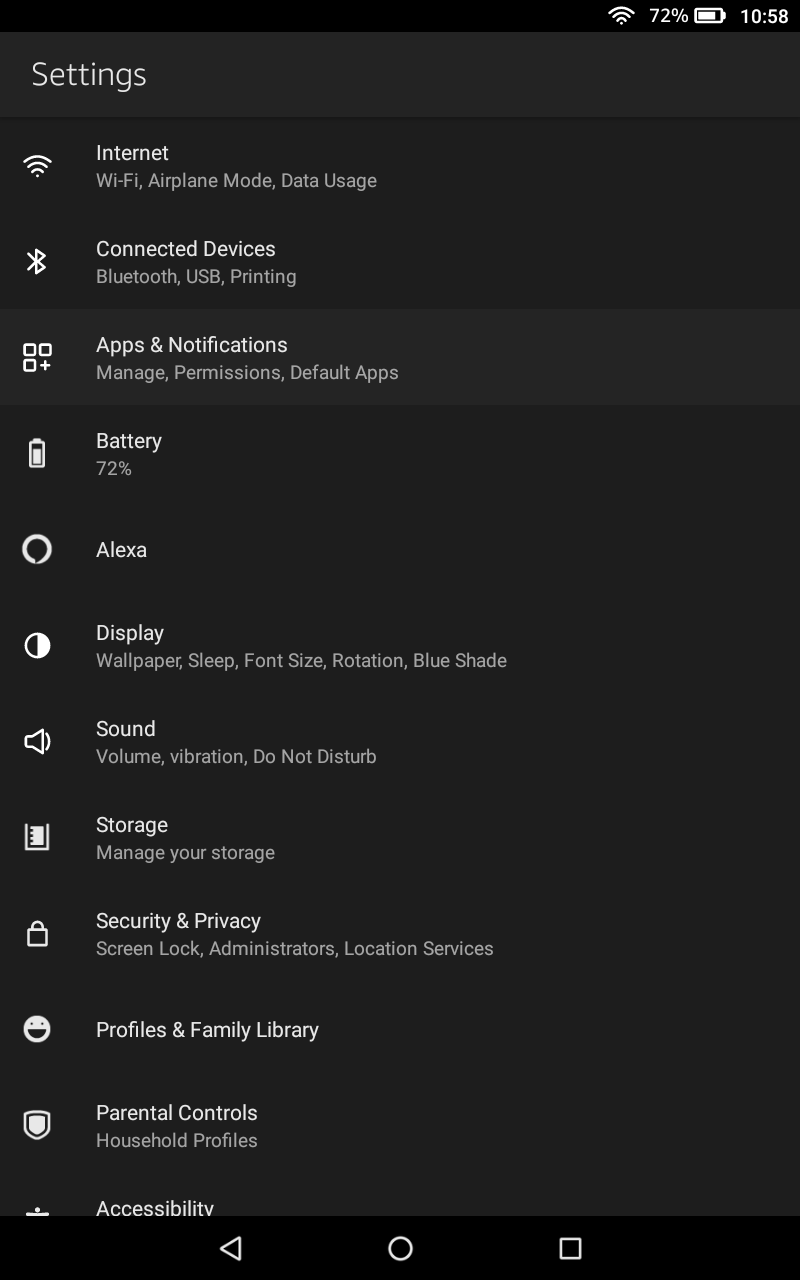
First, go to the main 'Home' page on your home screen and open the Settings app. Then tap the 'Security & Privacy category (older models might just say 'Security'), find the switch for 'Apps from Unknown Sources,' and turn it on.
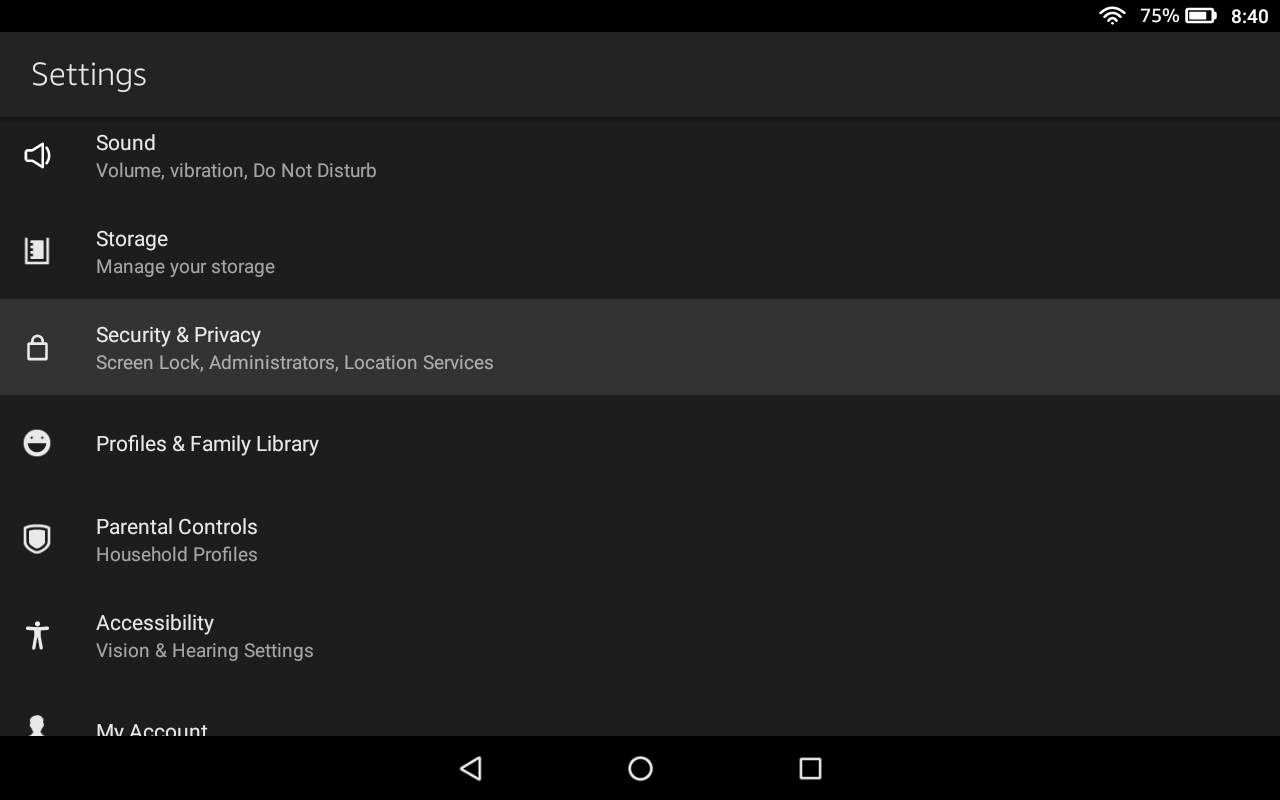
If tapping 'Apps from Unknown Sources' brings up a list of apps, then you don't need to do anything. You may receive a popup when installing APKs, but you'll just have to tap the 'Allow' button when prompted.
Now you're ready to download and install the APKs needed to get the Google Play Store running.

Install the Play Store

The next step is to download the proper APK files for the Play Store. You technically have to install four different applications  Google Account Manager, Google Services Framework, Google Play Services, and finally the Google Play Store. The first three apps handle basic account services and add APIs, while the last app is the store itself.
Because different Fire tablets run different versions of Android with varying hardware, the exact APKs you have to install depend on what Fire tablet you have. If you're not sure which model you have, open the Settings app again, tap on 'Device Options & System' (it might also just be called 'Device Options'), and look at what is listed under 'Device Model.
For the Google Account Manager and Google Services Framework applications, find the appropriate links for your device from the table below, and tap the main 'Download APK' button on the linked page. Don't open the downloaded files yet, we'll do that later.

GOOGLE ACCOUNT MANAGER


Fire HD 10 (9th Gen), Fire 7 (9th Gen), Fire HD 8 (8th, 10th Gen)Google Account Manager v7.1.2
Fire HD 10 (7th Gen and older), Fire HD 8 (7th Gen and older), Fire 7 (7th Gen and older), Fire HD 6, Fire HDX 8.9Google Account Manager v5.1

GOOGLE SERVICES FRAMEWORK


Fire HD 10 (9th Gen), Fire HD 8 (10th Gen)Google Services Framework v9-4832352
Fire 7 (9th Gen), Fire HD 8 (8th Gen)Google Services Framework v7.1.2
Fire HD 10 (7th Gen and older), Fire HD 8 (7th Gen and older), Fire 7 (7th Gen and older), Fire HD 6, Fire HDX 8.9Google Services Framework v5.1
For these last two applications, click the link for your device, then select the version closest to the top of the list which doesn't have "beta" in the name. Again, don't open the files yet, just download them.

GOOGLE PLAY SERVICES


Fire HD 10 (9th Gen, 2019), Fire HD 8 (10th Gen)Google Play Services (64-bit ARM, nodpi, Android 9.0+)
Fire 7 (9th Gen, 2019)Google Play Services (32-bit ARM, nodpi, Android 6.0+)
Fire HD 8 (8th Gen, 2018)Google Play Services (64-bit ARM, nodpi, Android 6.0+)
Fire HD 10 (7th Gen and older), Fire HD 8 (7th Gen and older), Fire 7 (7th Gen and older), Fire HD 6, Fire HDX 8.9Google Play Services (32-bit ARM, nodpi, Android 5.0+)

GOOGLE PLAY STORE


All modelsGoogle Play Store (universal, nodpi)
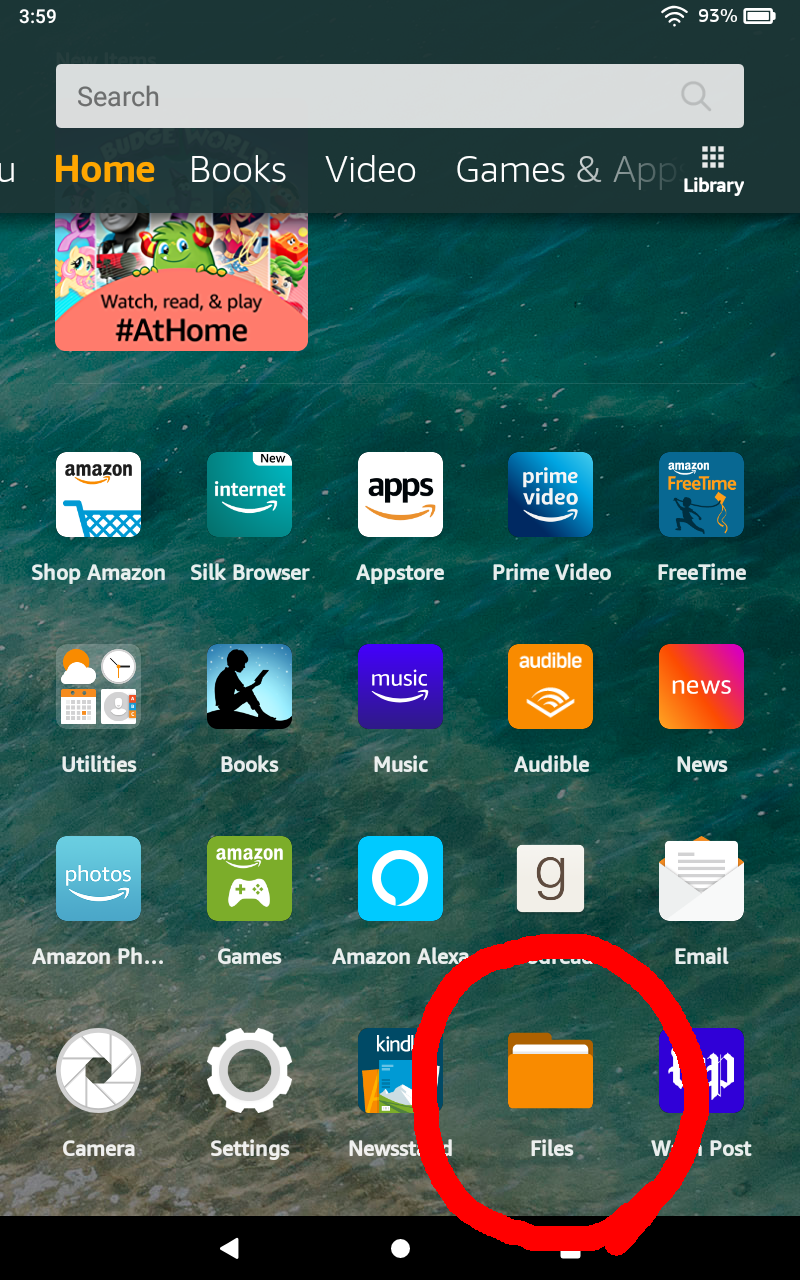
Now it's time to install the apps. Find the Files app on your tablet (it might also be called 'Docs' or 'Documents') and open it. Then, find your device's Downloads folder. On most Fire tablets, this is located in the side menu.
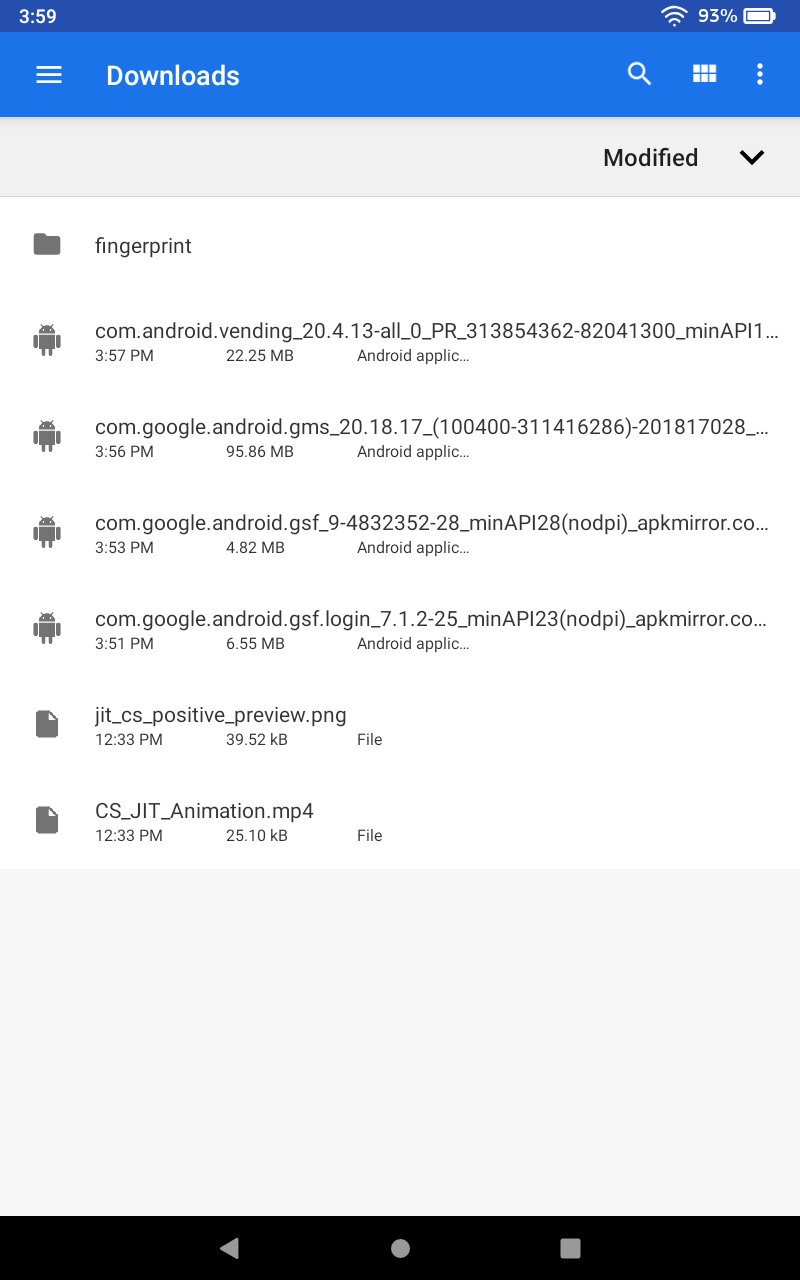
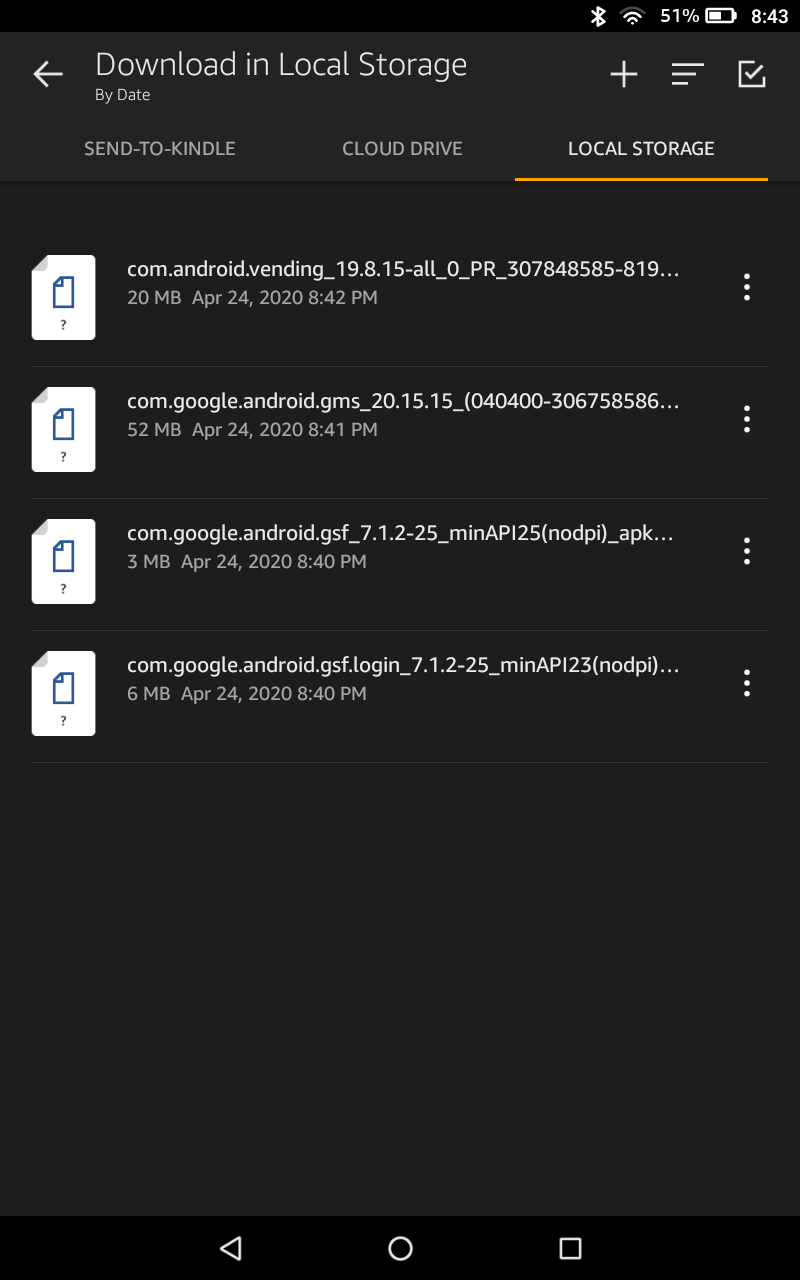
Finding downloaded APKs on a 2020 Fire HD 8
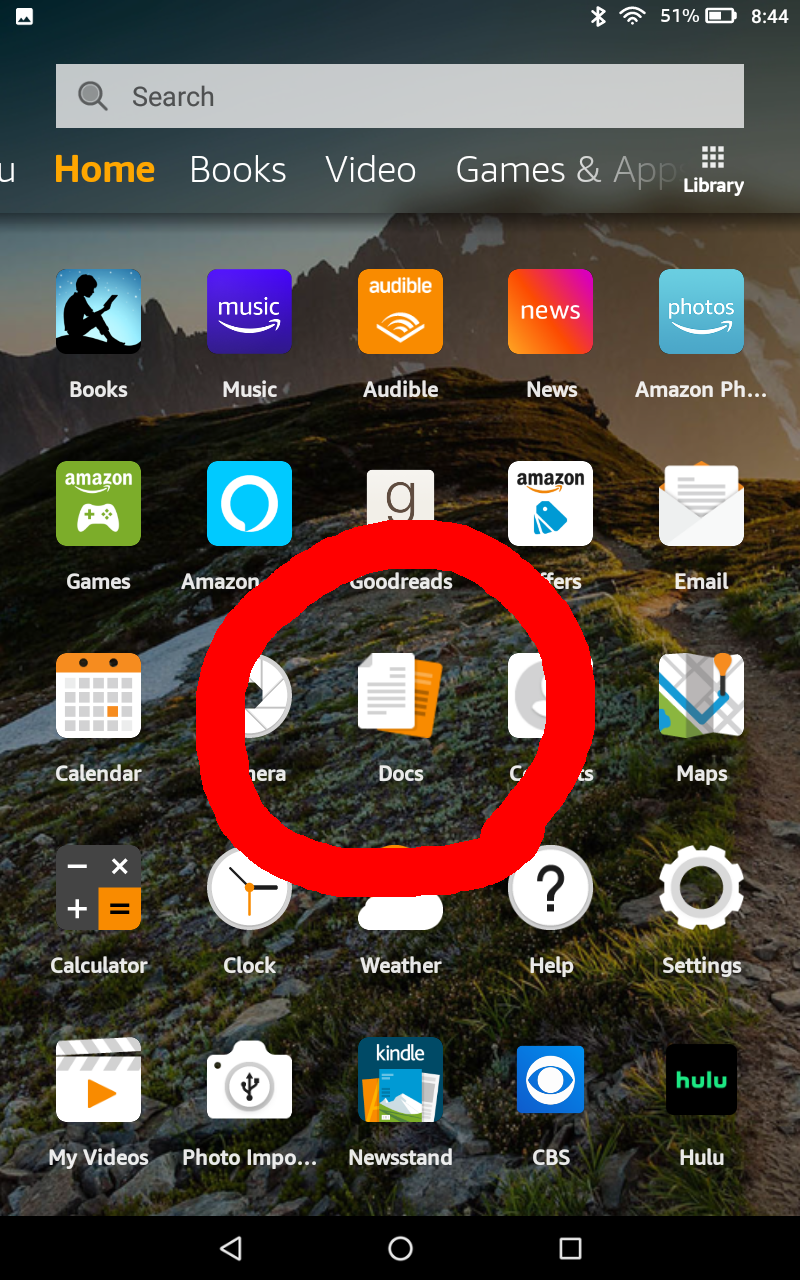
Finding downloaded APKs on a 2018 Fire HD 8
You should see all four APK files. If not, go back and see which one you missed (or just download all of them for good measure). Also, switch to the file list view if you haven't already, so you can see the full names of each APK.
Open the apps in the below order, and when the installation is complete, press 'Done' and not 'Open'. Installing the apps out of order will cause the Play Store to not work. Also, if you have an SD card, make sure to take it out during these installations.
  1. com.google.gsf.login
  2. com.google.android.gsf
  3. com.google.android.gms
  4. com.android.vending
Once you have installed all four apps, hold down the power button, and tap 'Restart' to restart your tablet. Older tablets might only have the option to power off — if so, let the tablet shut down, then hold down on the power button to turn it back on.
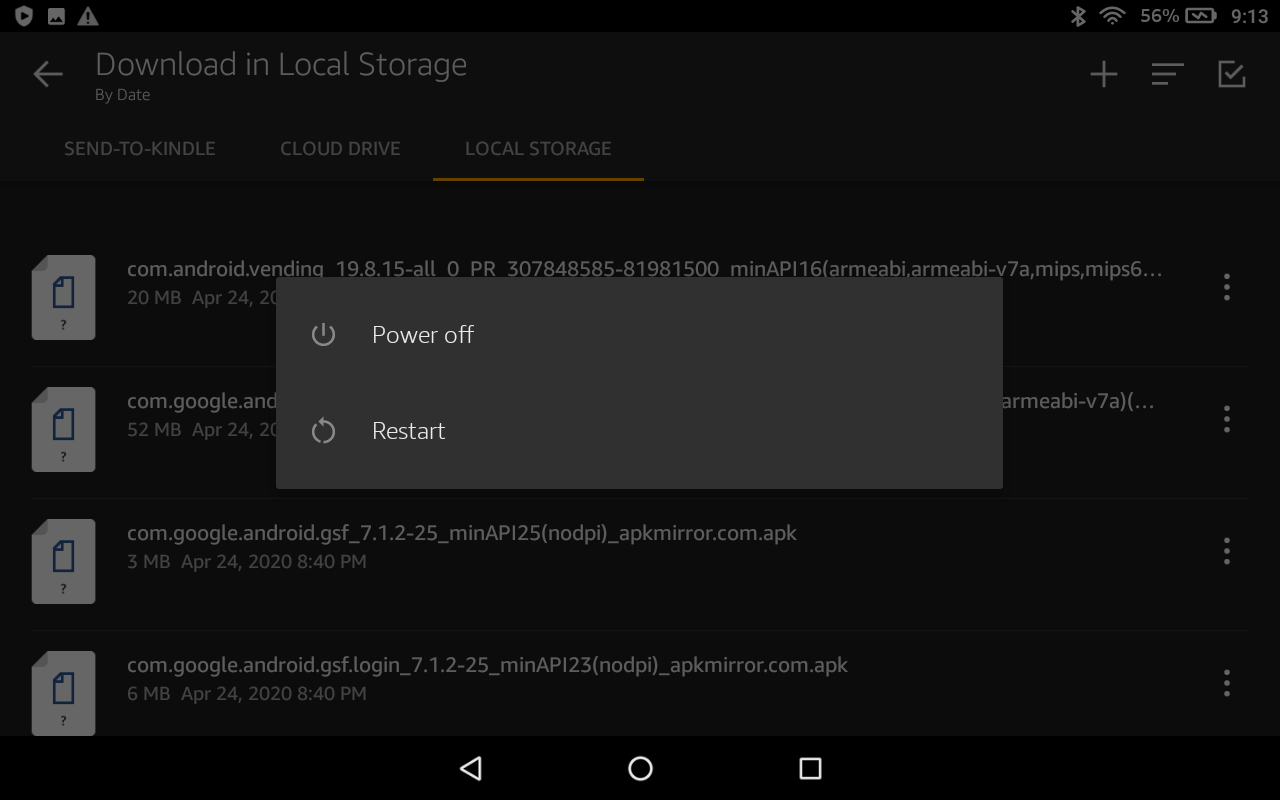
Restart (or power off, and back on again) after you finish installing the Play Store.
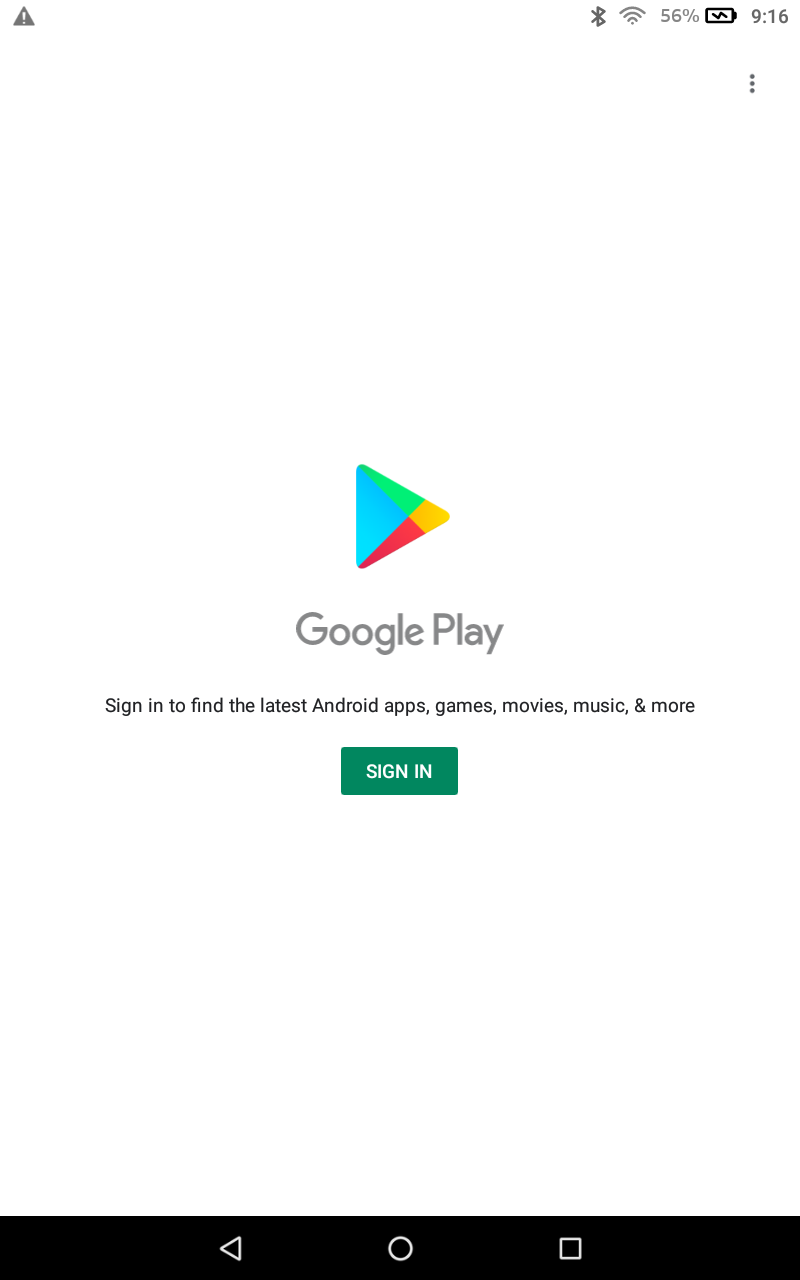
After your Fire tablet has booted back up, open the new Play Store app from the home screen. From there, the Play Store should ask you to login with your Google account, and then finally allow you to download and install apps.

Fixes for common problems

If the Play Store or other Google apps aren't working correctly, here are some fixes for common issues.

"This account already exists on your device"

If you get the error "This account already exists on your device" when signing into Chrome or another Google app, or if the app won't detect your Google account at all, follow these steps:
  1. Completely close the app you're having issues with (e.g. swipe it away in the Recents/multi-tasking screen).
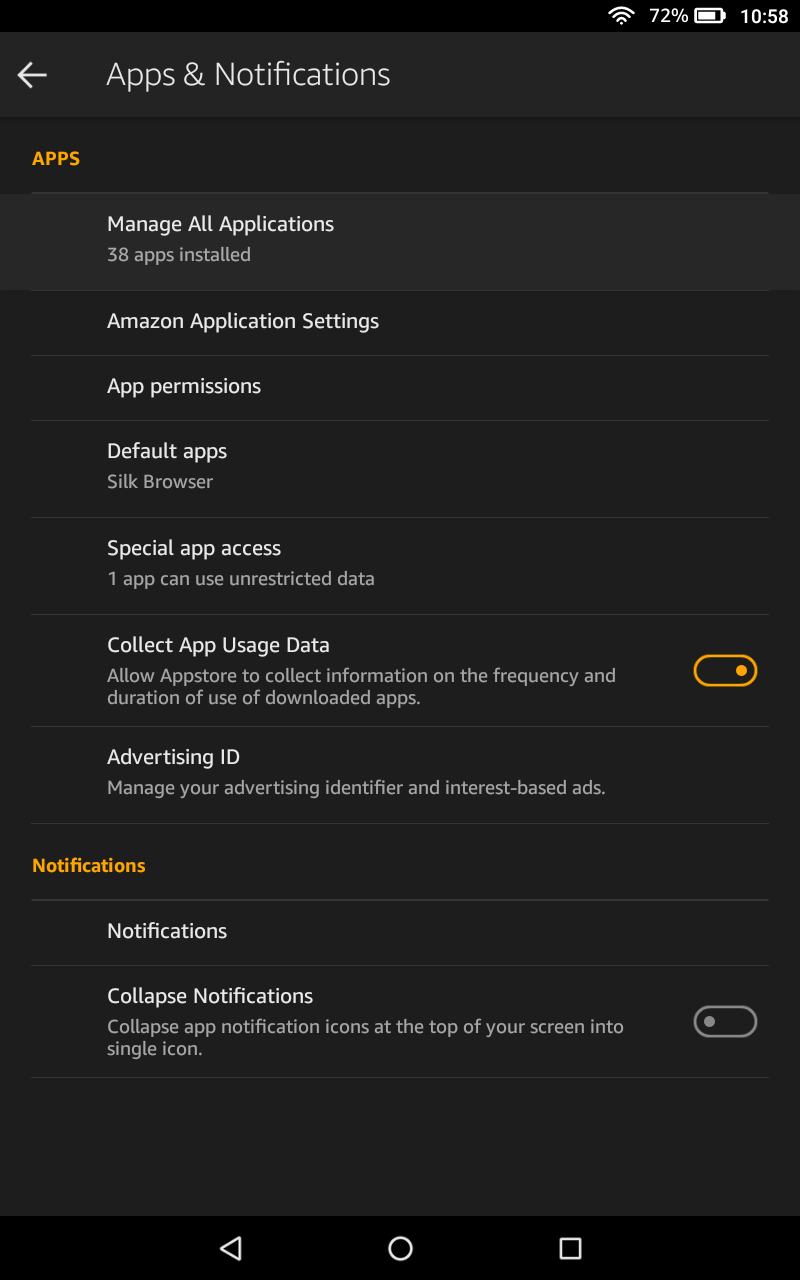
  2. Open the Settings app, tap Apps & Permissions, then select 'Manage all applications.' These options might have different names, depending on your version of Fire OS.
  3. Find the app you're having issues with in the list, tap on it, and select 'Permissions'.
  4. Switch all available permissions to 'On'. Enabling the Contacts permission alone did the trick in my testing, but you might as well enable everything for good measure.
  5. Open the app again.
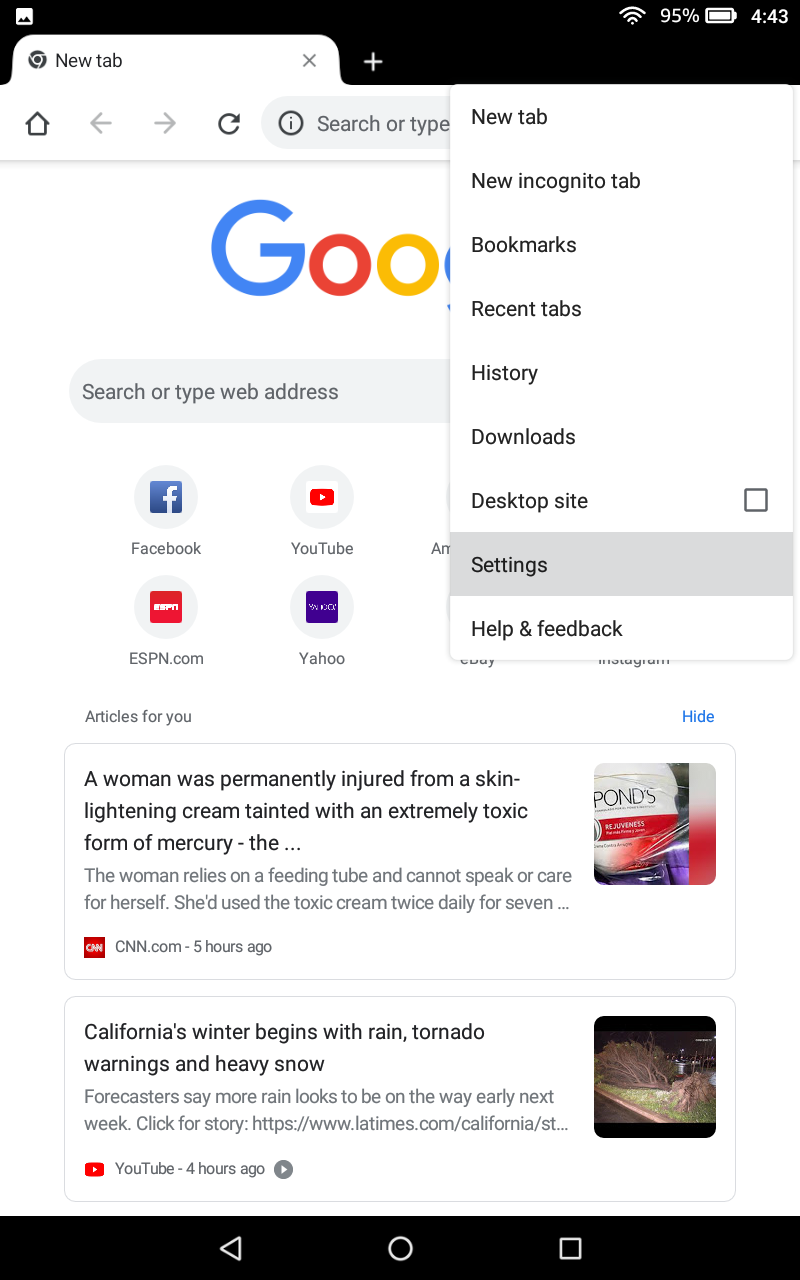
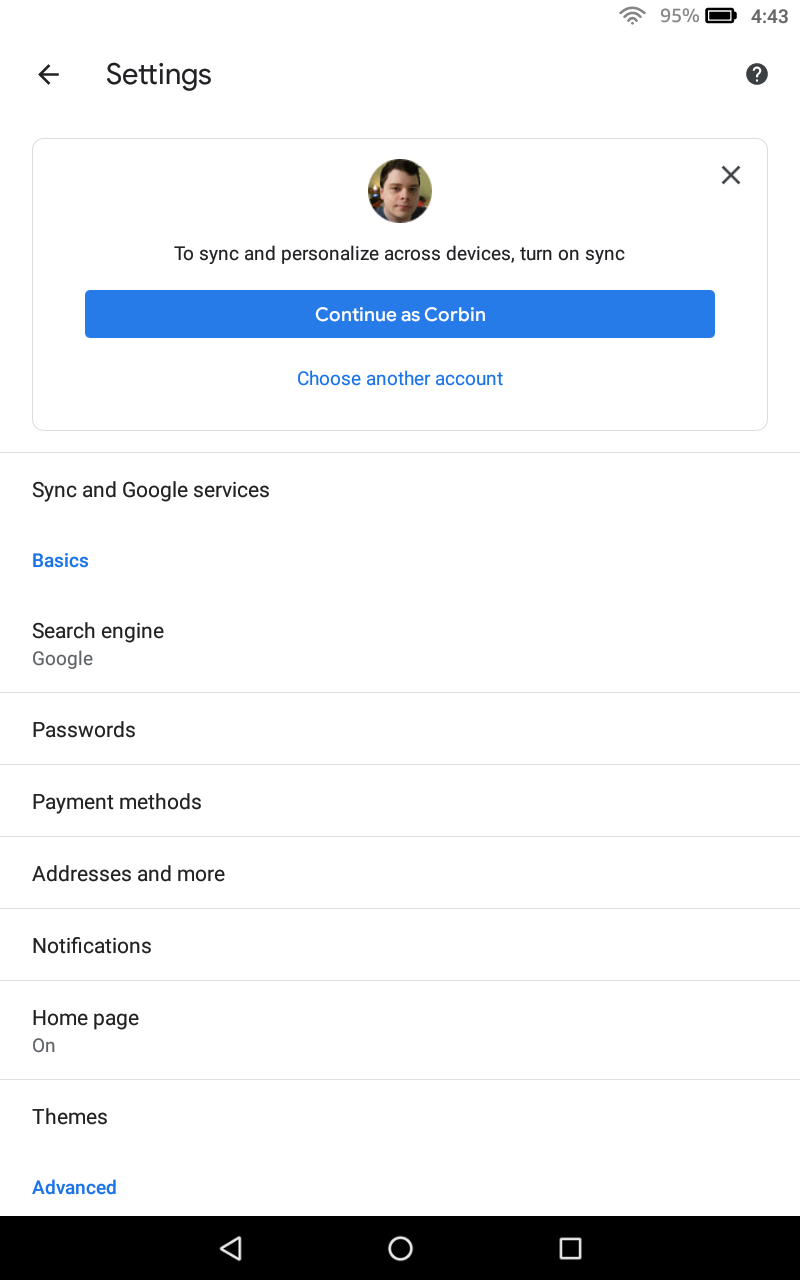
In Chrome's case, you also have to open the browser, tap on the Settings menu, and tap the 'Continue as...' blue button at the top of the screen.

Troubleshooting

If you're having a different issue than the ones listed above, here are some generic troubleshooting tips.

Reboot your tablet

This might be obvious, but it's a good step to take. Hold down the power button, tap the 'Power Off' option, and turn your tablet back on by holding down the power button again. Once it has booted back up, open the Play Store from the home screen and see if it works.

Clear app data

When I initially wrote this guide, I wasn't able to sign into the Play Store until I cleared the app's local data. This will essentially reset the Play Store app to its original state, and should fix most problems you might encounter.
Open the Settings app, select the 'Apps & Notifications' section (or whatever else has 'Apps' or 'Applications' in the name), and tap 'Manage All Applications.' Find the Play Store in the list of apps and tap it.
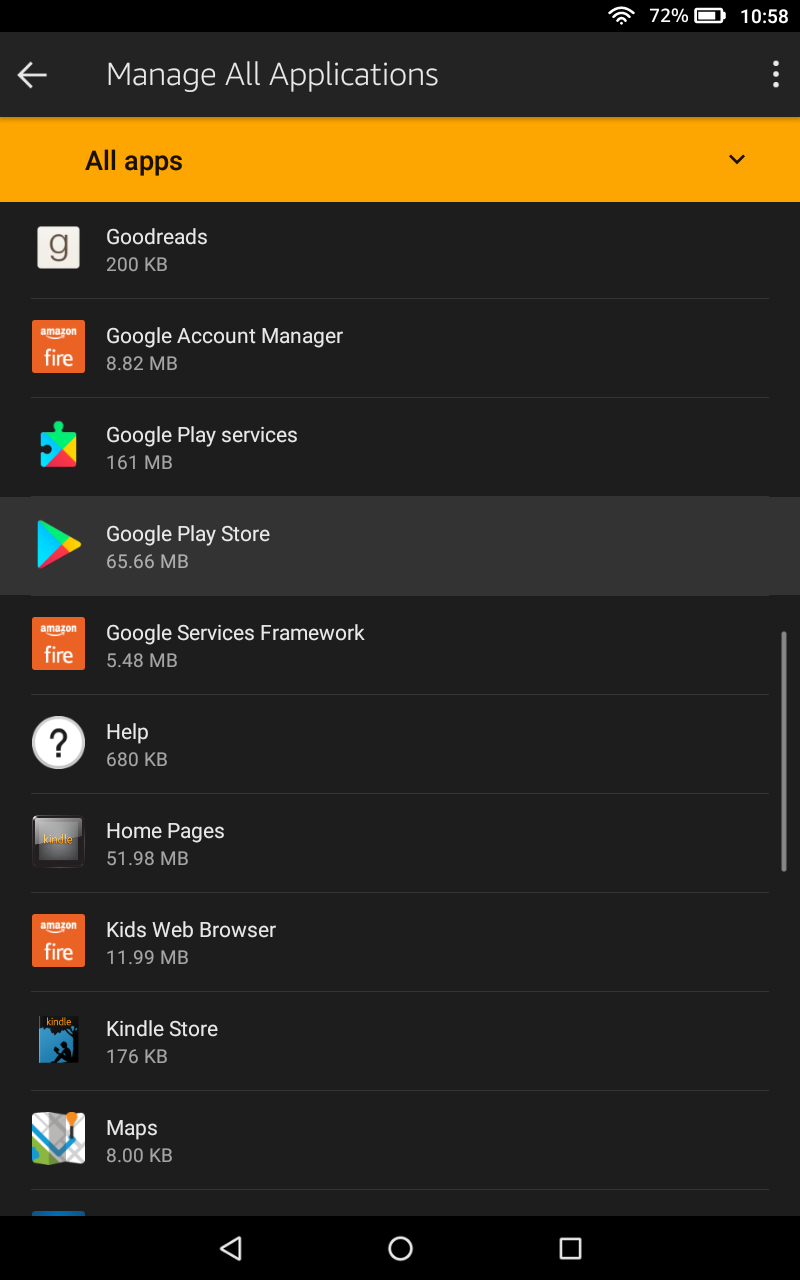
You have to perform two steps on this info screen. First, press the 'Force Stop' button to stop the Play Store from running. Then press the 'Storage' menu option and tap 'Clear Data' (it might also be called 'Clear storage'). Now return to the Play Store app and see if it works.
If that didn't help, follow the above steps again, but restart your tablet before trying to open the Play Store. If that didn't work either, try force-stopping and clearing data for Google Play Services in addition to the Play Store.

Reset the tablet

If you still can't get the Play Store to work, your best option is probably to factory-reset your tablet and try again. Make sure you don't restore from a backup when you're setting up the tablet again, unless the backup was made before you tried to install the Play Store.

Stuff to do afterwards

Congrats, your Fire tablet now has the Google Play Store! Pat yourself on the back. Now that the hard part is over, here are some things you should do or keep in mind.

Install Google apps

Now that you have the Play Store, you can download all the Google apps you couldn't download before! Here are some suggestions  if you're reading this on your Fire tablet, the links will take you right to the app's Play Store page.

Tuesday, June 14, 2016

How To Remove iCloud Lock via iCloud Remover Service

How To Remove iCloud Lock via iCloud Remover Service

Searching the net for iCloud Removal Tool and how to Remove iCloud Lock by official Remover solution is common trait for many people who are enduring the difficulties of the iCloud lock restriction. It is well documented fact that the number of locked to iCloud devices is really big and on top of that there is very little info on how to fix this. Still, the emergence of some new and revolutionary methods specialized in dealing with iCloud Removal problems have made things a bit easier at this moment.
Résultat de recherche d'images pour "icloud hack"
The main reason on why the iCloud lock happens is due to the inability of the iPhone owner to enter his iCloud ID or password. In some cases this is the case because the device is lost or stolen, but sometimes the reason can be simply because the owner has forgotten his login credentials. But let’s leave the reasons on why the iPhone is blocked for some other time. What is important at this point is to learn about the methods which can be used to remove the activation screen restriction on your handset.
As you may know, there are several fake services who are offering non-functional Removal solution services. It is important to make distinction between a perfectly functional methods and fake ones.
iCloud Remover

Remove iCloud Activation Lock by iCloud Remover

At this point there are two verified iPhone iCloud Removal Tool methods that actually work. The first method is what we call the default one. To qualify for this method you must meet certain criteria. You must have the original receipt from the Apple store from which you have bought your device or valid warranty. If you meet these criteria then all that you need to do is to go to the nearest Apple store and ask the technicians there to Remove the iCloud activation lock. Even though this method costs money, still it is 100% safe and efficient.

Alternative Method to Remove iCloud Activation Lock

However, even though it may be logical to use Apple’s services if something is wrong with our iPhone, for some users it is impossible to meet the criteria of providing ownership proof, simply because they have not bought their iPhone from official Apple store, but from the internet or different second hand seller.
If you belong in this category of users then you are well aware that it is very difficult to find alternative Remove iCloud Lock solution. Most of the online providers only charge large fees and do not actually remove the iCloud lock.
Remove iCloud Lock
But, in case you did not know there is one alternative solution that works. It requires that you use a iCloud Remover which was developed by Apple team of experts. This tool is very popular among the iOS society and is proven to fix the iCloud issue in only a few minutes.

How To Remove iCloud Lock by Removal Tool

  1. To get started, first use the iCloud Removal tool from the official website. Press this link here.
  2. Complete the online form. Complete the empty fields with the required data and press Confirm.
  3. Now wait several minutes while the iCloud removal process is conducted. A confirmation email will be sent once the old & locked iCloud account is removed.
  4. After the confirmation mail is sent, you will be able to create a new iCloud account which you will use on your device.
  5. Now all that you need to do is to login to your new iCloud account and the activation screen lock service will be permanently removed.
The iCloud Remover service works for all iPhone 6S, 6S Plus, 6, 6Plus, 5, 5S, 5C, 4S, 4C, 4, 3G, iPad 4, 3, 2, Air 2 and iPod touch. It is compatible with the new iOS version regardless of the broadband. The Bypass service tool has been put thru rigorous testings and trial periods and it is confirmed to be completely safe for use.
In case you own Apple handset which for some reason is iCloud locked then you can use this exclusive offer and Remove the iCloud activation lock screen immediately. You only need the correct IMEI code and a stable internet connection. There is no need to send your device anywhere and on top of that the service. Give it a try.

Saturday, May 2, 2015

How to change DNS server on your Android phone or tablet

How to change DNS server on your Android phone or tablet


Nexus 7 - TabletSimply put, your DNS (domain name system) allows your to comfortable surf the internet and easily find sites like androidbeat.com with needing to memorize an IP address. Changing your DNS server could offer some benefits to you and your device. People have noted improved speed and reliability, and can also access geolocked websites and outmanoeuvre content filters. So, if you are interested in testing this out on your Android phone or tablet keep reading.

How to change DNS server on your Android phone or tablet manually 
NOTE: You cannot change the DNS servers of already known Wi-Fi networks. You must remove them from the list of known Wi-Fi networks and then connect to them again during which you will be able to enter a DNS server of your choice.
Step 1: Go to Settings -> Wi-Fi. Then tap and hold the Wi-Fi network your are currently connected and click on Forget.
Step 2: Tap on the name of the Wi-Fi network again at which point you will be asked to enter the password.
Step 3: Once you have entered the password, scroll down and select Advanced options. Change IP settings from DHCP to Static
IP Settings - Android
Step 4: Scroll down to DNS 1 and DNS 2 and enter your preferred DNS addresses. Once done, tap the Join button.
Using apps from the Google Play Store
You can also try DNSet and Dns Changer to change your DNS server on your Android phone or tablet. These apps do not require root (allow root access does allow for more options when dealing with DNS issues) and will automatically change your server once enabled.
Using Dns Changer, run the application and select 2 servers from the available server list.

Dns Changer - Android

Once your two servers are selected, Dns Changer will notify you of a successful connection.

Dns Changer - Success


Do note though that these apps only work with selected versions of Android and do not change the default DNS server while using a 3G connection. For the latter, you will need to use an app called Override DNS, though it requires root access to work properly.
If you run into any issues, feel free to drop us a line in the comment section.
Like this post? Share it!

Featured

[Featured][recentbylabel2]

Featured

[Featured][recentbylabel2]
Notification
This is just an example, you can fill it later with your own note.
Done