When you’re creating a document in Google Docs, there’s more to it than just the content. A properly formatted document is also important. This can include elements like line-spacing, paragraph styles, and of course, margins. And these types of items are especially key for documents like school essays, for example.
Here we’ll show you how to change margins in Google Docs online and in the mobile app.
You have a couple of ways to change the margins in Google Docs online. The one you choose is up to you because they are both easy enough.
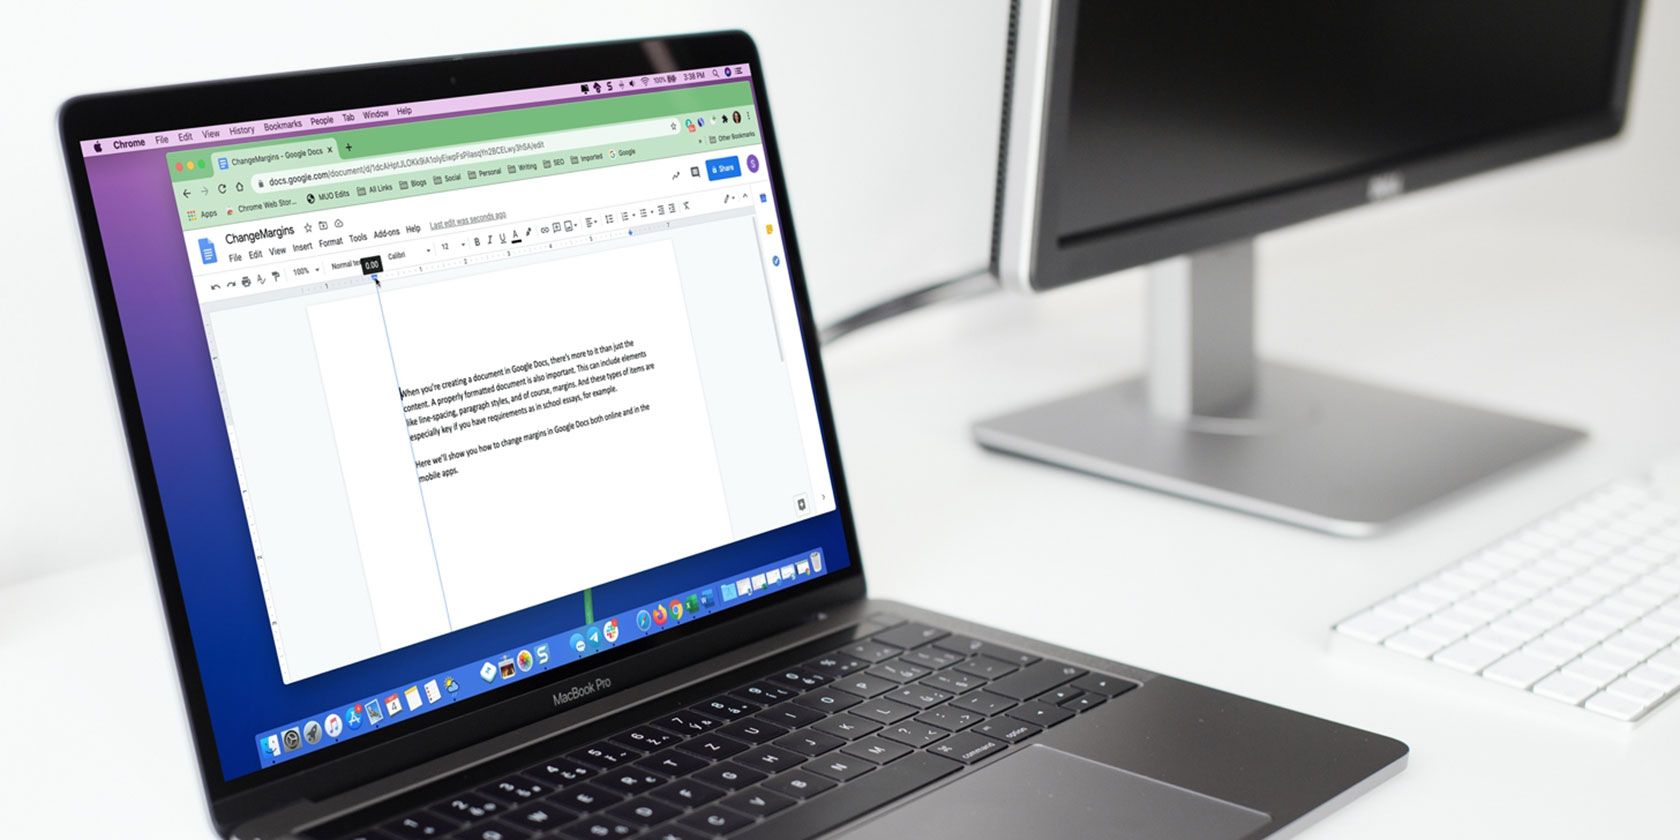
The first and fastest way to change your margins is by using the ruler. If your ruler is not displayed, click View > Show Ruler from the menu. You’ll then see one display across the top and the left side.
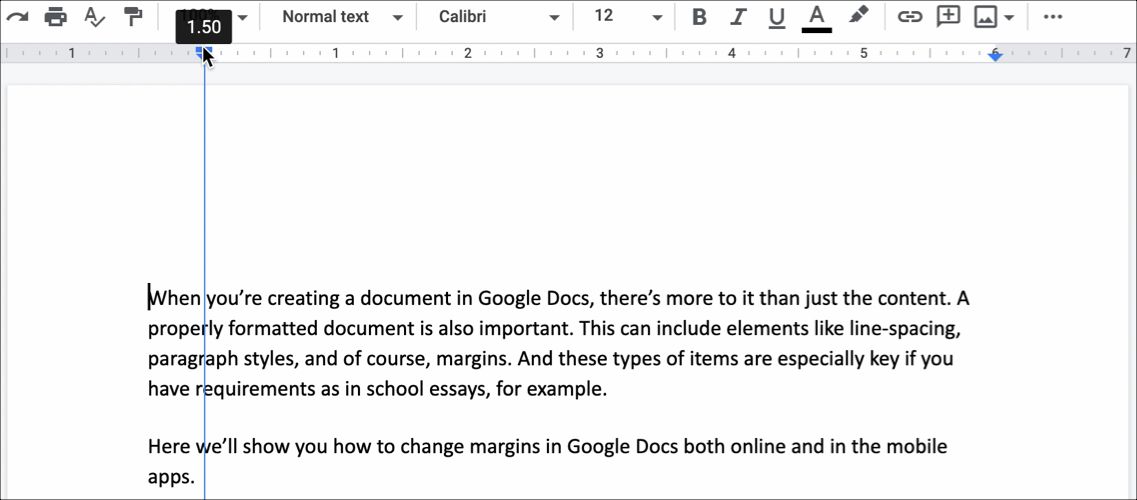
To change the left margin, put your cursor over the top of the rectangle/triangle combination on the left side of the ruler. You’ll see a small arrow and vertical blue line appear.
Drag inward or outward to decrease or increase the left margin. Be careful not to drag either the rectangle or triangle separately as this will affect the paragraphs and not the page margin.

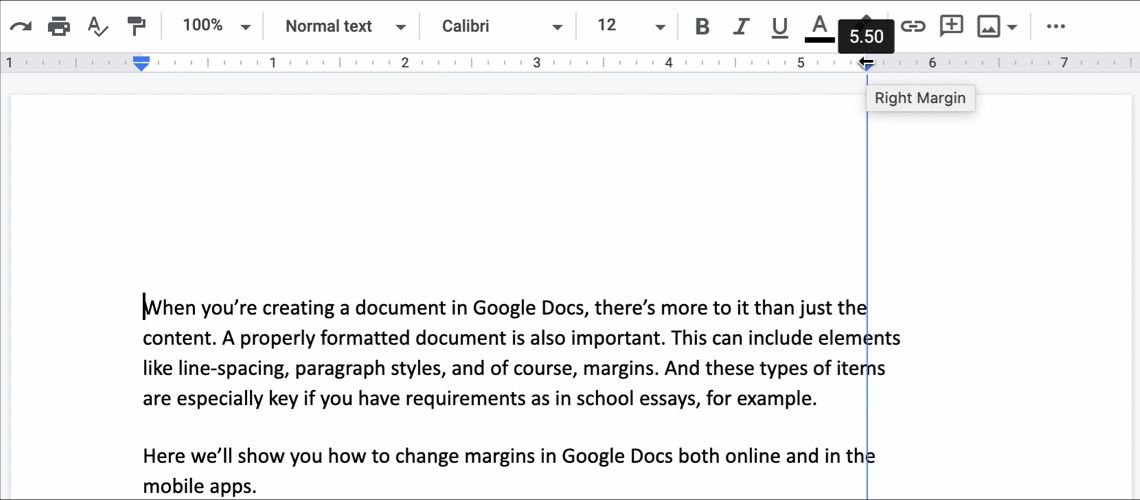
To change the right margin, put your cursor above the triangle on the right side of the ruler. When you see the arrow and blue line, drag inward or outward to change that margin.

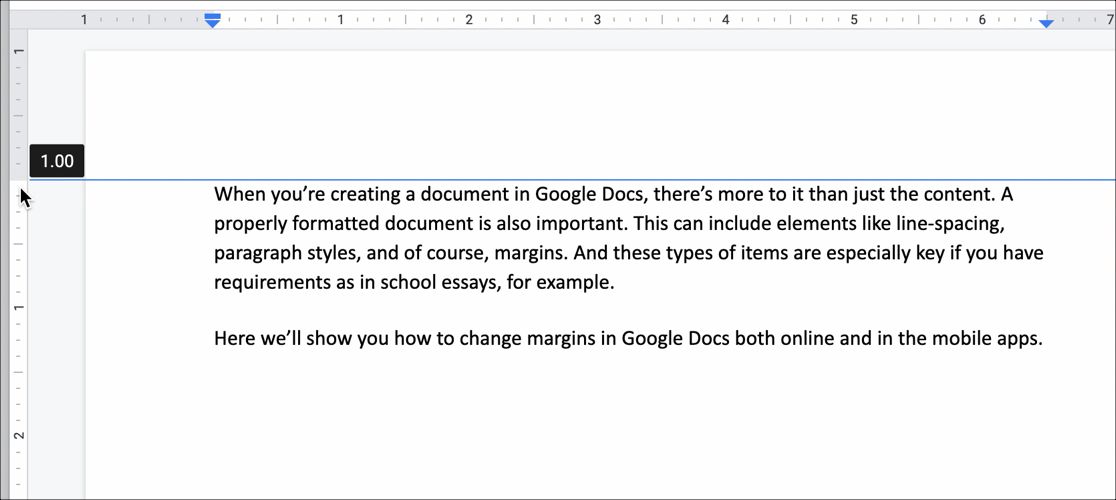
To change the top or bottom margins, put your cursor on the ruler where you see the shaded area turn to white. This will display a small arrow and a horizontal blue line. Then drag up or down to increase or decrease the margin.

As you drag to edit the margins using the ruler on any side, you’ll see the size (in inches) adjust as you move your cursor. This lets you be more precise. But for more accuracy, use the steps below to change the margins using the Page Setup.
If you want to input the specific measurements for your margins, for example, if you need one-inch margins, follow these steps.
- With your document open in Google Docs, click File from the menu and choose Page setup.
- Enter the measurements in the boxes under the Margins column for Top, Bottom, Left, and Right.
- Click OK to apply the margin changes.

Set Default Page Margins in Google Docs
You can set the margins in Google Docs online to default measurements if you like. This way, each time you create a new document, your margins will be set to the same size. This is convenient if you have specific margin sizes required for your documents.
- Open a document or create a new one where you want to apply the default margin sizes.
- Click File from the menu and choose Page setup.
- Enter the measurements in the boxes under the Margins column for all four sides.
- Click Set as Default.
- Hit the OK

When you create your next Blank document in Google Docs, you can go to File > Page setup to verify that your margins are set to the default measurements you selected.
Note that setting margins to default sizes will not apply when you create a document using a Google Docs template from the Gallery. However, you can still adjust margins for templates as described earlier.
Adjust Margins for Columns in Google Docs
If you format your document in columns, you can still change the margins in Google Docs and have them set differently for each column.
You’ll set the furthest left and right margins, which are technically page margins, using one of the methods as above. So you can use the ruler or the Page setup menu. But for the inside margins or column indents, you’ll need to use the ruler.
Click within your first column and you’ll see the blue triangle on the top right. This is the right margin for that first column. Drag the triangle inward or outward to adjust the margin for the column.
When you click within the second column, you’ll notice that rectangle/triangle combination you use to change the left page margin. So place your cursor above that combo and drag inward or outward to adjust that column’s margin.

If you use a three-column layout, you’ll have the same blue indicators on the ruler for changing your third column too. Just remember that they won’t appear until you click inside of a column.
Adjust Margins in Google Docs on Mobile
If you use the Google Docs mobile app, working with margins is slightly different. The feature does not appear in the current version of Google Docs on Android; however, it does appear on iOS.
So if you’re an iPhone or iPad user, here’s how to change the margins in Google Docs on your device.
- Open your document in Google Docs and access the Menu with the three dots on the top right.
- Select Page Setup.
- Tap Margins.
- Select from Narrow, Default, Wide, or Custom, which are explained below.
- Tap Apply.

Narrow: 0.5-inch margins on all four sides.
Default: One-inch margins on all four sides.
Wide: One-inch margins on the top and bottom with two-inch margins on the sides.
Custom: Tap the numbers and use the keypad to change the margins to any size you like.
Adjust Margins for Columns
If you want to change the margins for columns in the Google Docs app on iOS, you’ll basically edit the margins for the page as described above and then increase or decrease the column spacing.
Once you have the page margins set, here’s how to adjust the column spacing:
- Tap the Format button (capital A icon next to the plus sign at the top).
- Select the Layout
- Use the arrows next to Column spacing to increase or decrease the space that’s between the columns.
Download: Google Docs for iOS (Free)
When it comes to setting or changing margins in Google Docs, you have some pretty easy tools to use. The ruler is super handy for quick margin edits while the Page setup settings are ideal for exact margin sizes. So use one, the other, or both depending on your needs at the time. And don’t forget about the option to set margins by default!
![How to Find IMSI Number on iPhone [Helps with iOS Unlock][Updated] data:post.title](https://blogger.googleusercontent.com/img/b/R29vZ2xl/AVvXsEjLjHwhnfUXNJTuiylqmlurhLRVAEVi803j6xcnvN8EZwF5_XUynz1y0Ko-vwpx6O3nT5hogTELahedGzgQpXM5Y99fcBliinyBu8ACw8_DVV3FpPLkIqR0u7v_HM39rAkpV5MyJiG1h5s/s72-c/find+imsi+iphone.jpg)