Are your kids spending too much time on the Nintendo Switch? Or are you concerned about the mature content they might access on it? Either way, it's easy to set up and use parental controls on a Nintendo Switch to keep your children safe and in check.
With Nintendo's Parental Controls mobile app, you can even monitor a Switch remotely from an Android or iOS device. Use the app to keep track of what your kids are playing or adjust restrictions on the go.
Here's how to set up and use parental controls on a Nintendo Switch.
About Parental Controls on the Nintendo Switch
Parental controls on the Nintendo Switch fall broadly into two categories: content restrictions and time limits.
Content restrictions allow you to set maximum age ratings for the software on the Switch. You can also use the same restrictions to limit communication with other players or to restrict social media posting.
Time limits allow you to set a limit for how long the Nintendo Switch can be used each day. You can set different limits for different days of the week and you can even choose a bedtime to restrict the Nintendo Switch after a certain time.
To keep your kids safe everywhere, find out how to set up similar restrictions for their other devices with our complete guide to parental controls.
Parental Controls Affect Every Nintendo Switch User
Although you can have multiple user accounts on a single Nintendo Switch, any parental controls you set up will affect the entire system. This means that every user must abide by the same time limits, content limits, and social media restrictions.
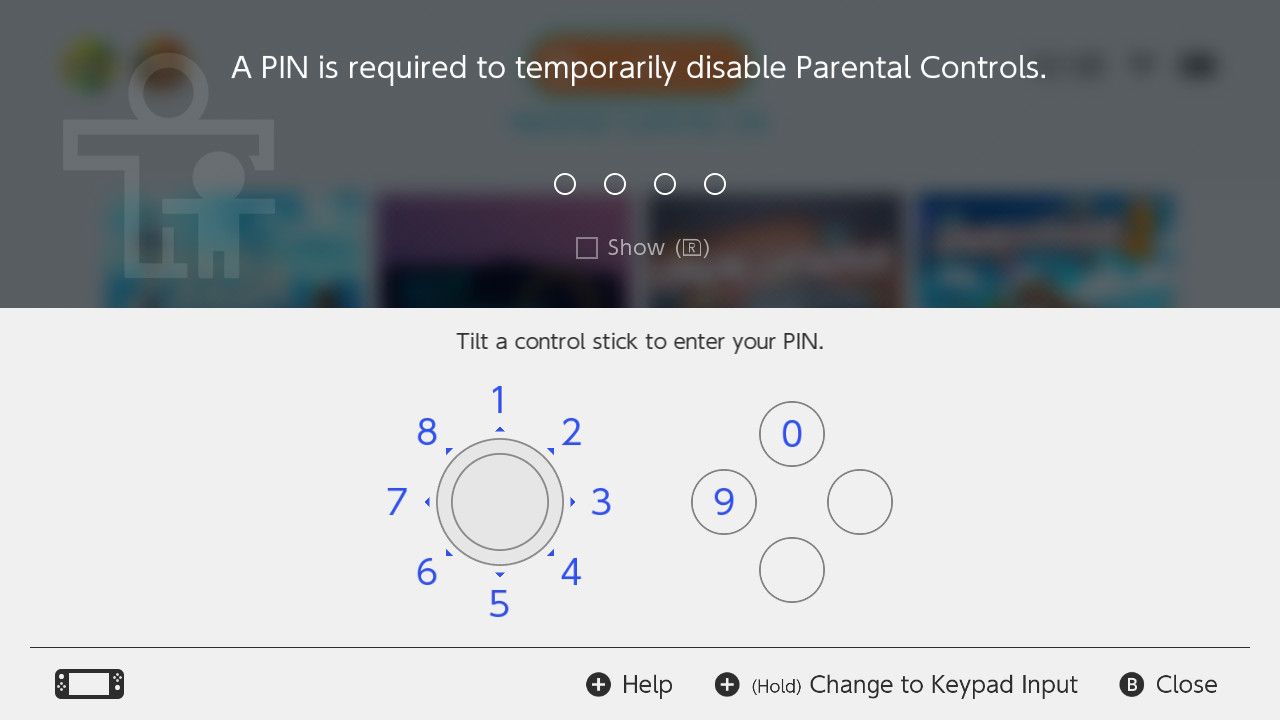
That said, it's possible to override these restrictions using the parental controls PIN. Share this PIN with anyone who uses the Nintendo Switch but doesn't need to abide by the restrictions. They can tap the orange Parental Controls icon at the top of the Nintendo Switch Home screen, then enter the PIN to bypass any restrictions.
Parental controls will turn on again the next time your Switch goes to sleep or powers off.
The Parental Controls App Gives You More Options
Although you can create content restrictions on the Nintendo Switch itself, you need to use Nintendo's Parental Controls app if you want to set time limits and bedtime alarms as well.
The Nintendo Switch Parental Controls app is free to download for Android or iOS devices. You can use it to remotely manage all of the parental controls on your Switch and to view a summary of how long each user spends playing different games.
You can only use a single smartphone to manage the parental controls for a Nintendo Switch system. However, if you own multiple Switch systems, you can use the same smartphone app to manage each of them.
Download: Nintendo Switch Parental Controls for Android | iOS (Free)
How to Use the Nintendo Switch Parental Controls App
To create time limit and bedtime restrictions on your Nintendo Switch, you must use the Nintendo Switch Parental Controls app. If you don't want to use the Nintendo Switch Parental Controls app, skip ahead to the next section.
To use the Parental Controls app, you first need to link it to your Nintendo Switch:
- Download the Nintendo Switch Parental Controls app on your smartphone and create or sign in to your Nintendo account.
- Tap Next in the app to receive a registration code.
- On your Nintendo Switch, press the Power button to wake it up or power it on. Then repeatedly press the Home button to unlock the Switch and go to the Home screen.
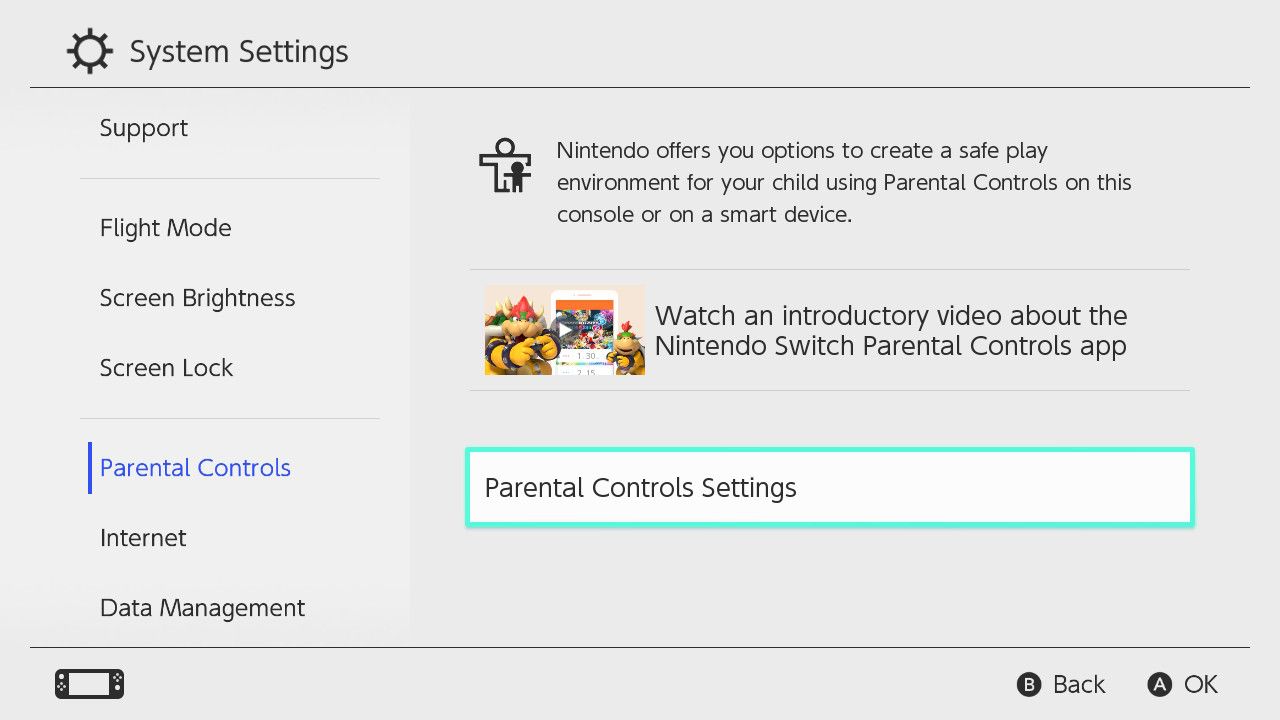
- Open the System Settings, select Parental Controls from the sidebar, then select Parental Controls Settings.
- Tap If You've Already Downloaded the App. Then tap Enter Registration Code and type the six-digit registration code from the Parental Controls app.
- Tap OK to submit your code, then tap Link to complete the link to your smartphone.


After linking the app with your Nintendo Switch, follow the prompts to set up your parental controls. Alternatively, use the instructions below to set up or edit your parental controls at a later time.
Set Time Limits and Bedtime Alarms Using the App
- Open the Nintendo Switch Parental Controls app on your smartphone.
- Tap Settings in the bottom-right corner and open the Play Time Limit settings.
- Tap Play Time Limit to set the same time limit every day.
- Use the Bedtime Alarm option to set the same bedtime every day.
- To create different settings for each day of the week, enable the Set Days Individually option. Then tap each day of the week to set your time limit and bedtime alarm.
- When finished, tap Save in the top-right corner to save your settings.


An alert appears on the Nintendo Switch when you reach the time limit or bedtime. This alert keeps repeating until the Nintendo Switch is put to sleep or the parental controls are disabled.
By default, it's possible for your children to ignore this alert and keep playing past the time limits. To avoid this, enable the Suspend Software option in the Play Time Limit settings.
Be warned though, this option might cause whoever is playing the Switch to lose any unsaved progress when the time limit or bedtime is reached.
Set Content Restrictions Using the App
- Open the Nintendo Switch Parental Controls app on your smartphone.
- Tap Settings in the bottom-right corner and open the Restriction Level settings.
- Choose a preconfigured set of restrictions based on age by selecting Teen, Child, or Young Child.
- To create your own restrictions, select Custom then edit the Restricted Software, Posting on Social Media, Free Communication, and VR Mode settings.
- When finished, tap Save in the top-right corner to save your settings.


You can choose to add certain Nintendo Switch games to a whitelist if you want them to remain available despite the content restrictions.
To do so, try launching that game on the Nintendo Switch first. Then open the Settings in the Parental Controls app and tap Whitelist next to the Restriction Level option. Turn on the switch for any games that you want to add to your whitelist. Then tap Save.
Change Your Parental Controls PIN Using the App
After linking your smartphone, the Parental Controls app automatically creates a PIN for you to use. It's best to change this PIN to something you can remember. Keep it secret from anyone who you don't want to bypass the restrictions.
To find or change the PIN:
- Open the Nintendo Switch Parental Controls app on your smartphone.
- Tap Settings in the bottom-right corner, then tap the PIN option.
- View your current pin or create a new one with the Change PIN field.
Review User Activity and Play Time Using the App
After setting up the Nintendo Switch Parental Controls app on your smartphone, you can use it to view a play-time summary for each user.
Open the Parental Controls app and tap Time Played in the bottom-left corner. This shows the time spent playing each day. Tap a day to view a breakdown of users and games.
Use the Monthly Summary tab to view the most played game by each user on your Nintendo Switch. You can also use this to see how many days that user played the Switch in the last month.


These summaries give you a clear overview of how much time your children spend playing the Switch. You can also use it to find out if they are obeying the time limits or if they have attempted to bypass the parental controls.
How to Set Up Parental Controls Without the App
If you don't want to install the Nintendo Switch Parental Controls app on your smartphone, you can set up content restrictions using the Nintendo Switch itself. However, the only way to enable time limits or bedtime alarms is through the app.
- On your Nintendo Switch, press the Power button to wake it up or power it on. Then repeatedly press the Home button to unlock the Switch and go to the Home screen.
- Open the System Settings, select Parental Controls from the sidebar, then select Parental Controls Settings.
- Press the X button or tap If You Don't Have a Smart Device.
- Tap Next to dismiss the popup alert.
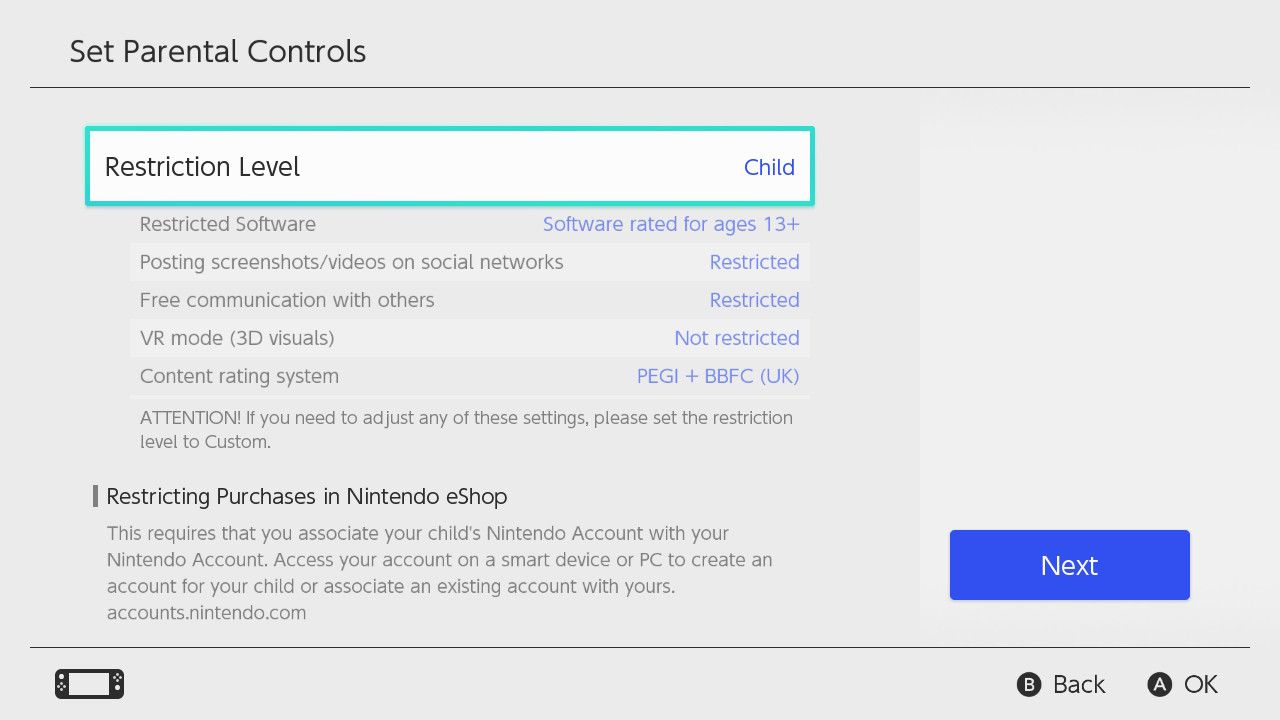
- Open the Restriction Level options to choose a preconfigured set of restrictions by selecting Teen, Child, or Young Child.
- To create your own restrictions, select Custom then edit the Restricted Software, Content Rating System, Posting on Social Media, Free Communication, and VR Mode settings.
- When finished, tap Next and create a PIN to save your settings.
More Tips for Your Nintendo Switch
Setting up parental controls is a good idea if you want to keep your children safe while playing the Nintendo Switch. But it isn't just your children you want to keep safe; you should also learn how to protect the Nintendo Switch itself.