Like the PS4, the PlayStation 5 makes it easy to capture your gameplay in screenshots and videos. You can then edit these captures and share them with your friends and other players.
Let's look at how to capture screenshots and videos on PS5 and what you can do with what you create.
The DualSense Controller's Create Button
The DualSense (the PS5's controller) has a Create button that serves as the home for capturing your gameplay. This is located to the left of the touchpad, above the D-pad.

The button is a replacement for and evolution of the Share button on the PS4 controller, which had similar functionality for capturing PS4 gameplay.
By default, pressing the Create button will do the following:
- Press once to display the Create menu.
- Press and hold to take a screenshot.
- Press twice to save a video clip of recent gameplay.
How to Take Screenshots and Videos on PS5
To take a screenshot, simply use the button shortcut. You'll hear a sound and see an icon appear at the top-right of your screen to indicate that the screenshot captured successfully.
For capturing video, your PS5 is always ready to record gameplay that just happened. Use the shortcut to capture a video of the length you've chosen in the settings (which we'll look at shortly).
In addition to these manual options, the PS5 will automatically capture a screenshot and short video clip whenever you earn a Trophy.
The Create menu has shortcuts at the bottom for several common actions. In the middle, you'll find Take Screenshot and Save Recent Gameplay, which are identical to their shortcut counterparts.

There's also Start New Recording, which begins recording video when you choose. This is handy if you plan to record a bit of gameplay from the start, instead of capturing something after the fact that happened unexpectedly.
How to Change Sharing Options on PS5
If you don't like the default Create button behavior, or want to tweak how screenshots and videos are saved, the PS5 lets you change these options. Head to Settings > Captures and Broadcasts to take a look. You can also access a few of these options more quickly by selecting Capture Options to the right of the create menu.
Under the Captures section, select Shortcuts for Create Button to change the button's behavior via Button mapping. Easy Screenshots swaps the options for opening the create menu and taking a screenshot. Alternatively, Easy Video Clips lets you double-tap the button to start or finish recording a clip, which is great if you regularly want to control the exact length of videos.

On this page, you can also change the Length of Recent Gameplay Video Clip. Choose from a minimum of 15 Seconds, up to a max of 1 Hour, to decide how long saved gameplay clips are.
Under Screenshot Format, you can choose whether to use HDR for screenshots. With HDR off, you can pick between JPG and PNG file types.
Check Video Clip Format to change the file type, resolution for manual recordings, and whether to include microphone audio. WebM is the most efficient, but MP4 is compatible with the widest range of devices.

Have a look at the Trophies tab for options related to automatic screenshots and videos when you earn them. You can choose to disable Trophy screenshots or videos, as well as setting the length of the videos to 15 or 30 seconds.

How to View and Share Captured PS5 Media
When you want to review or share the screenshots and videos you've taken, open the create menu and select the thumbnail on the far-left side. This shows as the latest screenshot or video clip you've taken.
On the resulting menu, use R1 and L1 to look through your recent captures, selecting one to view a larger version if needed. Below the image, you'll see icons for a few options.

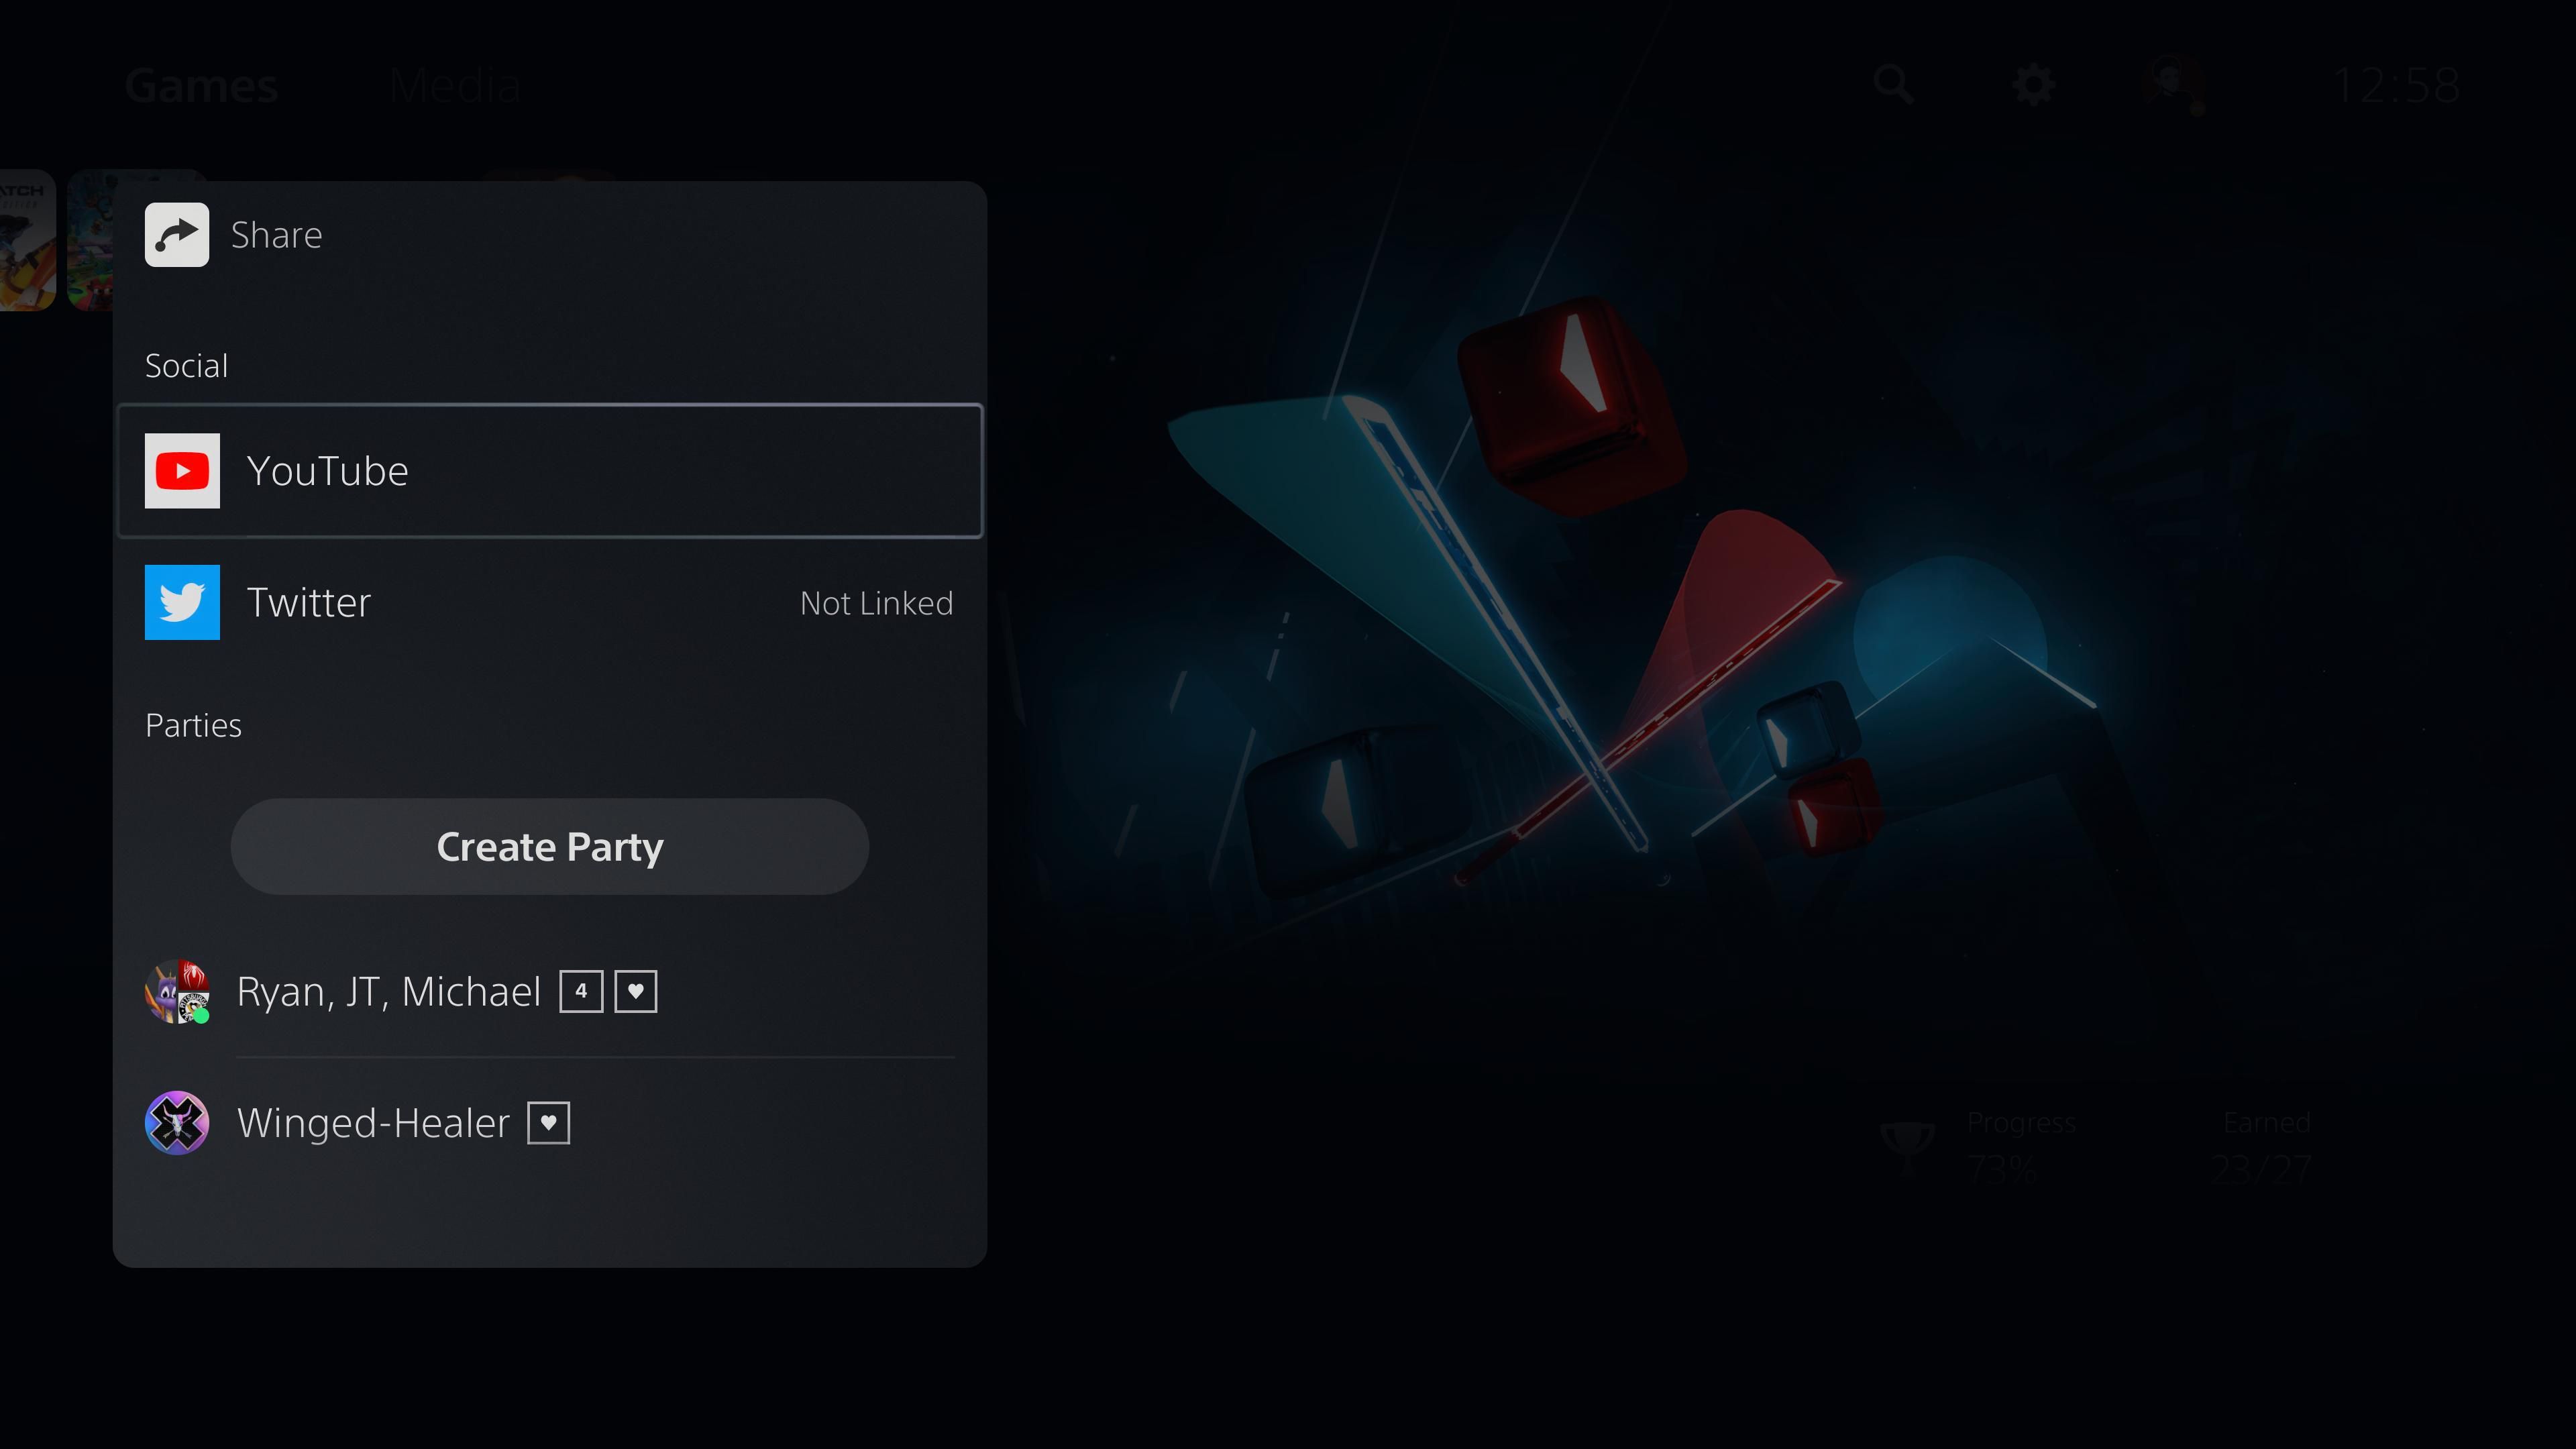
Share lets you send your capture to Twitter or one of your existing message groups. If you're sharing a video clip, you also have the option to send it to YouTube. This gives you the chance to fill out the relevant options like the title, tags, and privacy option.
Edit gives you simple cropping and text tools to mark up to a screenshot. When you're done, you can save the screenshot as a new file or replace the original. For editing videos, you have the option to trim it or take a screenshot to use as your profile's cover image.

Add to Favorites marks the image so you can easily find it in the future. And Delete trashes the image if you don't want it anymore.
You can also select Go to Media Gallery to show all of your PS5 captures. Use the tabs along the top to filter by your Favorites or show only those related to Trophies. Albums lets you see captures broken down by game.

On any of these pages, select an image to see the same options as above. You can also select the three-dot More menu to show information about the image on the right, including its capture date, file size, and more. This also gives you the option to rename the image.

Finally, use the sorting menu on the left side to sort by date or size, and show only screenshots or videos if you wish. Hit the checkbox bubble on the left side to select multiple items for mass-sharing or deletion.
If you connect a USB drive to your PlayStation 5, you can copy images and videos to it. You'll find this option on the More menu of an image mention above; it also appears at the bottom-right when selecting multiple items.

Keep Your PS5 Gameplay Memories
Now you know how to capture, view, and manage screenshots and videos of your PlayStation 5 gameplay. These handy features let you look back on your coolest moments from games, so it's good to know how they work before something amazing happens.
For more PS5 help, you should also know how to keep your console updated to access the latest features.
Image Credit: Mohsen Vaziri/Shutterstock