Mumble is an open-source voice chat application that advertises itself as free, secure, and high-quality. It's free in that anyone willing to put up the server space can host a Mumble server. Services exist that will host one for you, but they typically operate on a paid or freemium basis.
If you want to avoid fees and have complete control over your Mumble server, then read on.
The server-side app for hosting Mumble is called Murmur. You can set Murmur up on Windows, Linux, or macOS, but we're using Linux Mint in our example pictures. Your screen may look a little different.
1. Pre-Configure Your Network Settings

Before trying to install and run Murmur, it's important you properly configure the system hosting it.
Set a Static IP
You need a static IP address to run Murmur. The static IP will allow Mumble users always to find your server at the same location.
The process of setting one can vary quite a bit depending on your operating system and connection type. Do a quick search for "static ip <your operating system>" for a tutorial.
Open a Port
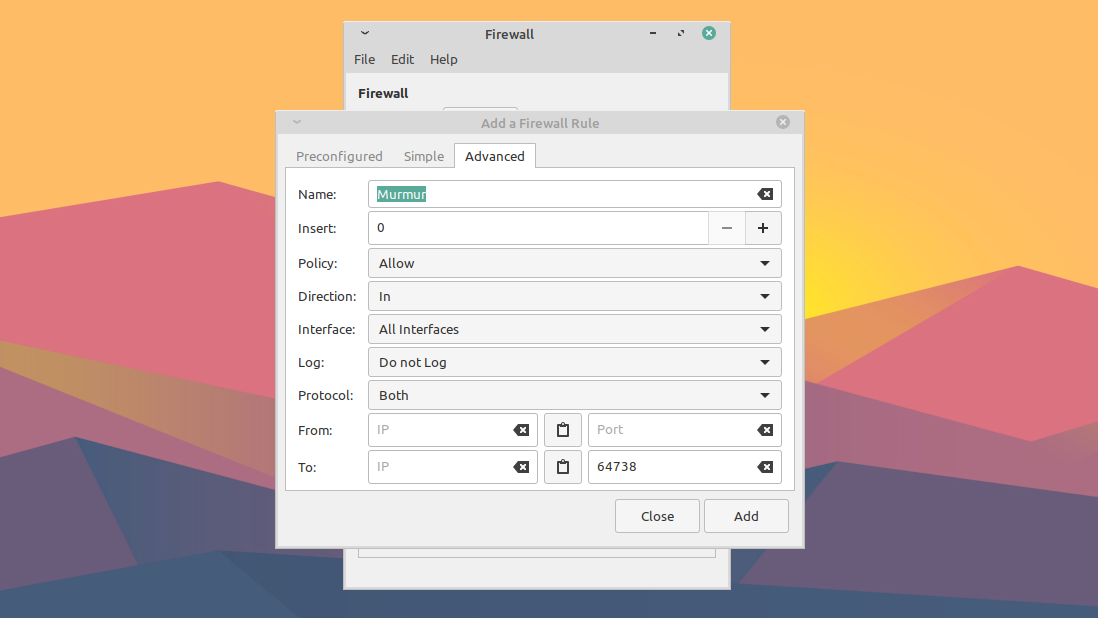
You'll need to open a port on your device so that guests aren't blocked from connecting to your Mumble server. The default port Murmur uses is 64738, but you can choose a different one if you prefer.
Accomplishing this will also depend on your device setup. Windows may automatically ask when you launch Murmur if you want to open its default port. Otherwise, you're going to have to look up how to do this manually on your specific operating system.
If you're using third-party security software, you'll also need to make sure they aren't keeping the port closed either.
To make sure you've properly opened the port, you can check with a website like CanYouSeeMe.org.
If you go through this process and still can't connect to your server, you may also need to forward the port on your router. You can use Portforward to find a tutorial on your specific router model.
2. Download and Install Murmur
Refer to the Mumble download page for links to the latest version for your operating system.
There are links for both Mumble and Murmur, so make sure you install Murmur (also called mumble-server) on your host machine and Mumble on whichever device you'll use for voice chatting.
3. Configure the .ini File

This step is only necessary if you have specific requirements for your server, like a limited bandwidth or number of users, or the use of a specific port. You'll also want to do this if you want your server to be private and available only to those you invite and give the password. Otherwise, your server will be open to anyone who finds it.
After installing Murmur, search your system for a file called "murmur.ini". It's usually found in the installation folder or somewhere similar to "murmur/murmur.ini" or "/etc/murmur.ini". Open it with any text editor.
There are many settings, but we'll cover just the most commonly edited ones. If the setting you're changing is commented, meaning it has a semicolon (;) in front of it, you must uncomment it by removing the symbol for the change to take effect.
Change Welcome Text
To change the welcome text the user sees when they join your server, look for welcometext= in the file. There will be a default message, and you can change it to whatever you like.
Change Default Port
If you're planning to use a port other than the default, find port= and change it to your preferred port. Again, make sure you have that port open on all firewalls and security software.
Set Murmur Server Password
To set a server password to keep unwelcome guests out, find serverpassword= and enter a secure password. Be sure to remember it and keep it safe. You and your friends will need it to connect.
Set Allowed Bandwidth
You can also change the allowed bandwidth with bandwidth= and the number of users allowed in your server at one time with usernumber=. You'll want to change those if you suspect your server will have issues hosting too many users at once.
Change Root Channel Name
Finally, if you want to give the main (root) channel on your server a specific name, you can edit registername=. Otherwise, the channel will be named "Root."
4. Start Murmur

The process of launching Murmur differs depending on your operating system. Windows and macOS let you launch it from your desktop or start menu.
On Linux, if you installed Murmur as a package, you can launch it via command line with:
murmurd
On some Linux distributions, the following command will run it with a helpful GUI:
murmur-user-wrapper
If you installed the Murmur static binary, find the file and give it the chmod treatment, and then issue the following command:
./murmur.x86
Please note that if you find after connecting to the server that the settings you saved in the .ini file have not been applied, try terminating Murmur and issuing the command with administrative privileges (e.g., sudo) or restart the server with administrative privileges.
5. Start Mumble

At this point, you have a working Mumble server that's ready to use, so go ahead and open the Mumble client. If you haven't used it before, make sure you go through the audio and certificate set up wizards.
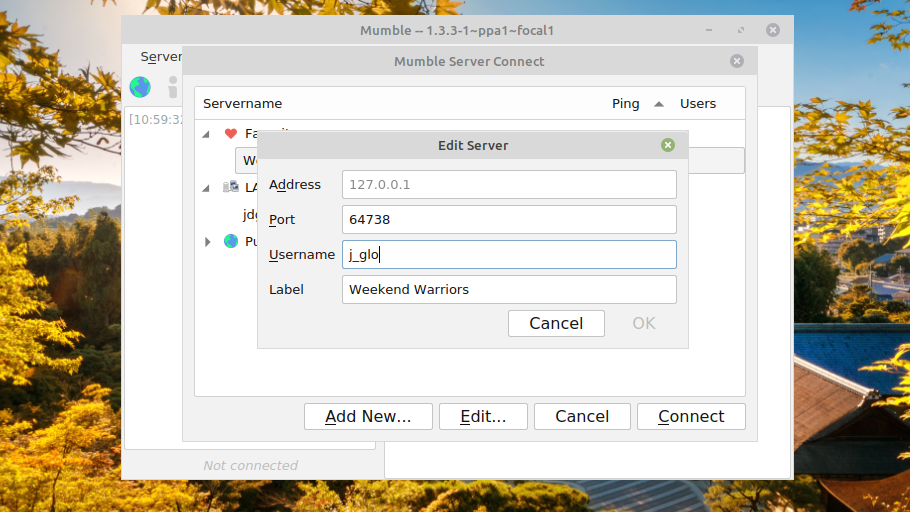
Next, click the Add new... button and enter the info for your server. Mumble will ask you to give the server a Label, which you'll use to identify it in your server list.
The Address field will be the server's external IP. Note that this will not be the static IP address you set earlier; it will be your external IP address. If you're unsure how to find that, you can always complete a web search for "what is my ip address," and your search engine will likely give you your external IP.
Enter your port number in the Port field if you didn't use the default port. Then choose a username to connect with. If you set a server password, enter it in the Password field when it asks you for one.
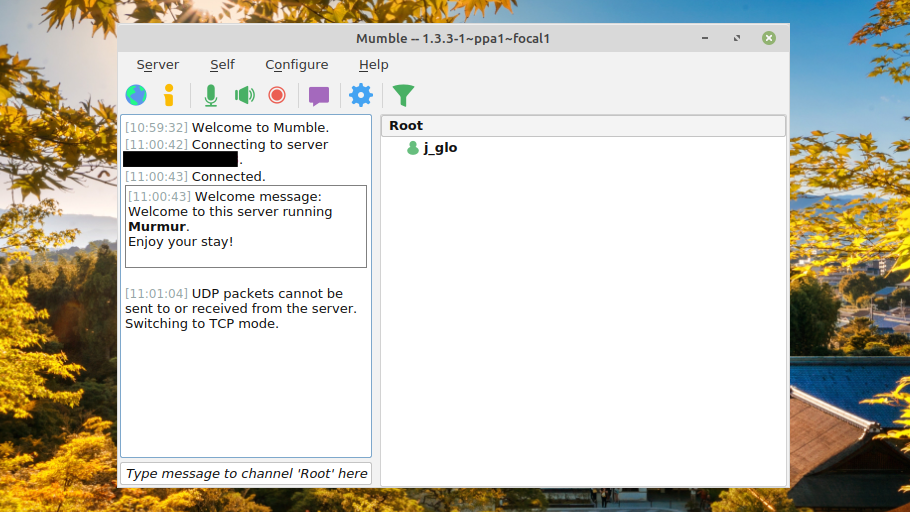
Once you're logged in, you'll be able to chat with anyone else who joins your server, either via voice or text.
If you want to make sure no one else can login and impersonate you on your server, register your username by right-clicking your username in the channel menu and click Register.
6. Become an Administrator

If you're just chatting with some friends and don't care about moderating the conversation, you probably don't need to worry about this too much, as a strong server password will keep most unwanted guests out.
But if you want the ability to do things like ban users and manage channels from the Mumble client, you'll need to take the following steps on the device running Murmur.
Before doing this, make sure you've registered your username as described in the step above.
Set SuperUser Password
You can set the SuperUser password on Windows by opening the installation folder in the Command Prompt and entering the command:
murmur.exe -supw Your_password
with "Your_password" replaced with whatever you want your password to be.
On macOS, open the terminal and enter this command:
/Applications/Murmur/murmurd -supw Your_password
Linux users can set the password with this terminal command:
murmurd -supw Password_of_your_choice
Alternatively, this command will let some Linux users set the password in a helpful GUI:
murmur-user-wrapper -p Your_password
If you installed a binary package, use:
./murmur.x86 -supw Your_password
After any of these commands, you should get a confirmation that the SuperUser password has been changed.
Login as SuperUser

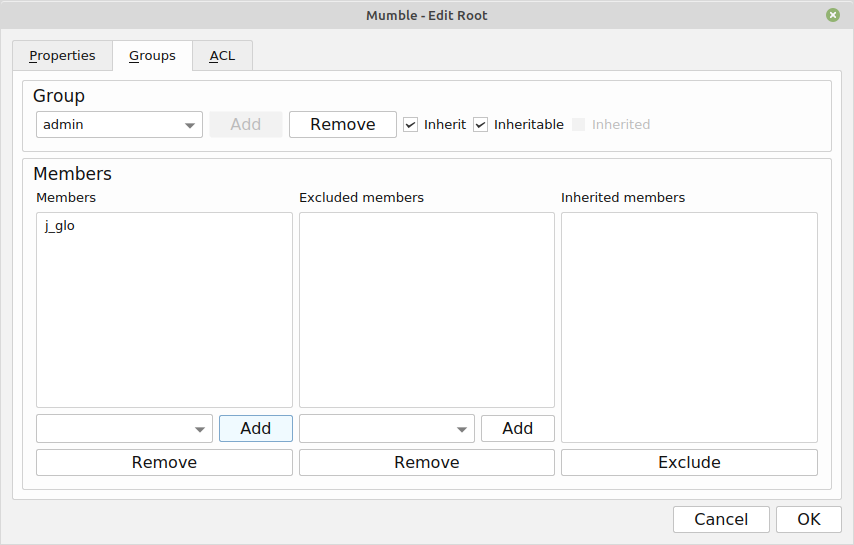
On the Mumble client, disconnect from your server and edit your login details, entering "SuperUser" as your username and the SuperUser password you created as the password. After logging in again, right-click on the root channel and click Edit.
Click on Groups, and then from the group dropdown menu, select admin. In the Members section, type in the username you registered earlier and add yourself to the admin group.
Log Back in as an Admin
Finally, disconnect from the server and login once again with your registered credentials. You should now have powers like editing or creating channels and promoting or banning users.
Chat With Your Friends on Your Own Mumble Server
All that's left to do is let your friends know your server's name, IP address, and server password, and you're ready to start voice chatting!
There are many more settings in the .ini file you can tweak to customize and optimize your server even more. When you're adjusting audio settings, keep in mind your sound quality might depend on the headset you're using, so make sure you pick the right one.
![How to Find IMSI Number on iPhone [Helps with iOS Unlock][Updated] data:post.title](https://blogger.googleusercontent.com/img/b/R29vZ2xl/AVvXsEjLjHwhnfUXNJTuiylqmlurhLRVAEVi803j6xcnvN8EZwF5_XUynz1y0Ko-vwpx6O3nT5hogTELahedGzgQpXM5Y99fcBliinyBu8ACw8_DVV3FpPLkIqR0u7v_HM39rAkpV5MyJiG1h5s/s72-c/find+imsi+iphone.jpg)