Vignettes have been used throughout the centuries to draw our attention to the subjects in works of art. In photography, they’re just as vital for guiding our eyes to the main subject, especially in scenes where the subject could be off-center or situated among other points of interest.
In this tutorial, we will show you a few ways you can create custom vignettes that make sense for your subject matter.
Why Would You Want to Create a Custom Vignette in the First Place?

The problem with many of the vignette tools out there, including in Lightroom and other major photo editing software suites, is that the vignette effects tend to look obvious and unpleasing to the eye. There are a couple of reasons for this.
In most cases, vignettes created by sliders and click-to-create methods tend to overdo the effect. Usually, the vignette is too dark in places where we wouldn’t expect it to be. Or maybe the effect isn’t gradual enough.
Another issue is that any highlights tend to get compressed by vignetting effects, creating a grayish mess that not only doesn’t look good but also informs the viewer that a careless vignette had been applied. You don’t want any of these problems in your images!
For these reasons alone, you would want to take a little more time with your images and create a custom vignette that will do your subject matter justice. While Photoshop doesn’t have a dedicated vignette tool, it does come with various tools and methods that can help you create custom vignettes. Let’s take a look at a few of these now.
Creating Custom Vignettes for Images with Highlights: Part I
Images with highlights are the toughest for standard vignette tools to handle. But there are a couple of tools in Photoshop that can readily handle highlights: the Gradient and Blend If tools.
Both tools only account for one additional layer in your Photoshop layer stack. We’ll take a look at two examples to show you how easy it is.
You can download our first image from Pexels to follow along.
Let’s get started!
- Load the image into Photoshop. Then, press the D key to set your Background/Foreground colors to the default. Your foreground color should now be Black.
- Click on the Create Fill or New Adjustment Layer icon at the bottom right of your screen. Select Gradient.
- The Gradient Fill menu tool will now appear. In the Gradient dropdown menu, locate the Basics folder, and select the Foreground to Transparent gradient.
- With the Gradient Fill menu still open, select Style and change it from Linear to Radial.
- Once again in the Gradient Fill menu, click to add a checkmark to the Reverse option.
- Click on the Scale arrow and change it from 100 percent to 230 percent. Then, click OK.
- Double-click on the far right side of the Gradient Fill 1 layer. A Layer Style menu should open.
- Select the White slider handle in Underlining Layer, and move it to a value of 225. You should see some of the highlights recovered now, especially in the windows.
- Next, Alt-Click on the same White handle and drag it to a value of 125. This should split the slider in two, and result in a fine-tuning of the vignette. Then, click OK.
What you’re left with is a great-looking custom vignette that can be adjusted at any time in the future because it was created non-destructively.
But we’re not quite done yet.
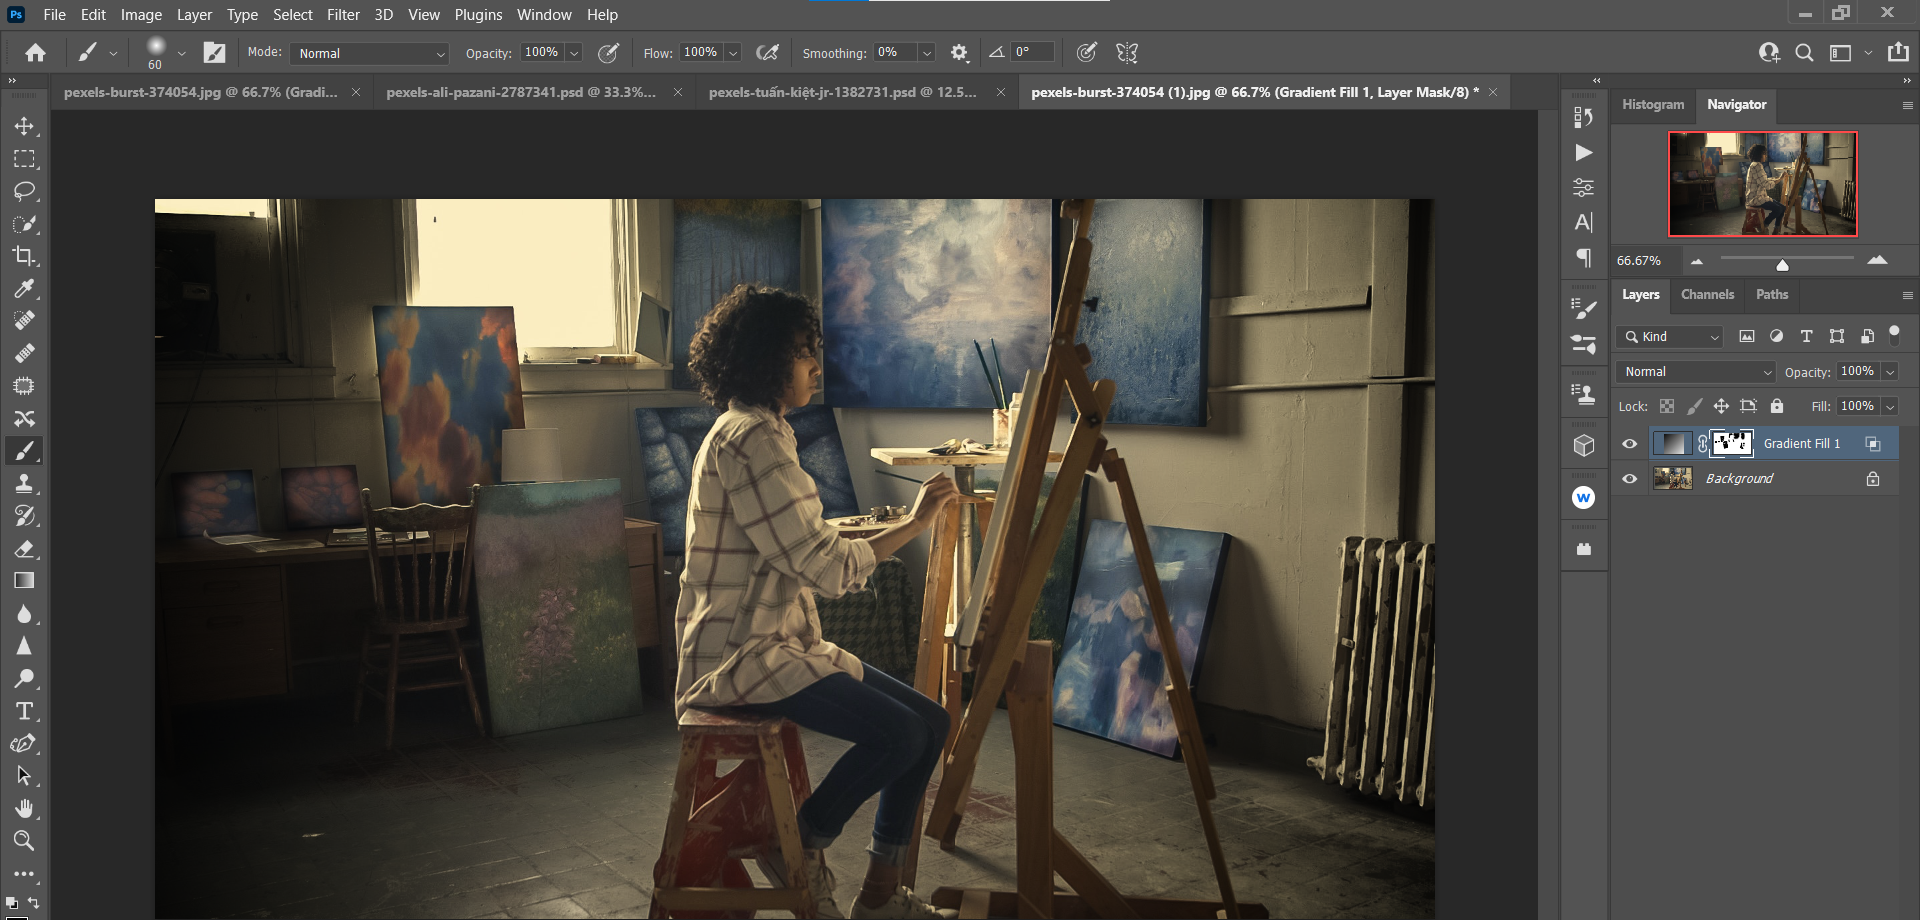
Most people won’t be able to tell that you applied a vignette to this image. However, you may have noticed that some of the paintings in the background have now gone dark. That’s because we were recovering the highlights with the Blend If sliders, while the vignette was applied to everything else.
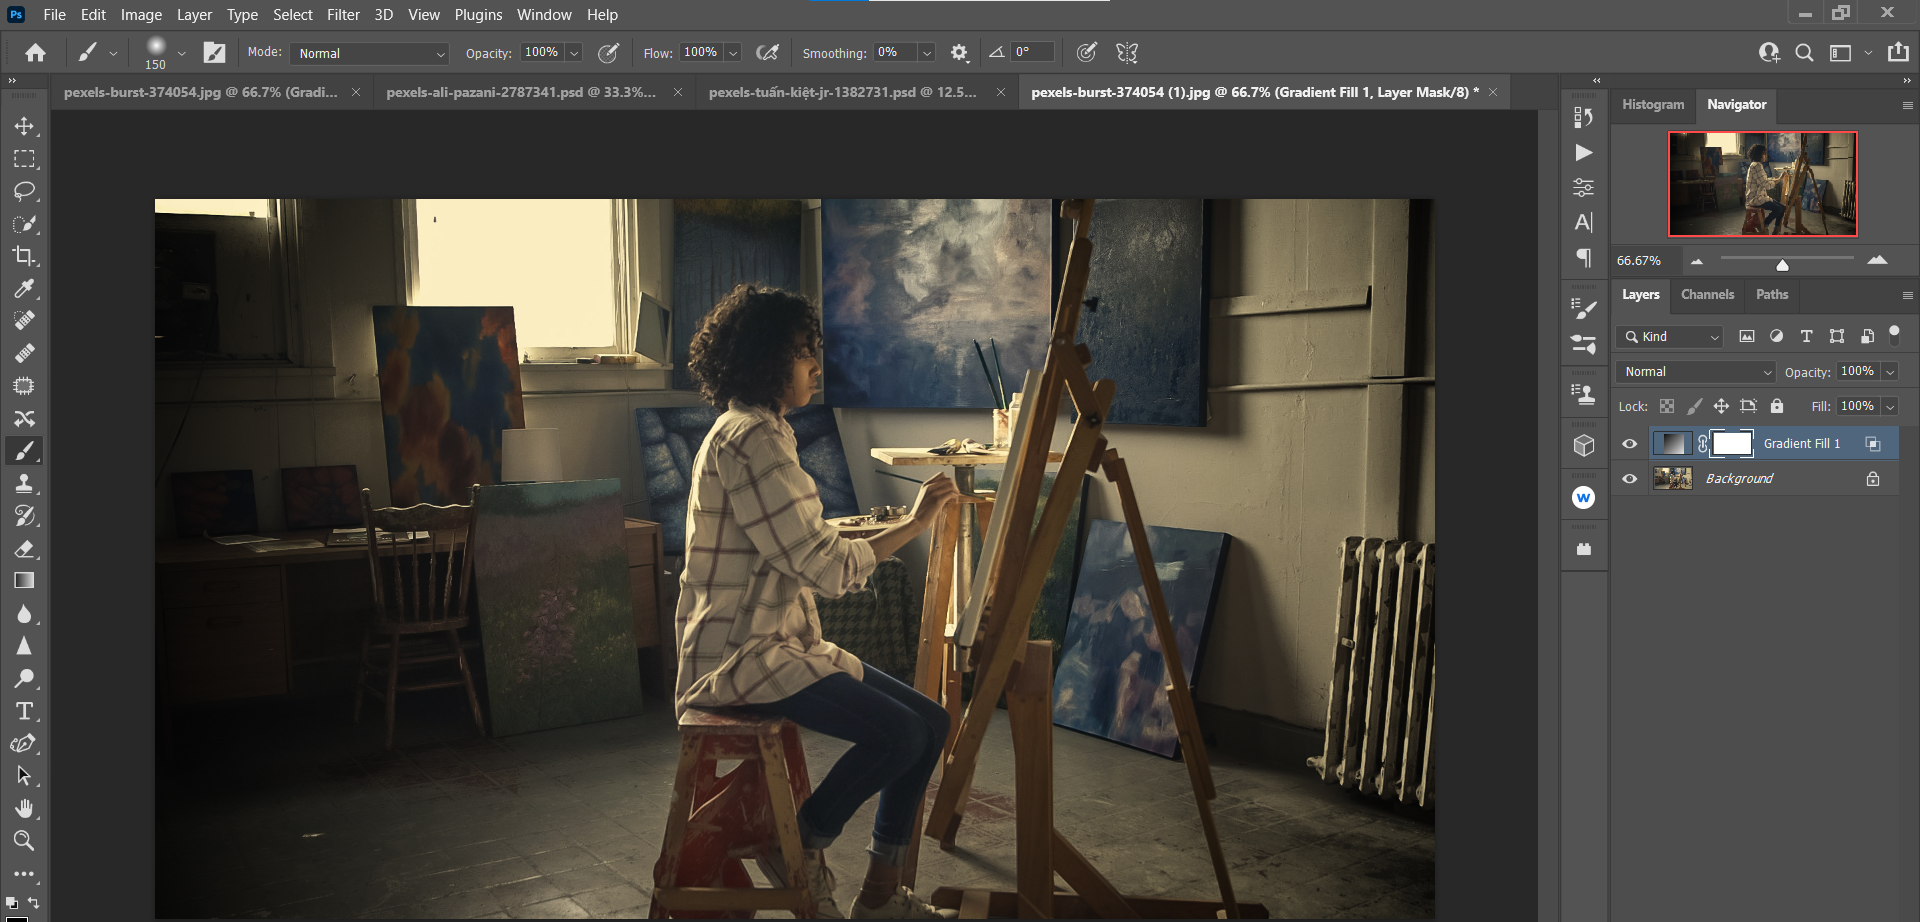
But this is an easy fix. There’s already a layer mask built-in to the Gradient Fill layer. All we have to do is press B for the Brush tool. Then, we can paint Black on the layer mask over the areas that we want to remove the vignette effect, as we did below in the "After" version.
Before:

After:
If you want to go a step further, Photoshop plugins like Luminar AI can be applied to make your photos stand out even more.
Creating Custom Vignettes for Images with Highlights: Part II
This next example requires a light touch. One may even argue that this image doesn’t need a vignette at all.
But say you wanted to create a vignette anyway, just to place even more emphasis on the subject. This can be done using the same steps as above—the difference will only be in how far we push the handle values.
You can download this image at Pexels and follow along.
- Load the image into Photoshop. Then, press the D key to set your Background/Foreground colors to the default. Your foreground color should now be Black.
- Click on the Create Fill or New Adjustment Layer icon at the bottom right of your screen. Select Gradient.
- The Gradient Fill menu tool will now appear. In the Gradient dropdown menu, locate the Basics folder and select the Foreground to Transparent gradient.
- With the Gradient Fill menu still open, select Style and change it from Linear to Radial.
- Once again in the Gradient Fill menu, click to add a checkmark to the Reverse option.
- Click on the Scale arrow and change it from 100 percent to 170 percent. Then, click OK.
- Double-click on the far right side of the Gradient Fill 1 layer. A Layer Style menu should open.
- Select the White slider handle in Underlining Layer and move it to a value of 245.
- Next, Alt-Click on the same White handle and drag it to a value of 100. This should split the slider in two and result in a fine-tuning of the vignette. Then, click OK.
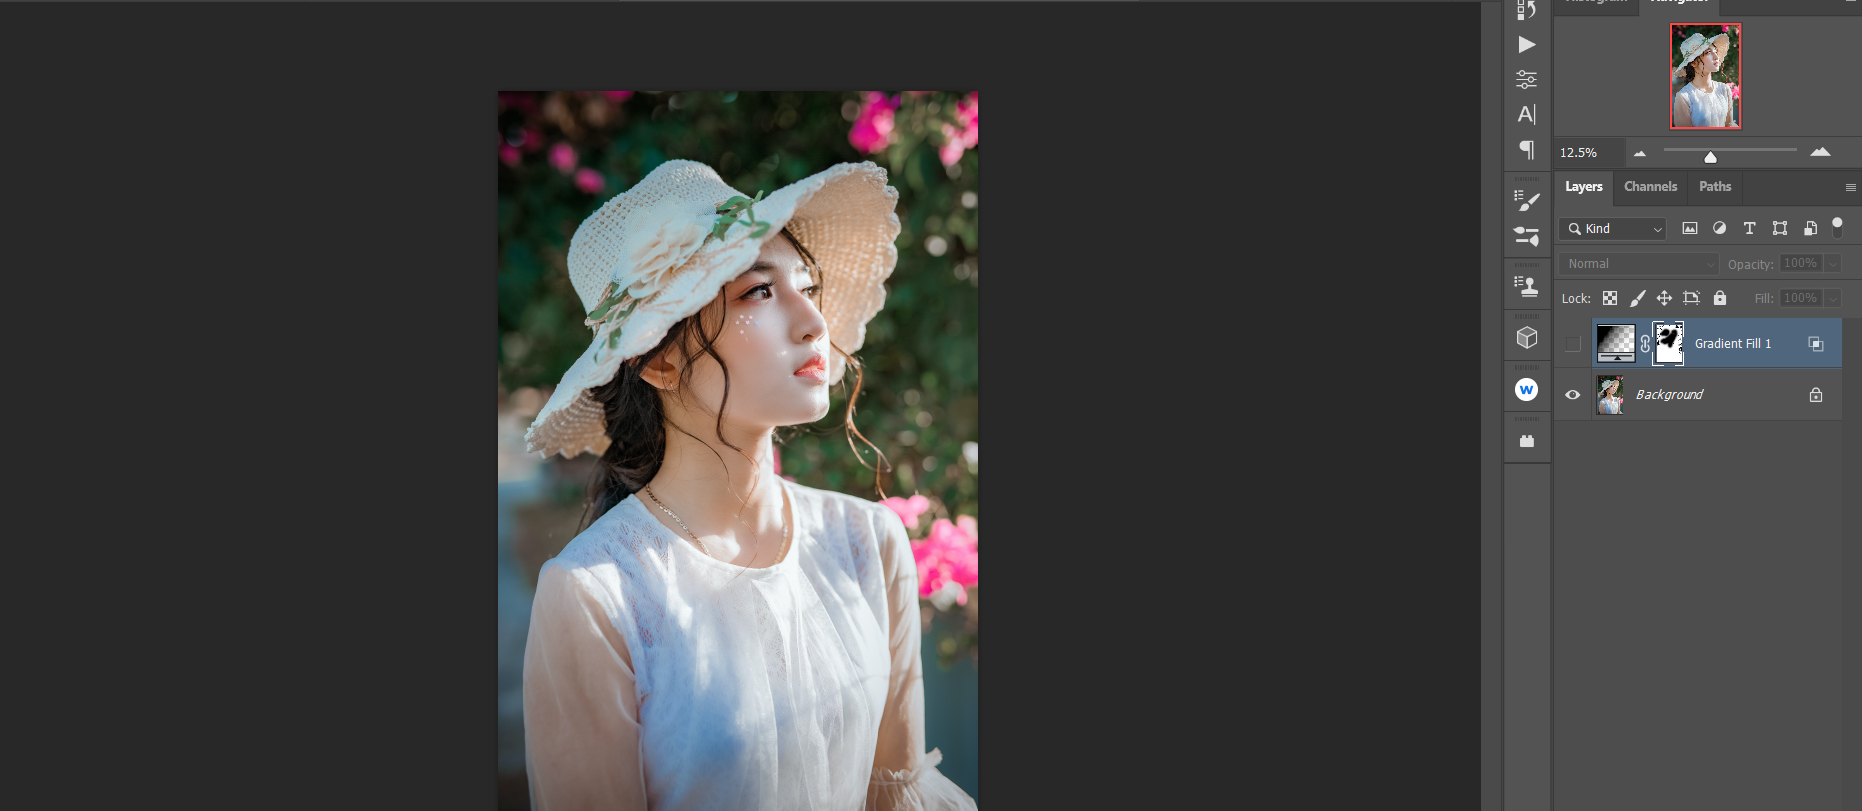
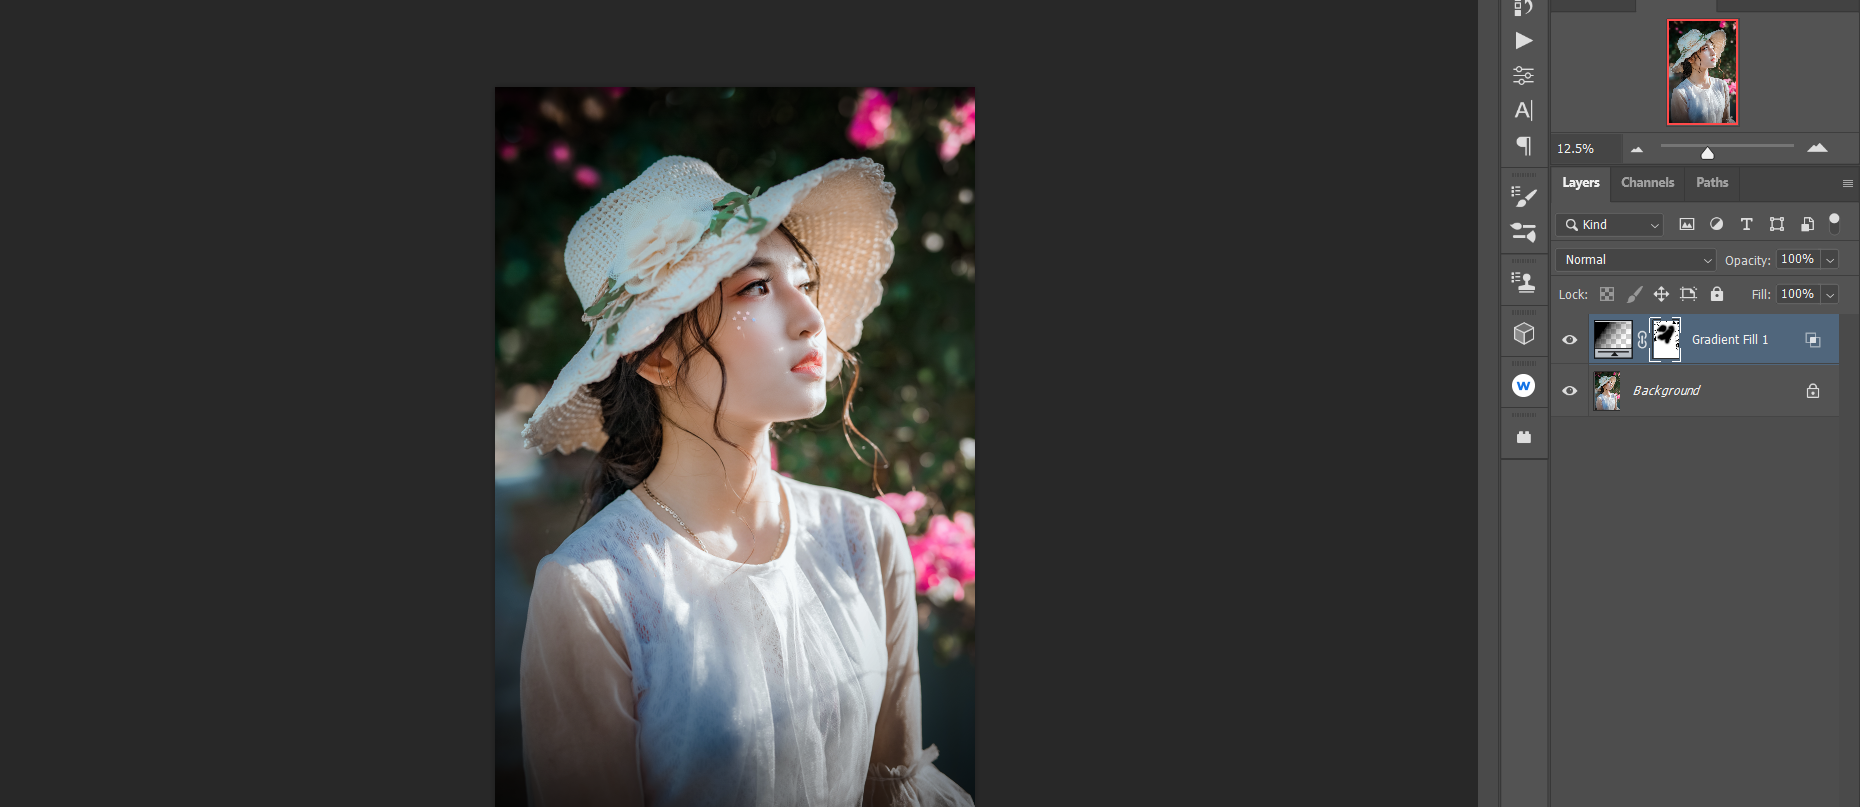
Similar to the previous example, some of the highlights and mid-tones have been darkened. This requires you to use the Brush tool with the foreground set to Black to paint over these areas on the layer mask. We also brushed over our subject’s face and hat along with the colorful flowers and background highlights.
Before:
After:
In case you make a mistake, don't forget to use keyboard shortcuts like Ctrl + Z (Command + Z on Mac) to undo changes in Photoshop.
Creating an Artistic Vignette for a Solid Background
We don’t always have to use the above method to add vignettes to our images. Photoshop is well-equipped with various tools to create vignettes for any type of image, including artistic ones.
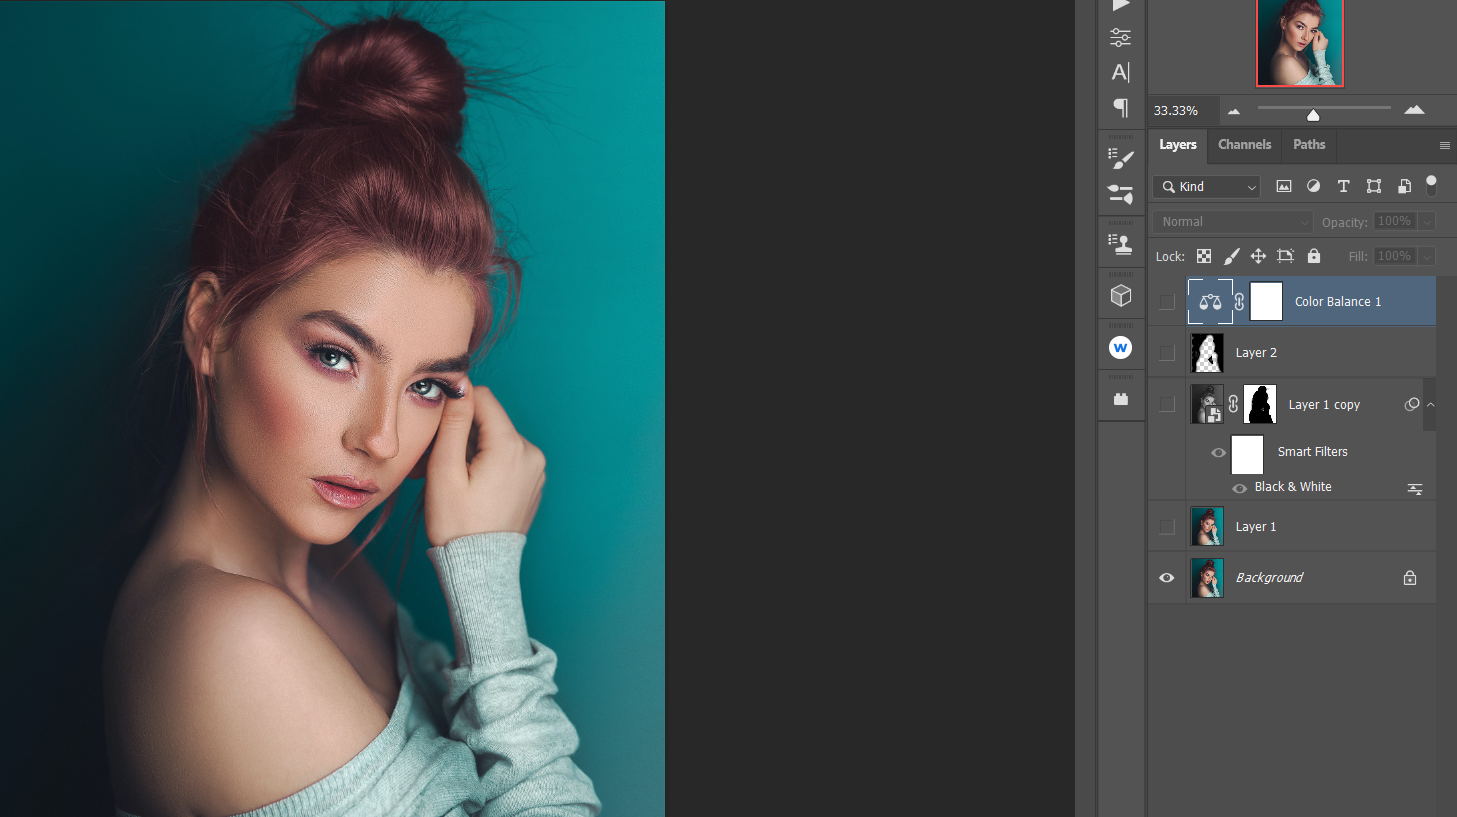
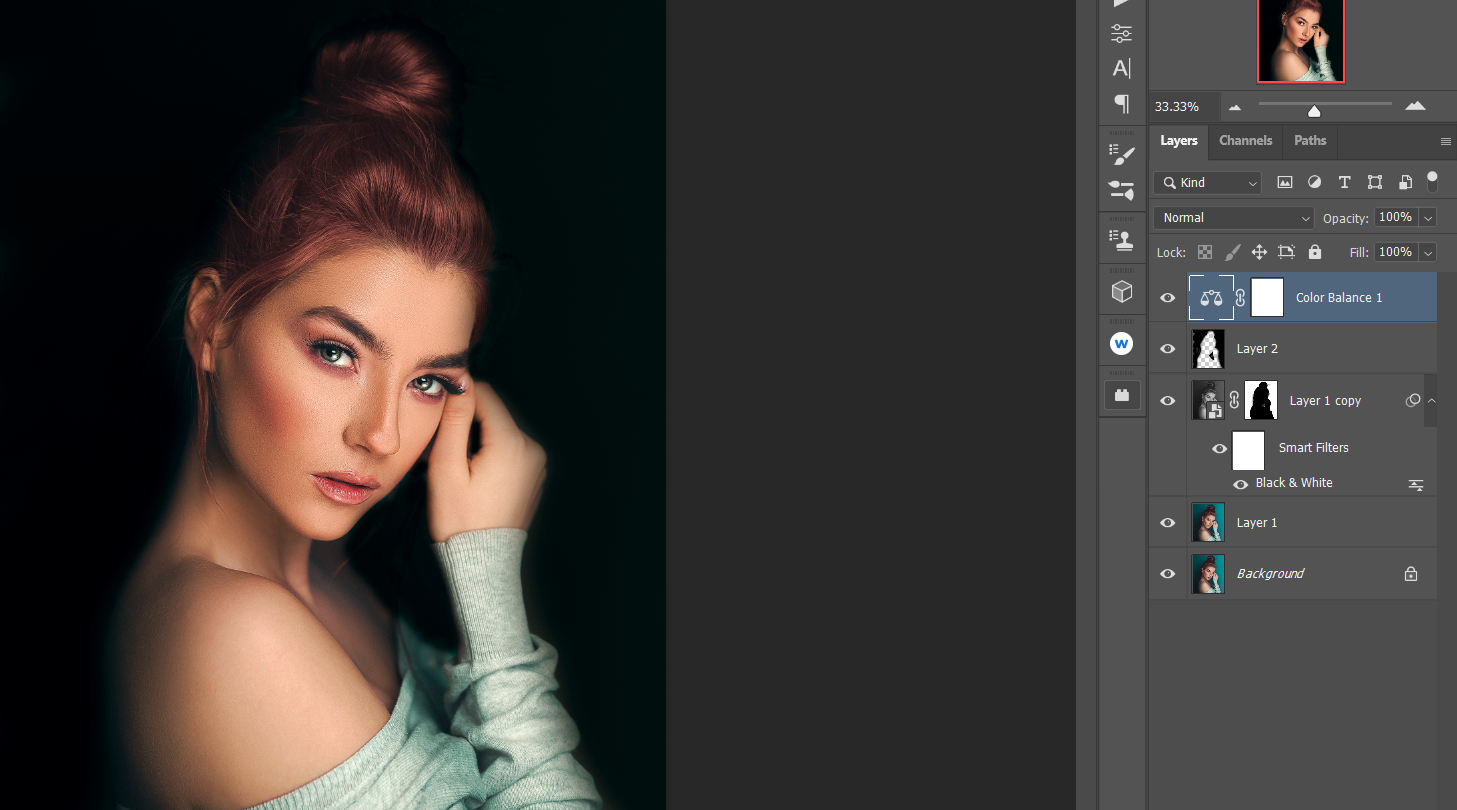
In this tutorial, we’ll use another method to create a vignette and add a few more layers to further enhance our subject. The end result will be a low-key effect with our subject completely surrounded in darkness. Also, we’ll add color corrections to make our subject pop even more.
You can download this image from Pexels and follow along.
- Load the image into Photoshop. Then, press Ctrl + J to duplicate the layer.
- Go to Window > Properties.
- The Properties menu should open. Click on View More.
- Choose Make B/W Background.
- Click Apply.
- Close the menu boxes. The background will now be black and white. Additionally, a new layer has been created as a smart filter, complete with a layer mask. Now, click on the + icon at the bottom of the screen to create a new blank layer.
- Change the Blend Mode from Normal to Luminosity. Change the layer Opacity to 80 percent.
- Click B for the Brush tool. Select Soft Brush from the brush options menu.
- Press D to set the foreground color to Black. Using your mouse (or other pointing device), paint in black around the subject as shown. Use the [ ] bracket keys to make the brush larger or smaller.
- Click on the Create New Fill or Adjustment Layer icon at the bottom of the screen and select Color Balance.
- Adjust the sliders in the Tone dropdown menu. Under Shadows, make the following changes: Red: -10, Green: +5, Blue: +10.
- Under Midtones, set the sliders at these values: Red: +20, Green: 0, Blue: -15.
- For Highlights, make these adjustments: Red: +15, Green: 0, Blue: -10.
By comparison, this isn’t your standard vignette effect. But like any good vignette, it draws attention to the subject in a very powerful way, especially with the addition of the Color Balance layer.
Before:
After:
Vignettes Should Always Be Custom-Made
If you’ve completed these tutorials, try going to your favorite photo editor that has a vignette tool, and apply it to these images. How do they look in comparison?
Until vignette tools become more advanced and offer you more control of the outcome, making your own custom vignettes in Photoshop is going to be one of your best solutions for showcasing your subjects.
Image Credit: Burst/Pexels
