Do you want to run or test an operating system without the hassle of actually installing it physically on your PC partition? Then a virtual machine will provide you just that. Virtual machines have become a core part of computing for both personal and business use.
This guide explains how you can set up a virtual machine natively on Linux using QEMU/KVM.
QEMU and KVM are two separate virtualization technologies that work together to achieve a smooth user experience in the virtualization space. Together they are referred to simply as KVM or QEMU/KVM.
What Are QEMU and KVM?
QEMU is a hosted virtual machine monitor and machine emulator, that is, it emulates the CPU architecture of the host operating system. However, it does not provide hardware acceleration, hence the need for KVM to provide a good user experience.
KVM is a native virtualization engine on Linux. It is the first official Linux virtualization to be implemented in the Linux Kernel, and as you can guess KVM stands for Kernel Virtual Machine. KVM functions as a Type 1 hypervisor.
Implementations of KVM are supported on the x86 platforms (32-bit and 64-bit) that support virtualization CPU extensions (such as those provided in Intel VT and AMD-V lines). The only exceptions are the Atom processor from Intel.
Since KVM is implemented directly on the Linux Kernel, it has great support across a wide variety of Linux distros. Best of all, you can easily manage virtual machines from the command terminal, from creating a virtual machine to starting one up.
Installing QEMU/KVM
For practical reasons, this guide shows you how to install QEMU/KVM on an Ubuntu Linux box or host system, then install Linux Manjaro as the guest operating system. But feel free to use any Linux distro of your choice as the guest OS. The guest OS can even be Windows.
You can easily install QEMU/KVM from the command terminal, using Apt for Debian-based distros.
First, make sure your package sources are up to date by running the following command.
sudo apt updateThen run the following command to install the required packages.
sudo apt install qemu-kvm bridge-utils libvirt-client libvirt-daemon-systemThe bridge-utils is a utility for configuring the Ethernet bridge. This will ensure that your virtual machine is connected to the internet if your host machine is. Libvirt provides an abstraction for interacting with QEMU/KVM to define and launch a virtual machine.
After installing these packages for managing the virtual machine, go ahead and load the kvm-cpu module. If you are using an Intel-based CPU, run the following command:
sudo modprobe kvm-intelIf you happen to be using an AMD processor, use:
sudo modprobe kvm-amdTo avoid being prompted for a password whenever you want to run a QEMU/KVM virtual machine as a regular user you should add your user to the KVM group. You can find your username by running the whoami command. Then add your user to the KVM group:
sudo adduser muo kvm(In this example, muo is the username.)
Creating the Virtual Machine Disk
To make the management of virtual images easier, you can create a folder in the home directory that will hold the different virtual machines that you create.
Go into your home directory and create a directory named KVM:
cd ~
mkdir KVM
Use the qemu-img tool to create the virtual disk for the guest operating system.
The virtual disk acts as a container for the guest operating system and its related files. Use the command below to create the virtual disk. In addition, it will format the virtual disk for you.
qemu-img create manjaro_disk.img -f qcow2 12GThe -f option specifies the format of the virtual hard disk, in this case, Qcow2. With the Qcow2 format, only enough disk space is allocated upfront. As you add more data to the guest operating system more disk space will be allocated dynamically.
This comes in handy for saving disk space on your host machine. There are more disk formats that QEMU/KVM offers, the choice you make will depend on your needs.
Installing the Guest Operating System
As mentioned earlier, the guest operating system discussed in this guide is Manjaro Linux. You can download a Linux Manjaro ISO from the Manjaro official site. This guide uses the XFCE edition, version 20.2.1 at the time of this writing. XFCE is a light-weight desktop environment for Linux operating systems. Other Manjaro Linux editions are GNOME and KDE.
Now that, you have the virtual disk and guest operating system ISO in place, you can proceed to install the guest operating system. To initialize the installation process of the VM you can simply run the following command.
kvm -m 1024 -cdrom ~/Downloads/manjaro-xfce-20.2.1-210103-linux59.iso -boot d \
manjaro_disk.img
The -m option specifies the amount of RAM in MB to be used during the installation process. The -cdrom acts as a virtual CDROM for the location of the ISO image, in this case, the Downloads directory is the virtual CDROM.
Note: Even though your PC does not have a physical CDROM drive, you should still specify the -cdrom option.
Finally, the -boot option specifies the virtual disk that you want the guest operating system to be installed plus the location of the boot loader.
After running the command above, you will be presented with a screen that will look like the one below. Use the default setting here, i.e. Boot with open source drivers. Press Enter to proceed.

Manjaro will then boot into a live mode. Click the Launch installer button to proceed with the installation, or take a look at the documentation and the desktop.

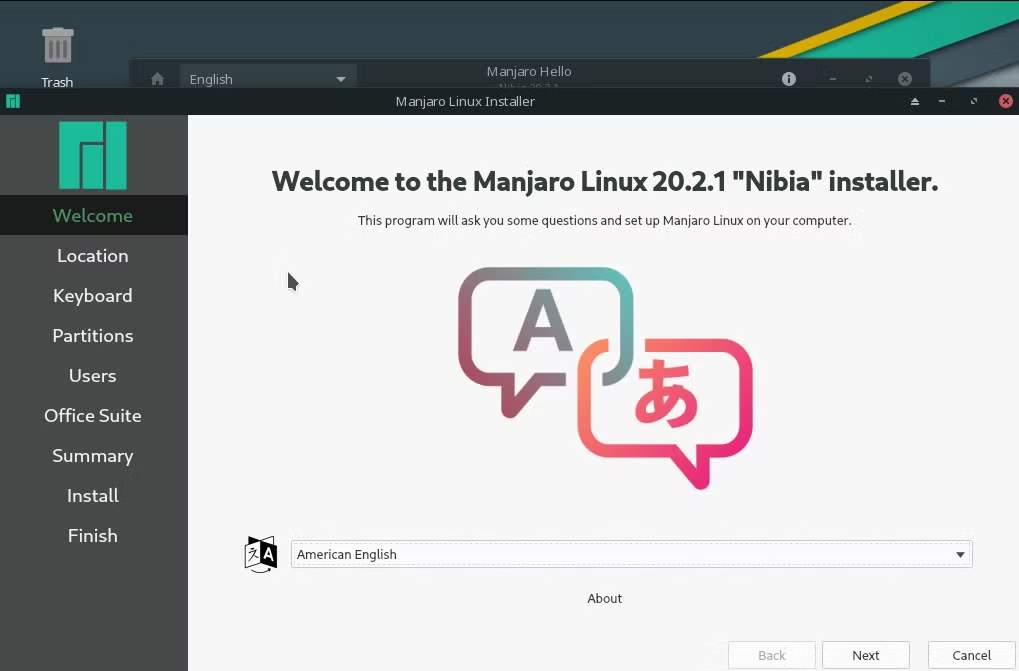
The next option to configure is the language. Select the language of your choice and click next.

After you select the language you will be asked to choose your location and configure other locale settings.

Next, is the configuration of the keyboard layout. Use the default selected layout, which is based on the language selected above. Here, you also have the option to test if the layout is indeed working by typing in the black space. Click Next if everything looks okay.

Note: You also have the option to go back to earlier configurations with the back button.
Partition the Virtual Disk
Here, select the partition on which you want to install the guest operating system. Since you specified to use the virtual disk that was created above, you currently only have a single partition.
Go ahead and select the Erase disk option. Remember: it is not your physical disk that you are erasing here, but rather the virtual hard disk. This is another good reason for using a virtual machine, you are less likely to mess around with your physical disk partitions.
Manjaro Linux also gives you the option to encrypt the entire disk, so that if someone gets hold of it, they cannot access your data without a passphrase. This is recommended if you store sensitive data and travel around with your PC often. You can leave out this option, for now, to keep things simple.
Manjaro Linux will format the hard disk to use the Ext4 File System.

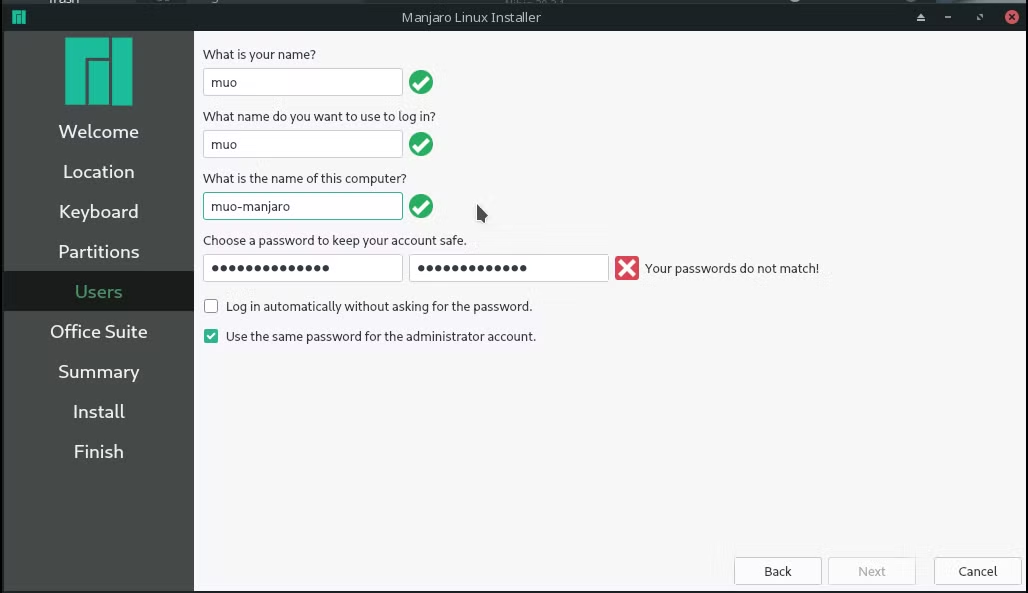
Linux is a multiuser operating system. The next step allows you to set up the initial user for your system. Select the checkbox marked Use the same password for the administrator account. You can add more users later on.

Manjaro gives you the option to either use LibreOffice or the FreeOffice office suite, or you can choose to install none.

The next page will provide you a summary of the configuration that you have selected. Take a good look at it and click install if you are satisfied with the choices you have made. You will be prompted to go ahead with the installation. Click Install now to proceed or go back if there are any changes you wish to make.
While Manjaro installs, you can minimize the progress window and play around with the Manjaro Desktop.

Once the installation is done, which should take a few minutes, click Done and close the QEMU window. Alternatively, you can terminate the installer process by pressing CTRL + C from the command terminal that you used to start the installation process from.

Starting the New Virtual Machine
To start the newly created virtual machine, you can simply run the following command. The -m option specifies the amount of RAM in megabytes to be allocated to the virtual machine. Meanwhile, ~/KVM/manjaro_disk.img is the location of your virtual hard disk for the guest operating system.
kvm -m 2024 ~/KVM/manjaro_disk.imgRunning Virtual Machines With QEMU
This guide looked at how to get started using the native Linux virtual machine QEMU/KVM using Manjaro Linux as the guest operating system. Virtual machines offer several advantages over physically installing operating systems on disk partitions. They are easy to set up, start, and manage.