During a fresh installation of Windows, you set up a user account that gives you full access to your computer. But if you're planning to share your PC with someone else, you probably wouldn't want them to have the same level of access as you do.
Apart from creating multiple users, Windows 10 also allows you to limit what other people can do on your shared PC by providing multiple account types, namely Standard User and Administrator. Here, we'll be taking a look at four different ways to switch between these account types.
Windows 10 Standard User vs. Administrator: What's the Difference?
The Administrator account gives you unrestricted access to everything that's on your system. In contrast, you cannot use a Standard user account to manage system files or install any new applications on the computer.
It doesn't end there. Existing programs that require administrator privileges cannot be operated with a Standard account, either. You cannot adjust any setting that affects the whole PC, like creating a new user account.
When you're sharing your PC with someone else, it's reasonable to have these restrictions in place. Of course, if you trust them enough, you can grant administrator privileges to their account too.
Any additional users that you create in Windows are standard accounts by default. However, as long as you're logged in as an administrator, you can provide elevated permissions by simply changing the account type.
1. Change Account Type on Windows 10 from Settings
The Windows 10 Settings app has become the go-to destination to personalize your computer. It gives you access to most of the basic settings you need, unlike the Control Panel, which can overwhelm new users. Therefore, this is the method that most people prefer for changing the account type.
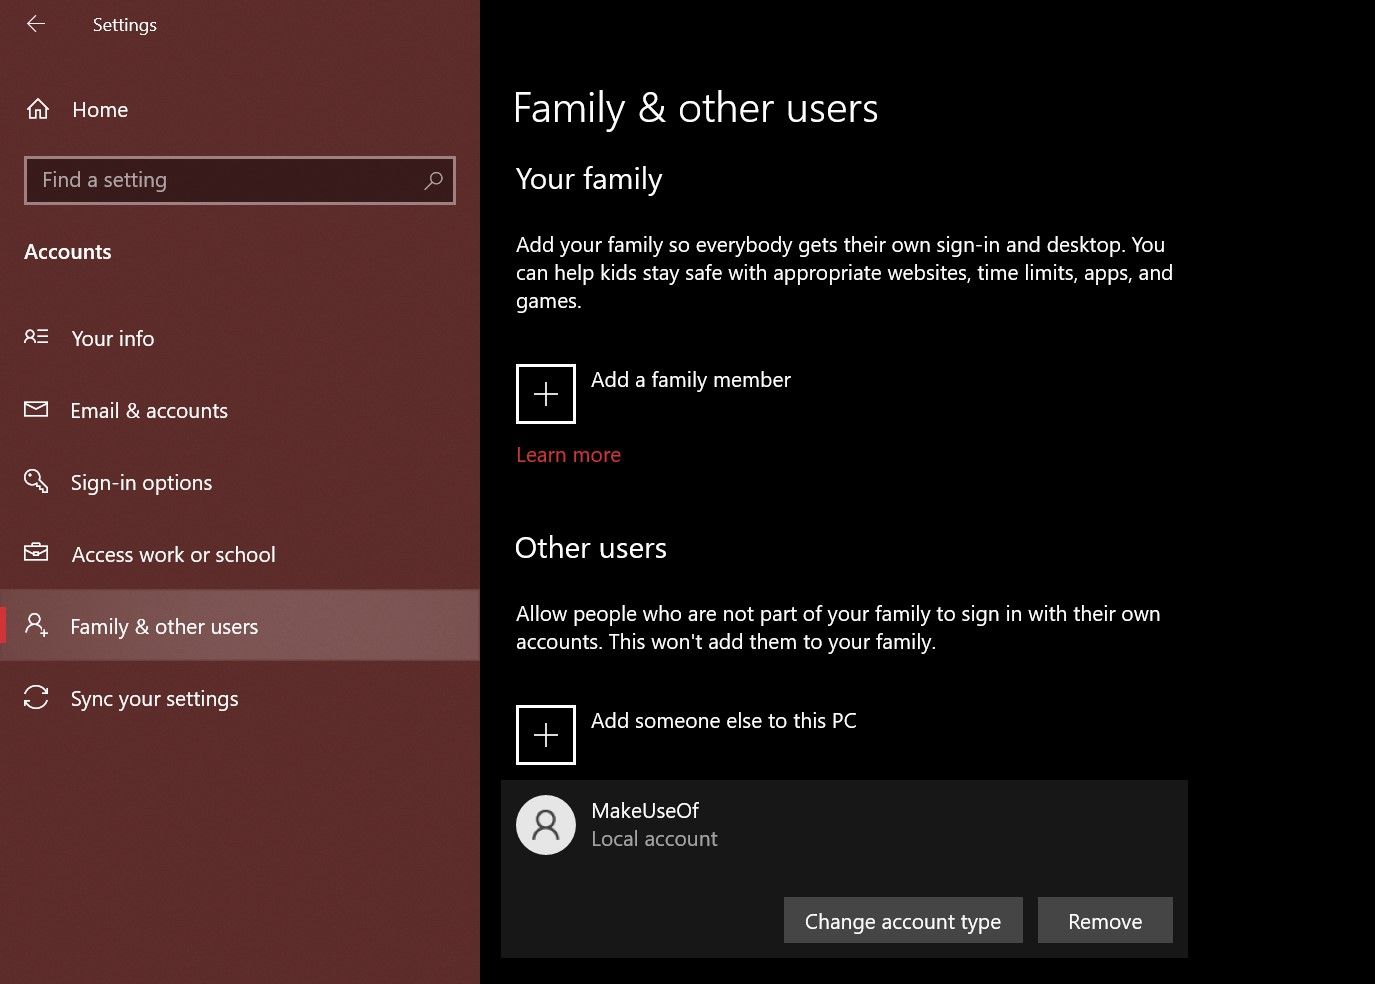
- Press Windows Key+ I to open the Settings panel.
- Next, head to Accounts > Family & other users.
- Look under Other users and select the account that you want to change privileges for. Now, click on Change account type.
- You'll get a popup on your screen showing the current permissions of the selected user account. Click on it and choose either Administrator or Standard User to make the changes accordingly.
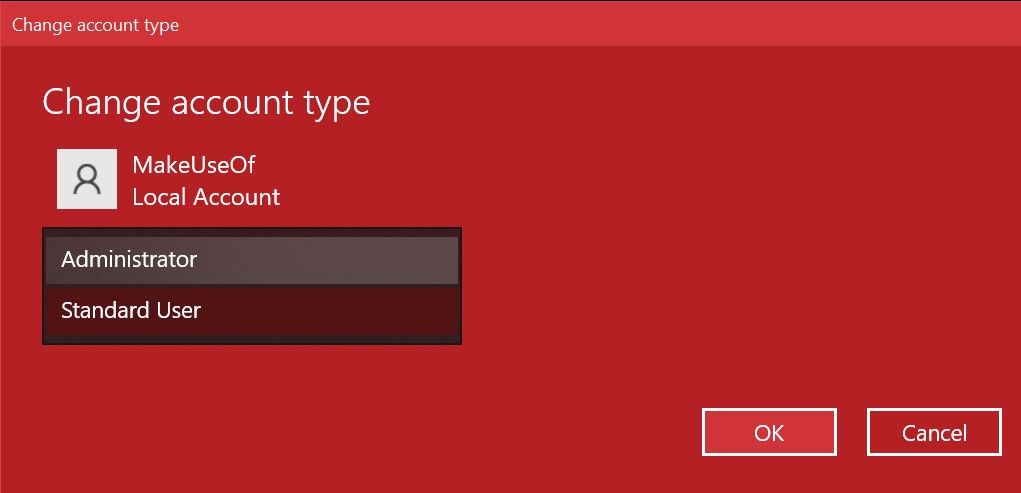
Make sure to click OK to apply these changes. You can now log in to this account without losing administrator privileges. Pretty straightforward, right?
2. Switch Account Group in Windows 10 Using Netplwiz
Netplwiz is a dedicated panel for managing all the user accounts on your computer. It's a system executable that can only be accessed if you're signed in as an administrator. Back when there wasn't a dedicated Settings app for Windows devices, Netplwiz was a popular choice to switch between the account groups, i.e., Standard User and Administrator.
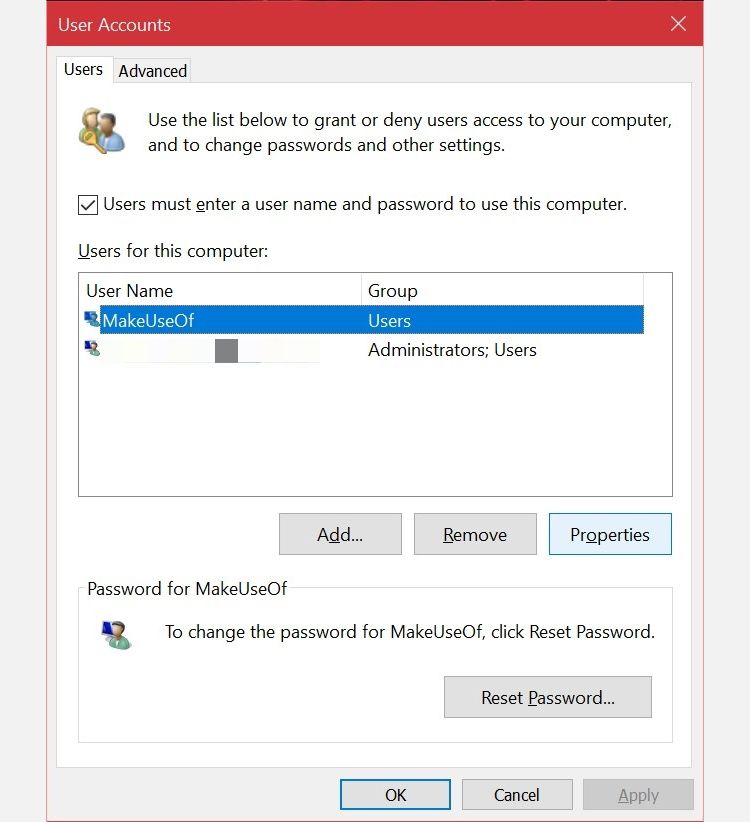
- Type netplwiz in the Start menu search field and click on the best match to open the following User Accounts panel. Here, you'll be able to see all your user accounts. Select the one that you want to change privileges for and click on Properties.
- Now, switch to the Group Membership section, and you'll find the available account groups. Select your desired choice and click on Apply.
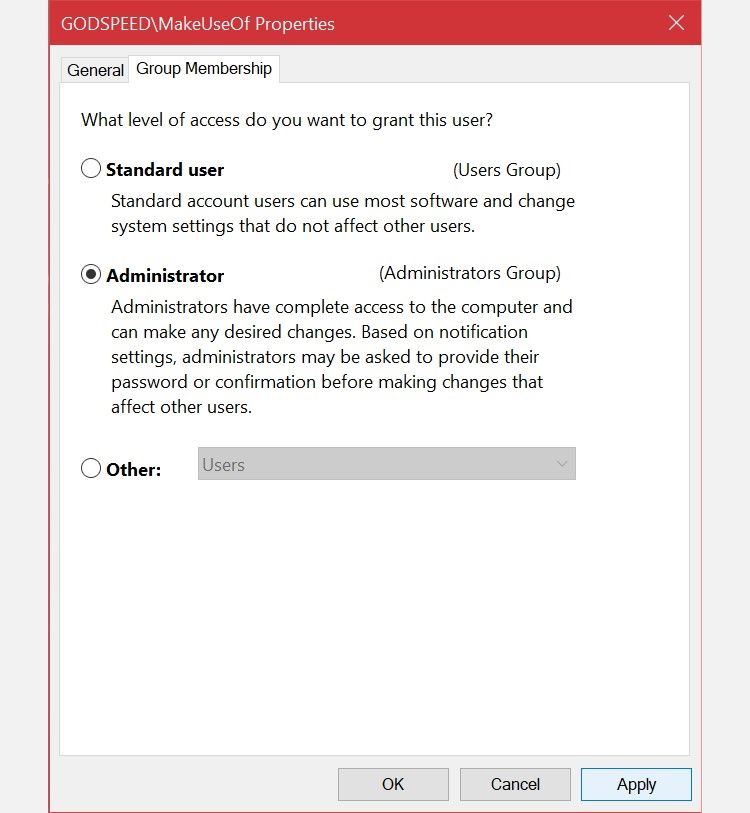
Unlike the Settings app, Netplwiz will display a third option that further expands the account types. These are for very specific permissions that you'd like to grant the other user.
For example, you can select the Power Users option, which gives the account limited administrative powers. Or, you can choose Guest if you want Windows to restrict them even further than a standard user does.
3. Switch Your Windows 10 Account Type From the Control Panel
The Control Panel has been an integral part of Windows devices for as long as one can remember. It was the de facto settings panel for Windows computers until the introduction of the dedicated Settings app in Windows 10.
It still has its place, since you can use it to make advanced system-level changes that the Settings app cannot currently complete. Follow these instructions to learn the old school way of changing the account type:
- Input control panel in the Start menu search bar and select the Best Match.
- Select Change account type (this option has a shield icon).
- Next, select the account you want to change the permissions for. You'll have multiple options for the selected account. Click Change the account type to continue.
- Here, select one of the two available choices, then Change Account Type to apply the changes.
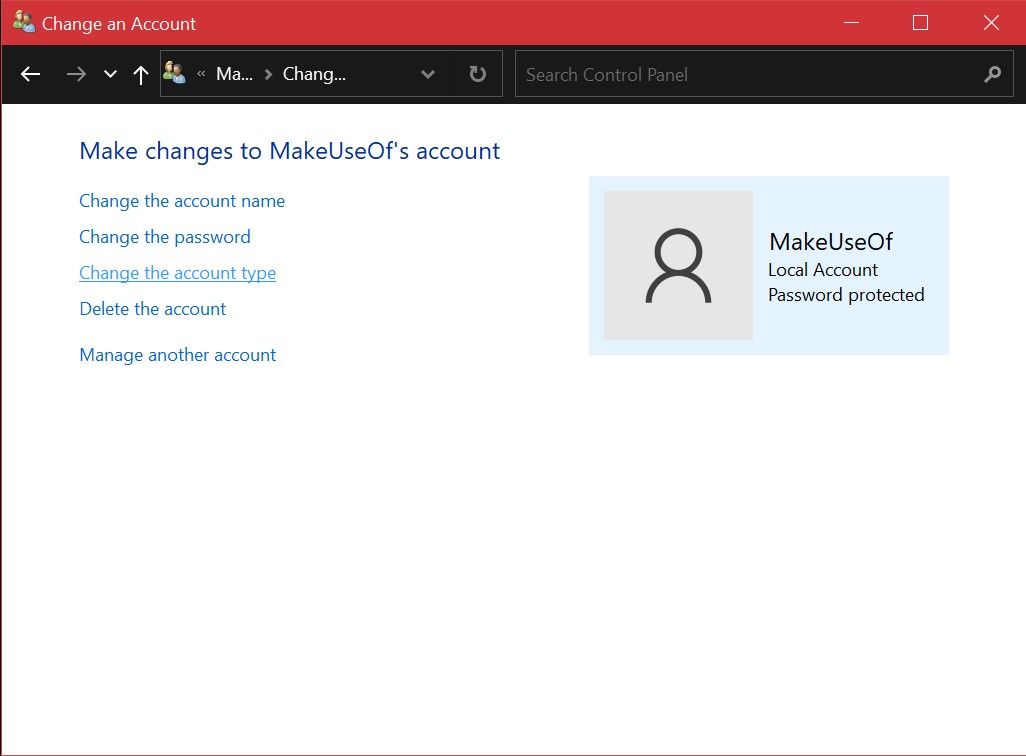
You may be familiar will all these menu items if you've used legacy versions of Windows. Regardless, it's mostly a straightforward process.
4. Use the Command Prompt to Change Account Type in Windows 10
Command Prompt, also known as CMD, is the built-in command-line interpreter on Windows PCs.
With the right CMD commands, you can perform various tasks on your computer. The program is basically a coder's paradise, but you don't need coding skills to change an account type with a simple command line. The following two steps are all you need to keep in mind.
- Input command prompt in the Start menu search bar. Select Run as administrator instead of launching it directly.
- To change the account type to administrator, type the following command and hit Enter.
net localgroup administrators [USERNAME] /add - To switch back to standard user, use this line of code instead, and press Enter on your keyboard.
net localgroup administrators [USERNAME] /del
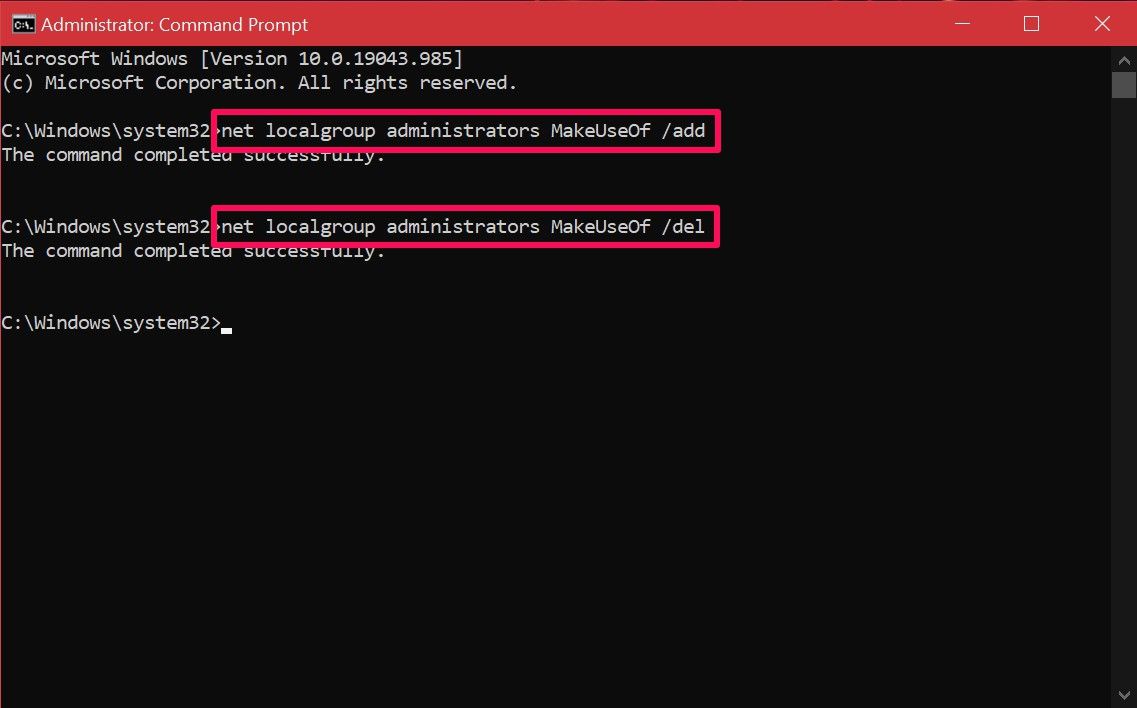
If you get an error saying access is denied upon executing the command, it indicates that you aren't running CMD as an administrator. As long as you know this command, you don't have to fiddle around with the system menus like the other methods. Hopefully, you're able to get the hang of it fairly quickly.
Switch Windows 10 User Account Types the Easy Way
As you can see, you're not limited in terms of options. Now that you're familiar with all the various methods, it's up to you to try them out individually and find the best one. Depending on your use case, this may vary. Some users may prioritize the Netplwiz method since it allows them to fine-tune the permissions further, whereas others would be more than happy with any one of these methods.