Sometimes, drivers stop working, and this is especially noticeable for GPUs. GPU drivers are prone to bugs because of frequent updates, and sometimes you need to start from scratch.
Here are three ways you can totally wipe GPU drivers from your PC and install them on a clean slate.
Why Would You Even Need to Remove and Reinstall GPU Drivers?
External devices can’t function without drivers on Windows. While Microsoft does provide “basic” drivers for all sorts of devices, it’s usually a good idea to install the manufacturer’s official drivers. This is especially important for GPUs since GPU vendors like AMD and Nvidia provide software optimization, features, and customizable settings with their drivers.
However, drivers are never perfect. Sometimes a new update introduces a new issue, and users have to wait until the manufacturer fixes that issue. It's also possible that installing new drivers repeatedly can cause weird issues. If you're switching from AMD to Nvidia or vice versa, it's also good practice to remove the drivers of the older GPU.
Related: Easy Ways to Fix the nvlddmkm.sys Error in Windows 10
Preparing for Clean Removal and Installation
Before you go and try one of the below methods, it's a good idea to get a few things sorted out. You should already have your new drivers downloaded and ready to install before you remove anything. Where you get your drivers from depends on where you bought your PC or built it yourself.
If you built your own desktop, you'd want to go directly to AMD's, Nvidia's, or Intel's website and download drivers. If you bought an OEM PC, it's possible to use drivers straight from AMD, Nvidia, or Intel, but it's a better idea to go and find the OEM-provided drivers.
You will also need to reboot your PC at least once during the process. You can technically ignore that, but a reboot is recommended to be safe. So, save all your important files and stuff.
The last thing you should do is disconnect from the internet. Windows will automatically attempt to download and install the latest GPU drivers it can find if you remove your GPU drivers. Disconnecting from the internet will prevent that, which is why we recommend downloading drivers first.
1. Use Windows Device Manager
Device Manager is one of many tools for configuring devices connected to your PC, and it can update, rollback, and delete drivers. Search for Device Manager in the search bar and open the utility.
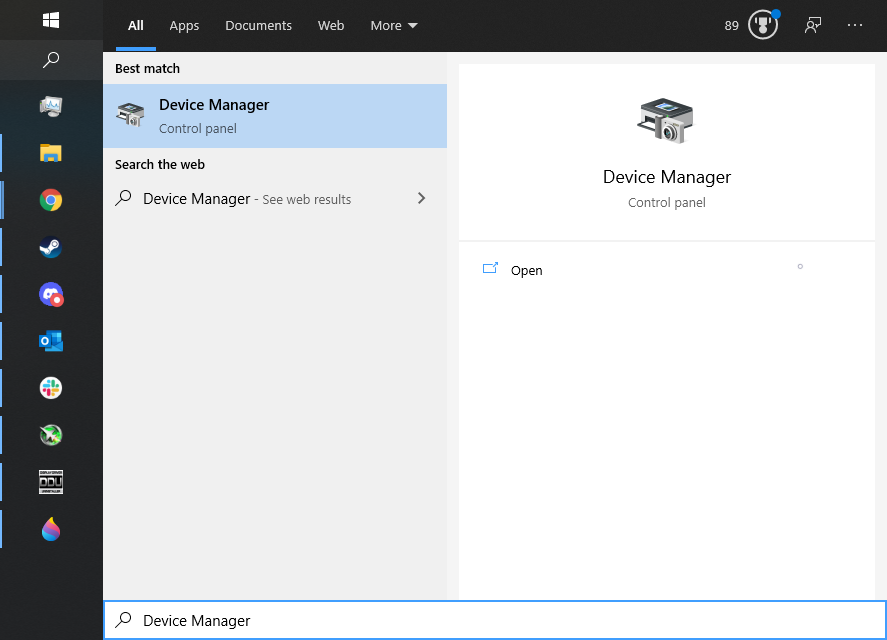
Then navigate to Display adapters, right click on your GPU, and select Properties.
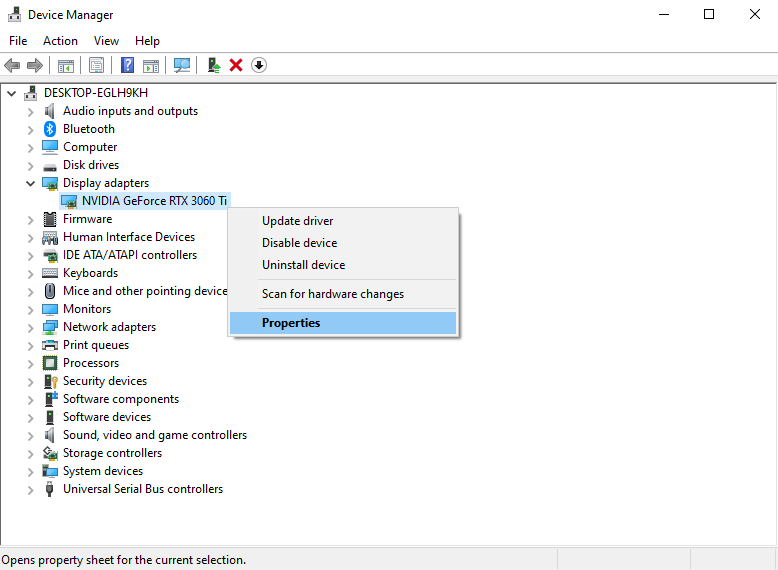
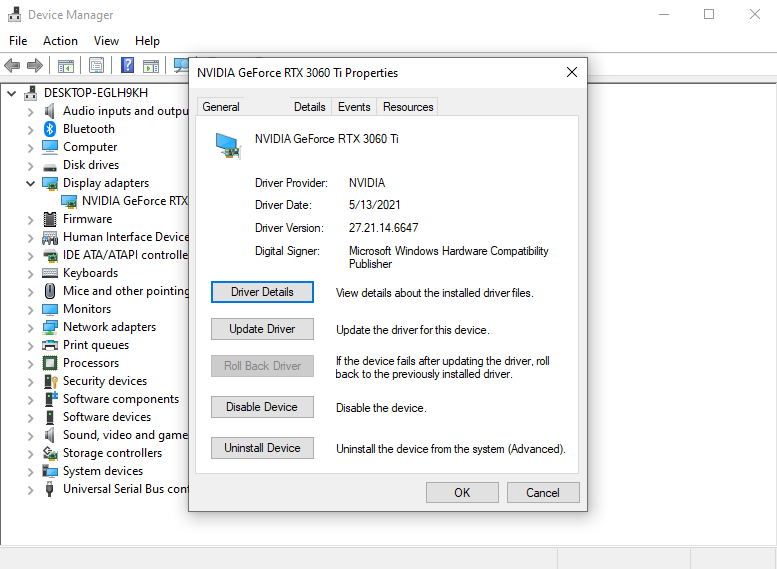
From there, navigate to the Driver tab. The tab displays the options to Update Driver, Roll Back Driver, and Uninstall Device.
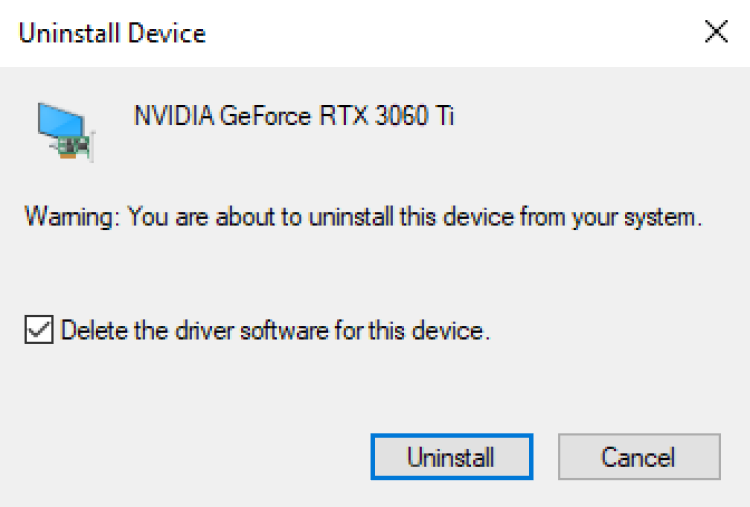
Driver deletion is included under that last option as an optional feature.
Device Manager is useful for driver rollbacks (meaning you can revert or "roll back" to a previous version), but its update methods might disappoint you. Its automatic method searches for Windows-certified drivers, but most GPU drivers are not Windows certified. This doesn't mean non-certified drivers are bad, however. AMD, Nvidia, and Intel don't always ask for Microsoft's seal of approval because it is a time-consuming process.
The manual method is only recommended if you're an experienced user.
For example, a GPU in an OEM-built PC might have to use official drivers, which might be old or buggy. However, it's possible that drivers provided by the GPU manufacturer could work better if you use the install wizard. However, this is a rare case as most users will never have to worry about this.
The other problem is that Device Manager only installs the driver. All those fancy applications you can use to tweak your GPU are not part of the driver itself; they're just bundled in with drivers. Windows will not install them, unfortunately. There are Windows Store versions of these apps, but it's probably better to get it straight from the source.
In short, Device Manager is good for removing drivers and reverting to older ones, but it's poor for installation. It's better to use the driver's wizard for installation.
2. Use the Driver's Clean Install Option
AMD and Nvidia offer options for clean installation when you install their GPU drivers. Intel, sadly, does not offer this feature yet.
For AMD users, just run the driver and click through the wizard. Eventually, you will see this fancy looking window:
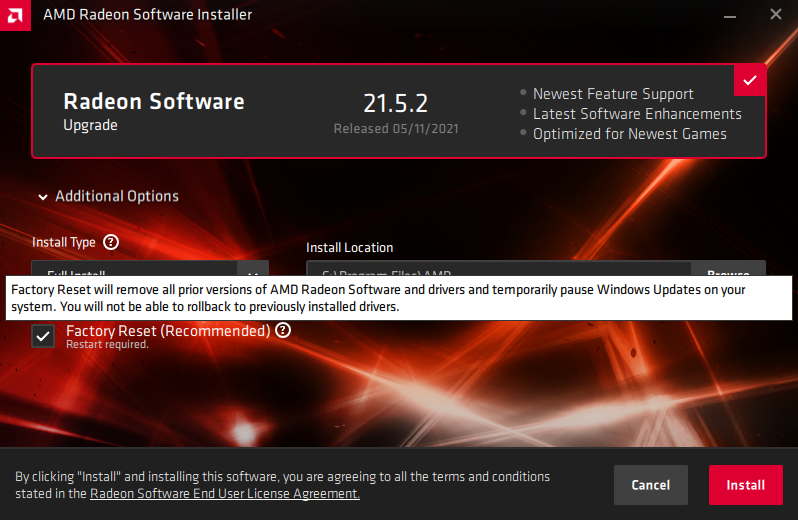
The Factory Reset option should be selected by default. The only thing left to do is click through the rest of the wizard and wait for the process to finish.
There is also a standalone app called the AMD Cleanup Utility, though it's probably more convenient to do the Factory Reset in the driver wizard.
Related: What Is GeForce Experience? Key Features and Benefits Explained
Nvidia's clean installation is also located in its wizard, but it's a bit more tedious to access. Once you have started the installation wizard for your Nvidia drivers, you'll first need to select one of these two options (both allow for clean installation) and press Agree And Continue:
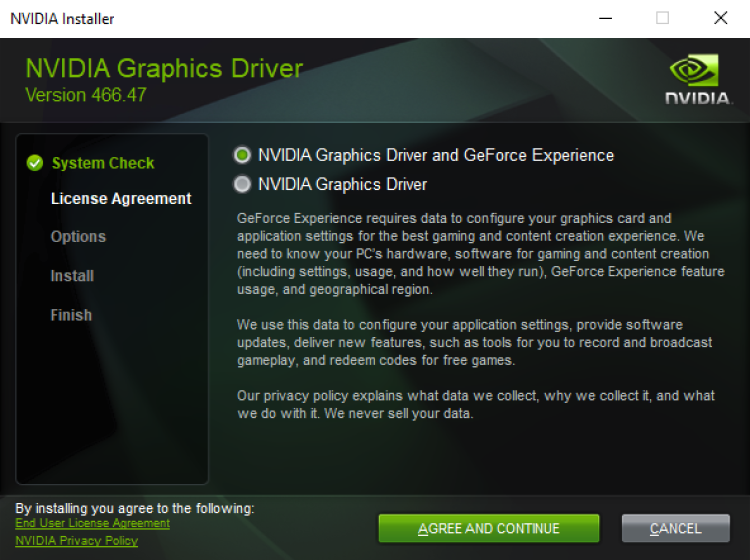
Then, select Custom (Advanced).
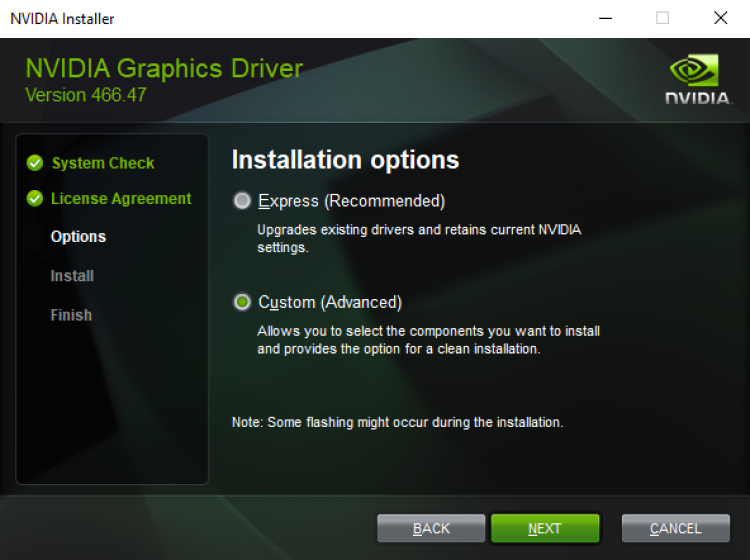
Check Perform a clean installation.
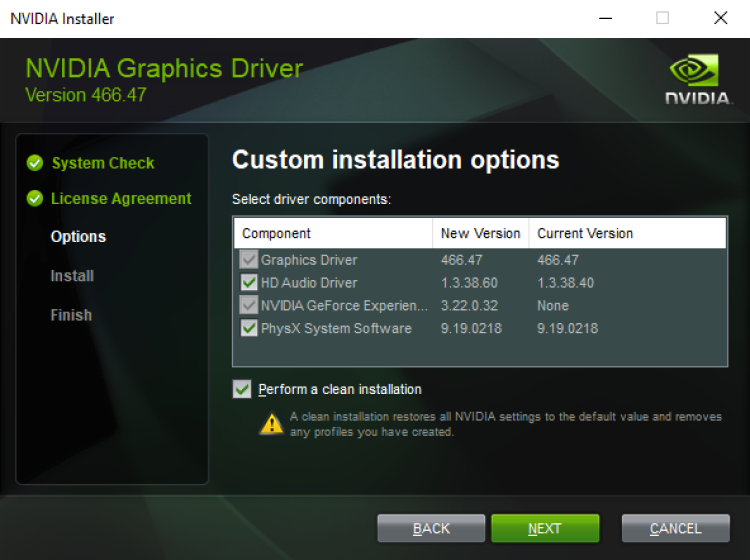
And that's it. Just click through the rest of the wizard as normal, wait for the installation to complete, and you should be good to go.
3. Use Driver Display Uninstaller
Driver Display Uninstaller, or DDU, is the preferred method of PC enthusiasts. It is a third party program developed by Wagnardsoft that supports driver removal for AMD, Nvidia, and Intel GPUs. DDU is extremely thorough and will remove everything or almost everything relating to GPU drivers.
To get DDU, go to Wagnardsoft's website, and select the entry with the most recent date. At the time of writing, the most recent version is 18.0.4.0, as you can see here:
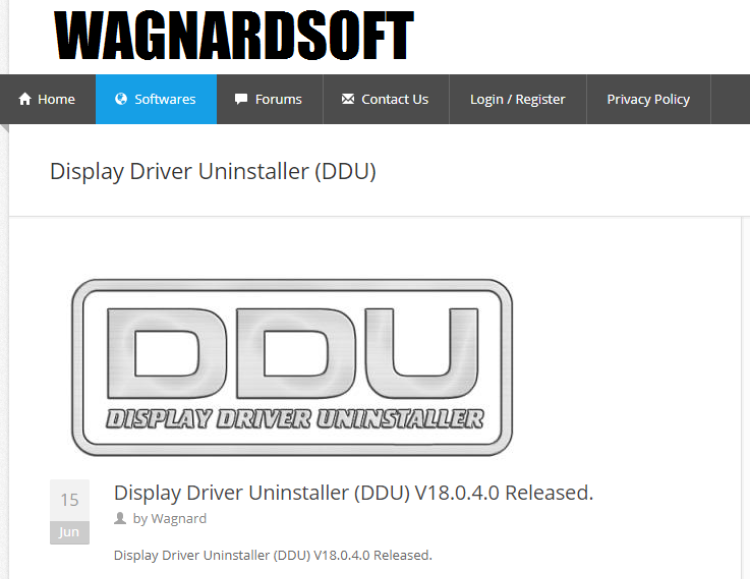
Then find where it says Click here for DOWNLOAD & SUPPORT and click on it. That will send you to yet another page where you should see something that reads Official Download Here. Click on that to start the download. You will receive an executable. Run the executable and click Extract.
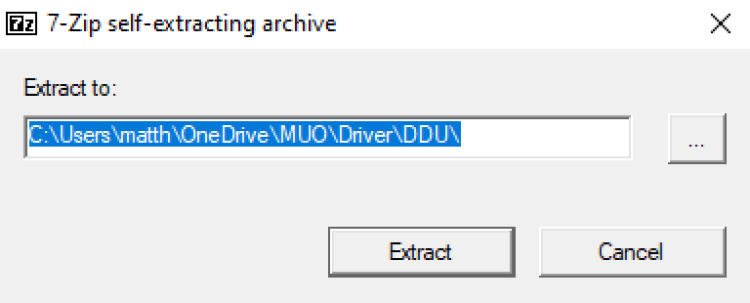
You should receive a folder named something like DDU v18.0.4.0, depending on the version number. This is what the folder contents look like:
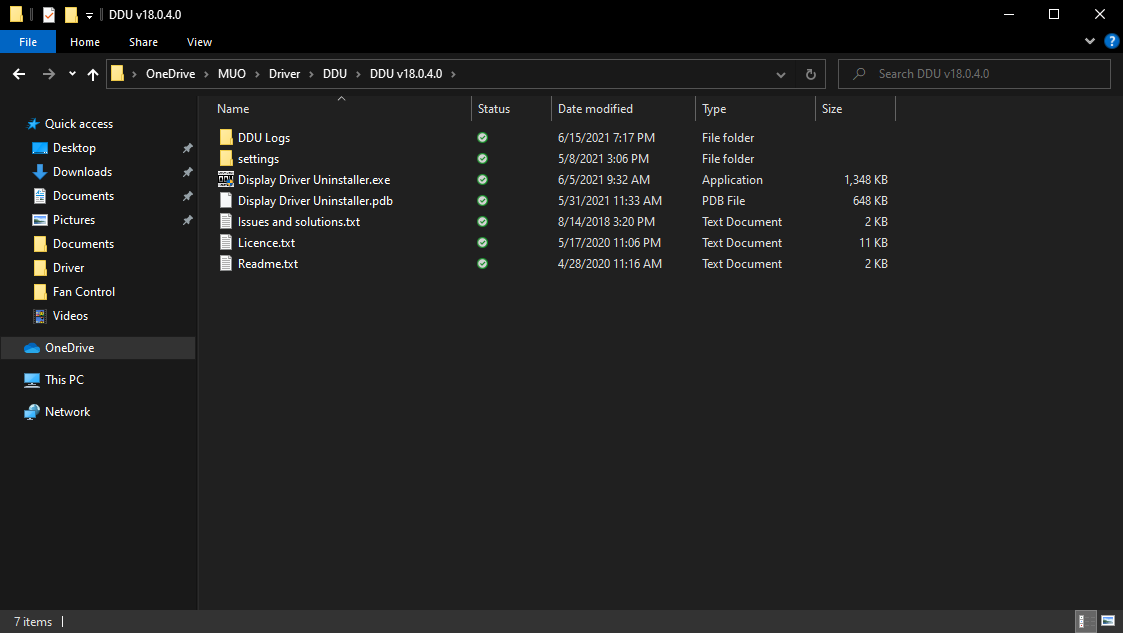
To run DDU, open the folder, and run Display Driver Uninstaller.exe. Before you do anything, the app might close some other apps for safety reasons and show you this list of options:
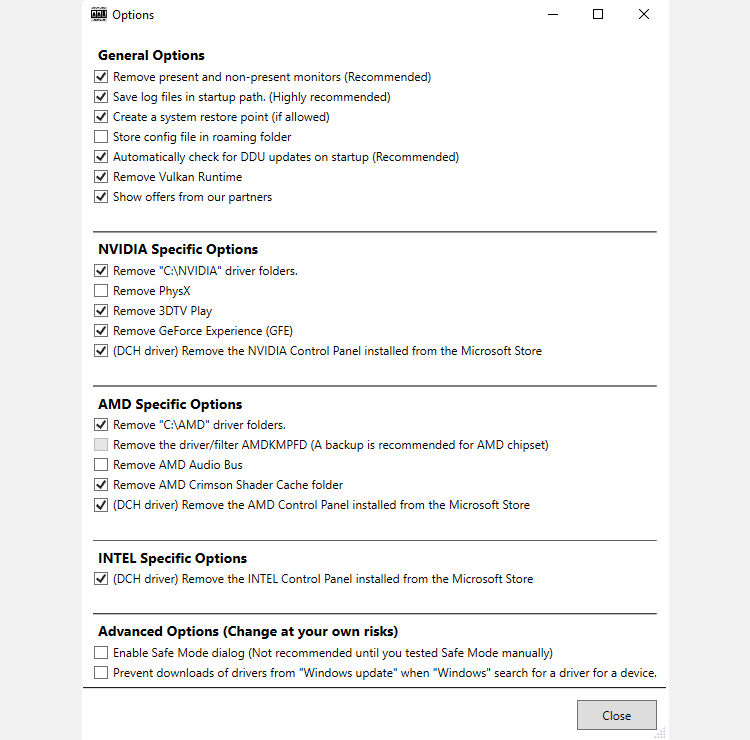
Just click Close. If you are not in Safe Mode, DDU recommends that you go into safe mode before removing any drivers. Safe Mode isn't required for the driver to be removed, however. Next, click on Select device type and choose GPU.
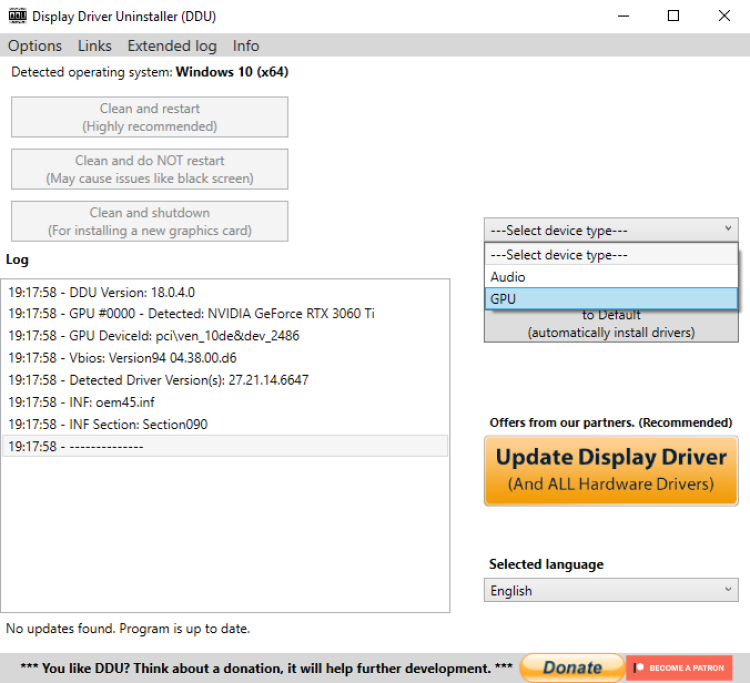
By default, DDU will choose one of your GPU drivers to clean, which can be a problem if you have multiple GPUs. If DDU has automatically selected the wrong GPU drivers, all you need to do is click where it says AMD, Nvidia, or Intel, and select the proper vendor.
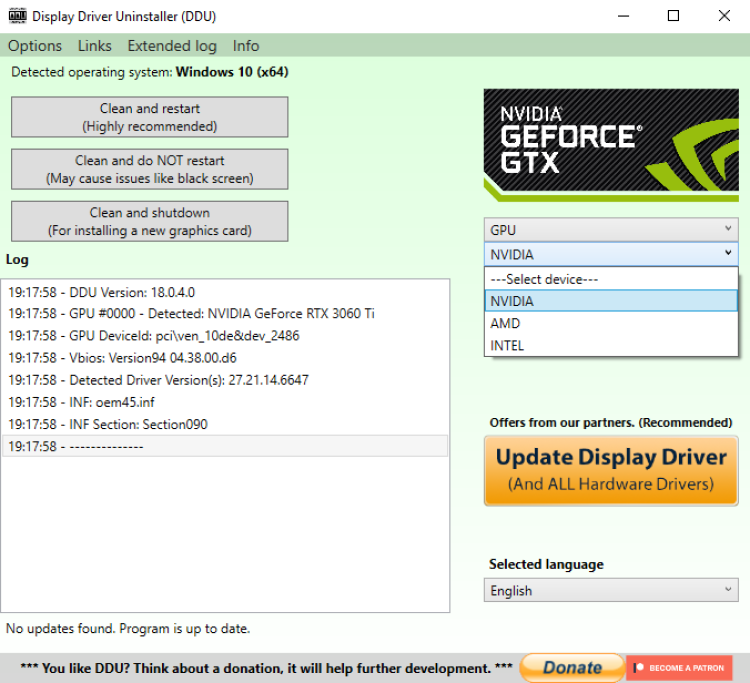
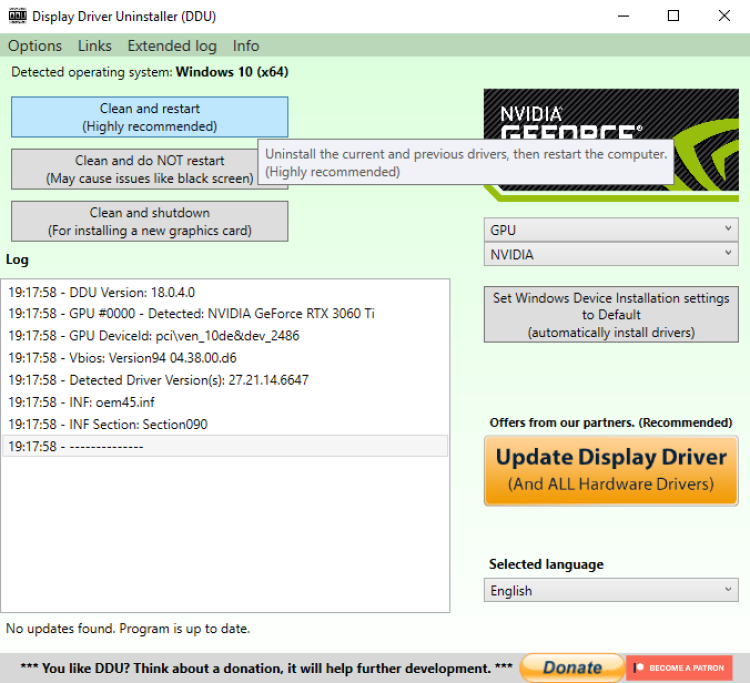
Finally, just press Clean and restart. DDU will remove your drivers and will automatically restart your PC.
Wagnardsoft does not recommend using DDU every time you want to update your drivers, but it can be a good last ditch attempt to fix issues you suspect might be driver-related. It's also useful if you are switching from one GPU vendor to another.
DDU is probably an overkill for most users, but sometimes the nuclear option is the easiest.
Cleanly Removing Drivers Is Good Practice
Thanks to AMD and Nvidia providing this feature in their drivers, it's effortless to ensure a bug-free update. Or, even if you need to revert to an old version, Device Manager and DDU have you covered.