There are various ways you can change the line spacing of your Word document. This article is going to show you step by step how to change line spacing in Word.
How to Change Line Spacing in Word
1. Open your Word document and click on the Home tab.

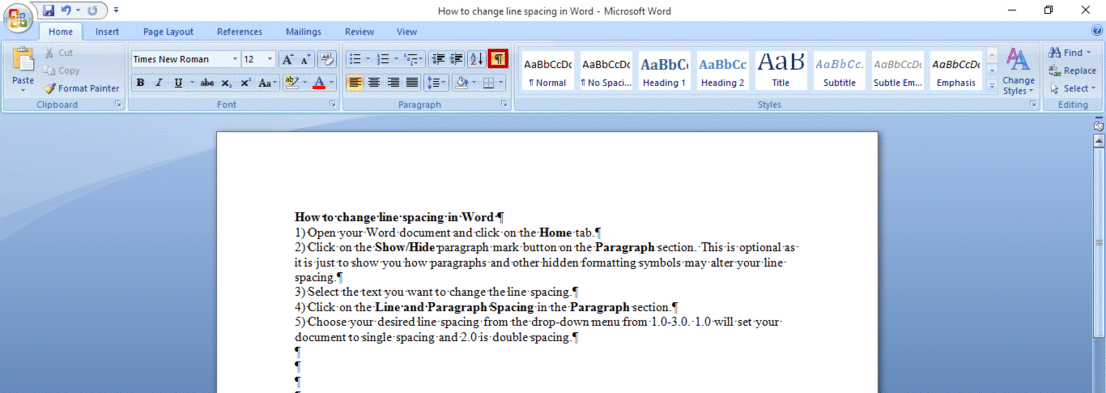
2. Click on the Show/Hide paragraph mark button on the Paragraph section. This is optional, as it is just to show you how paragraphs and other hidden formatting symbols may alter your line spacing.
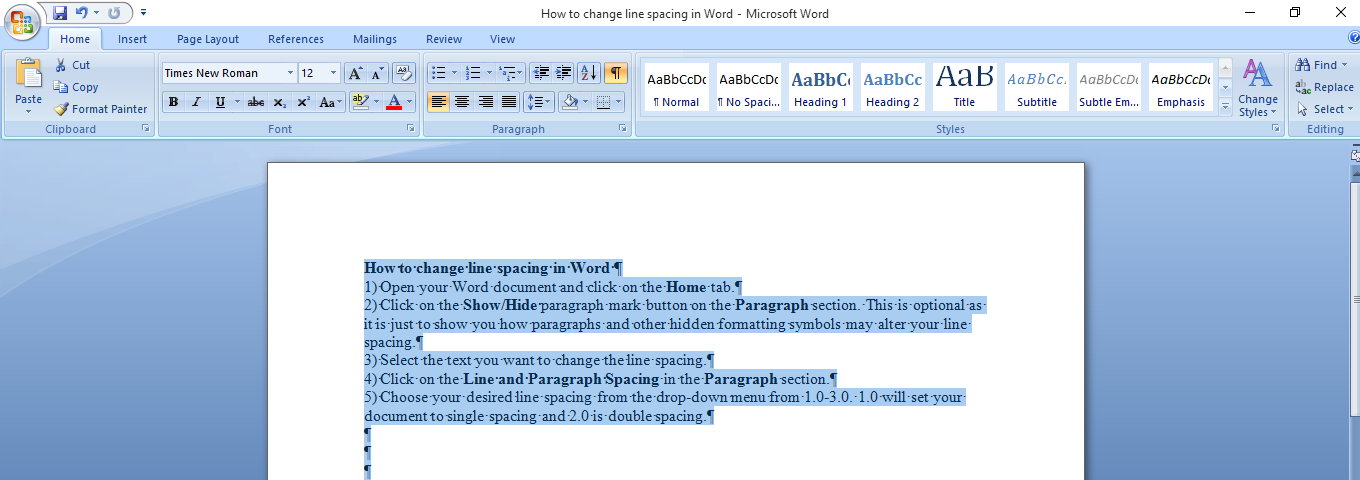
3. Select the text you want to change the line spacing.
4. Click on the Line and Paragraph Spacing in the Paragraph section.
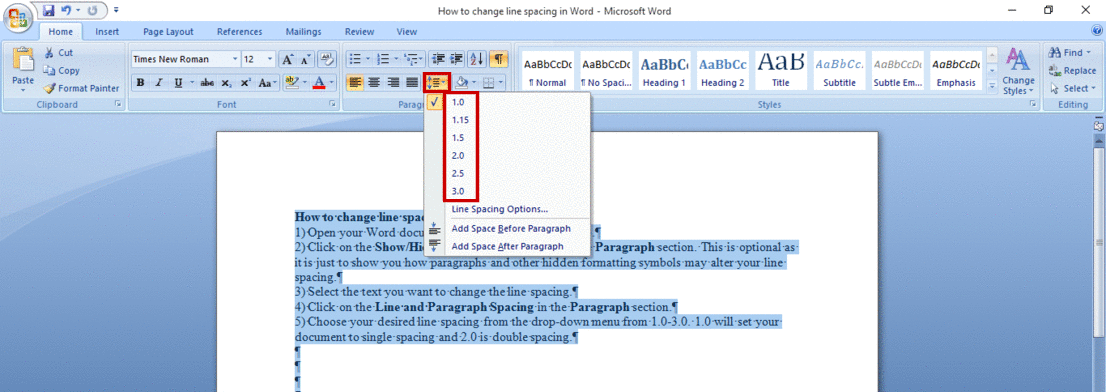
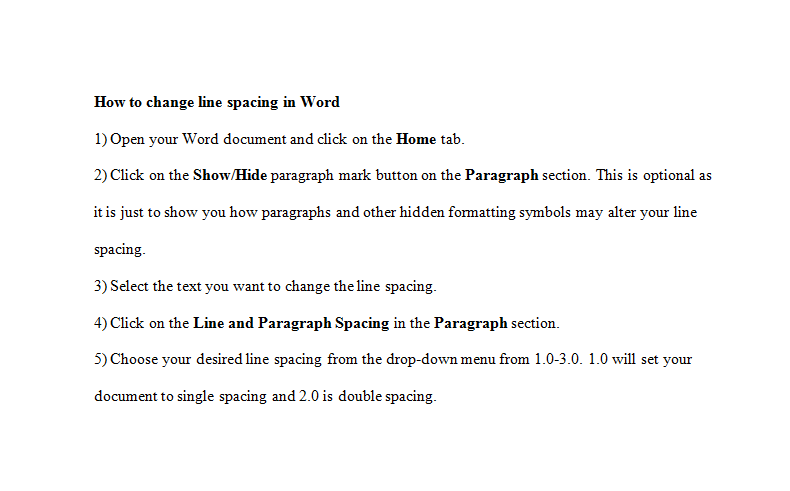
5. Choose your desired line spacing from the drop-down menu from 1.0-3.0. Here, 1.0 will set your document to single spacing and 2.0 is double-spacing.
How to Change Line Spacing in Word From the Paragraph Dialog Box
1. You can change line spacing in Word using the Paragraph Dialog Box. The process is the same as above, however when you get to step 4, click on the Paragraph Dialog Box.
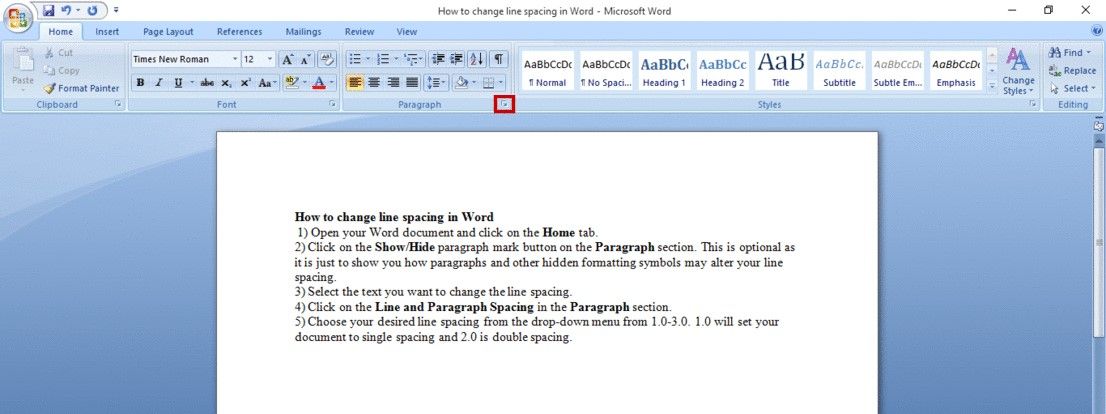
2. The Paragraph Dialog Box will pop up. Click on to Line spacing and choose your desired line spacing. Click OK to set the change in line spacing.
How to Double Space in Word From the Page Layout Tab
To use this method:
- Open Microsoft Word.
- Click on the Page Layout tab.
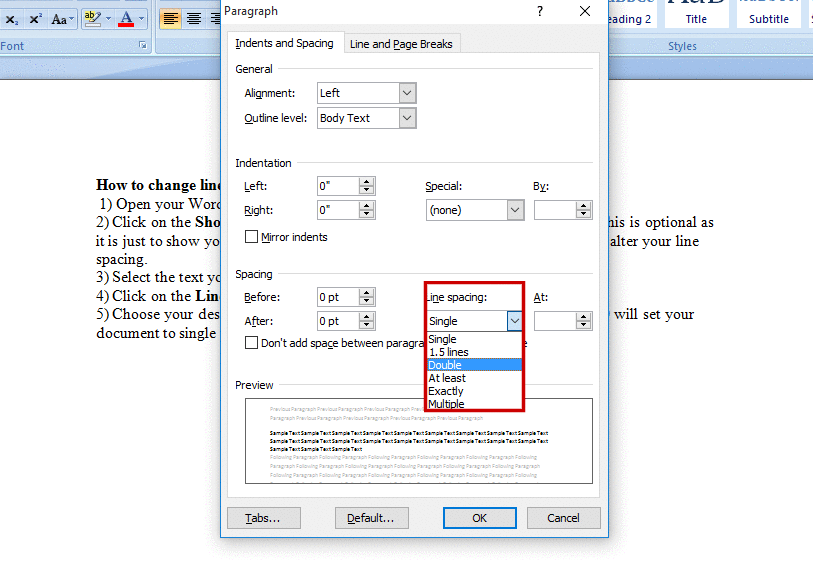
- Go to the Paragraph section. Click on the down-facing arrow in the bottom right corner, which will pop the Paragraph dialog box.
- Click on the Indents and Spacing tab.
- In the Spacing segment, look for the Line Spacing box and click on it.
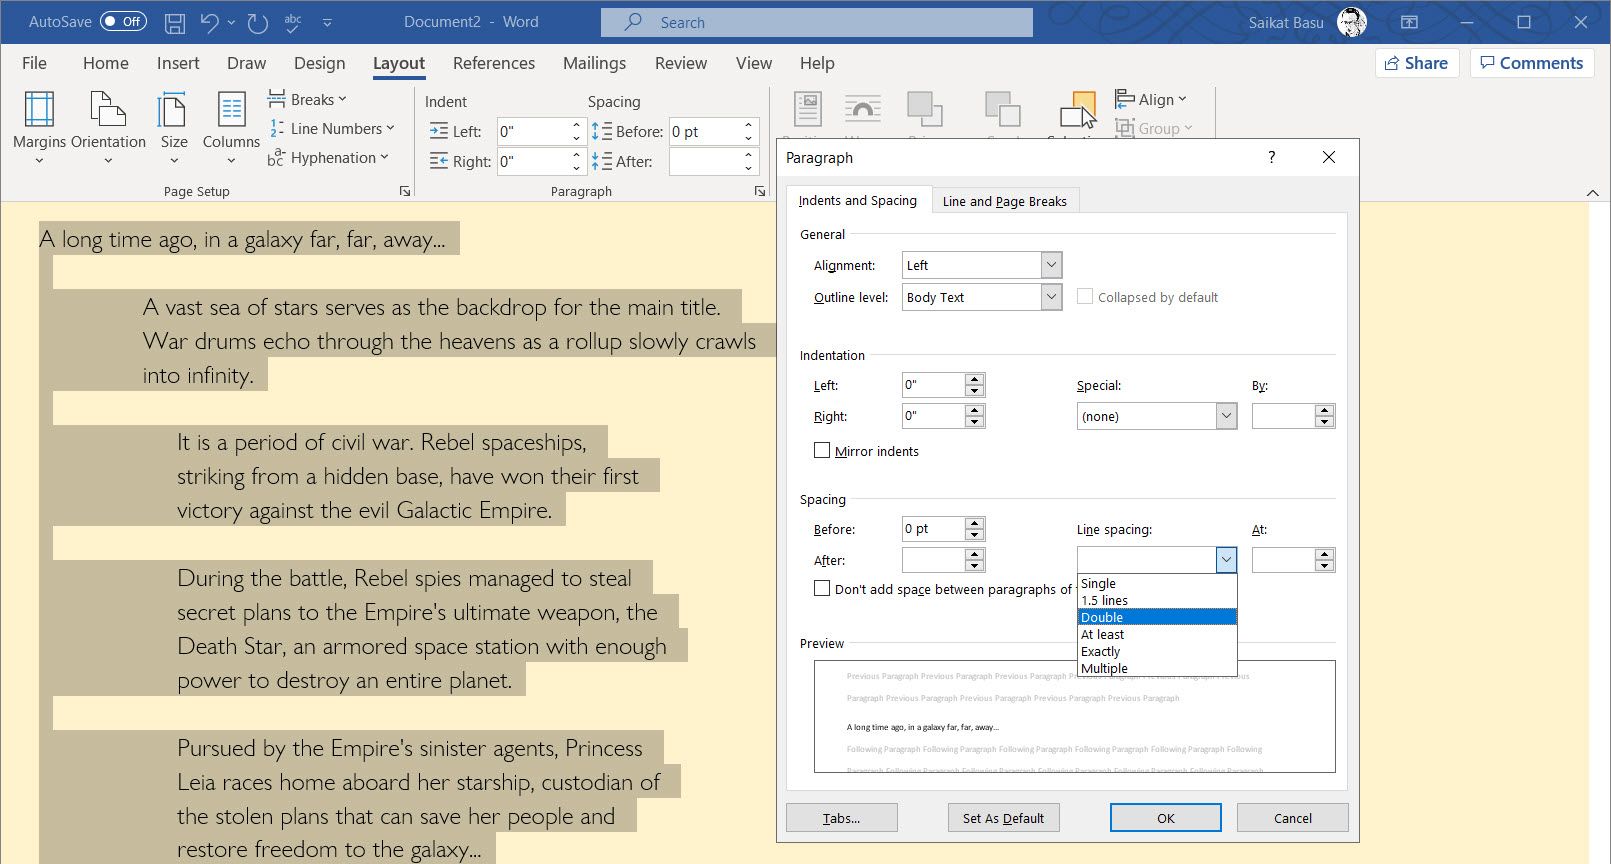
- Then click on Double from the list box.
- Click OK to set the double-spacing, and that will also exit the dialog box.
Line Spacing in Word
One of the easiest ways to improve the readability of your Word document is by changing the line spacing. With the above steps, you can do that and have a readable document.