Every so often, when you play a video game, there's a moment that you just want to memorialize. Whether it's some stunning scenery, a funny bug, or an epic accomplishment, sometimes a picture can tell a thousand words.
That's one of the reasons that Steam is so great. It makes it incredibly simple to take screenshots in-game at the press of a button; they get saved and stored immediately.
Here's everything you need to know about taking screenshots of games with Steam.
How to Take a Screenshot With Steam
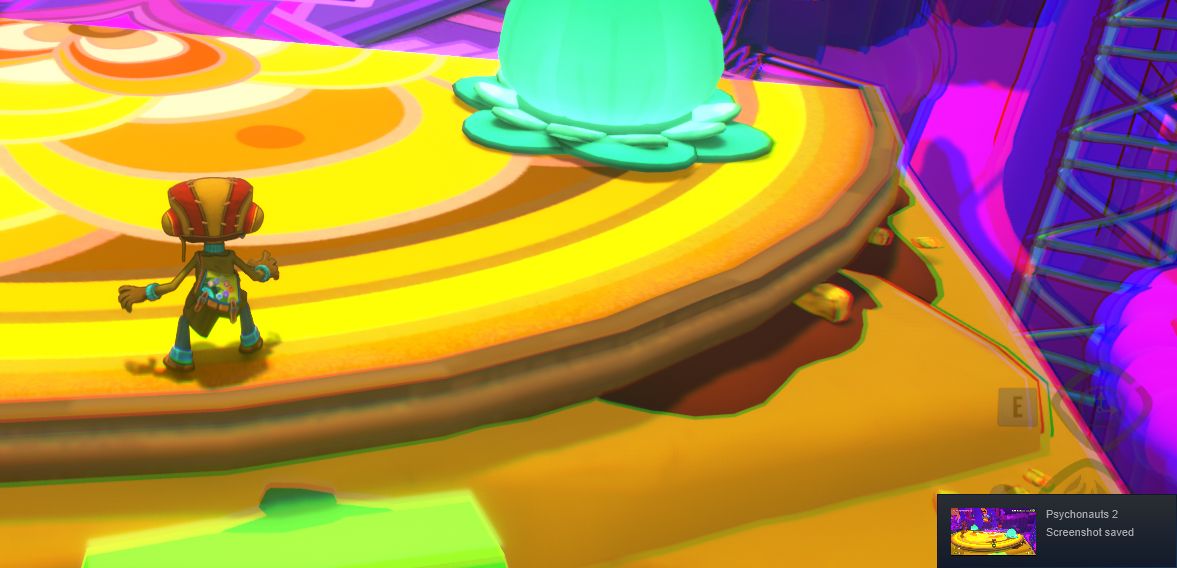
While you can take screenshots with the Windows Game Bar, if you're playing a game on Steam, the easiest way to capture a snap is to press F12 to take a screenshot. A shutter sound plays and a notification pops in the bottom-right to confirm the screenshot has been captured.

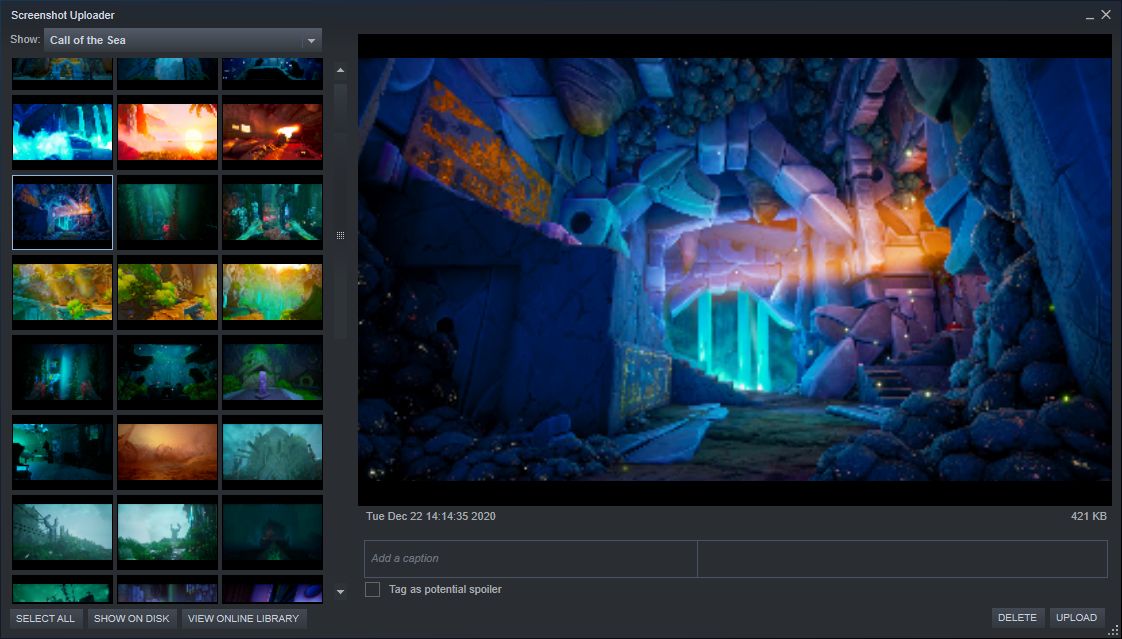
To view all the screenshots you've captured during the game session, press Shift + Tab to open the Steam overlay and click View screenshots.
By default, the screenshots are stored locally on your computer. However, in this interface, you can choose to Upload screenshots to share on the Steam Community for other players to view. You can add a caption and mark the image as a spoiler.

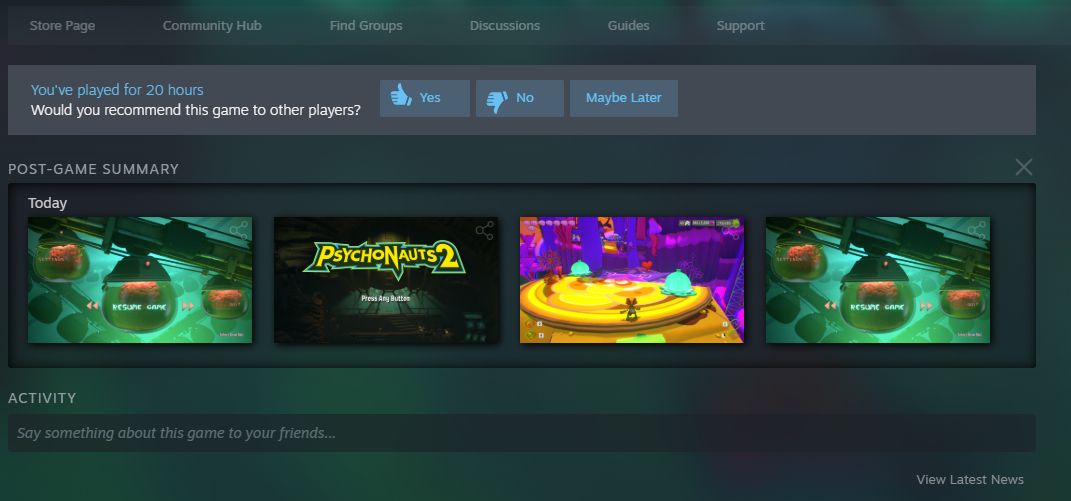
When you close the game, you'll see a Post-game summary in your Steam library that shows all the screenshots you captured during that session.
How to Manage Your Steam Screenshots
It's easy to view and manage your existing Steam screenshots.
First, go to your Steam library and navigate to the game you wish to view your screenshots for.
On the right-hand side, look for the Screenshots panel. Click a screenshot to view it full-sized. Scroll down for details on the screenshot, like when you took it and the image size. You can also click Share to share the image on your Steam profile or activity feed.

To view all of the screenshots, Click Manage my X screenshots. This opens the Screenshot Uploader interface, which is the same as the one you can use via the Steam overlay.
You can browse through all your screenshots (hold Shift and click to select multiple screenshots) and use the dropdown to jump between different games.
If you want to browse the raw image files on your computer, click Show on disk. This will open the folder on your system where the screenshots are stored. You'll notice the folder path isn't exactly obvious, and each game is stored in its own confusingly named folder, so you're better off navigating to your local screenshots via this method than going manually through File Explorer.
How to Customize Your Steam Screenshot Settings
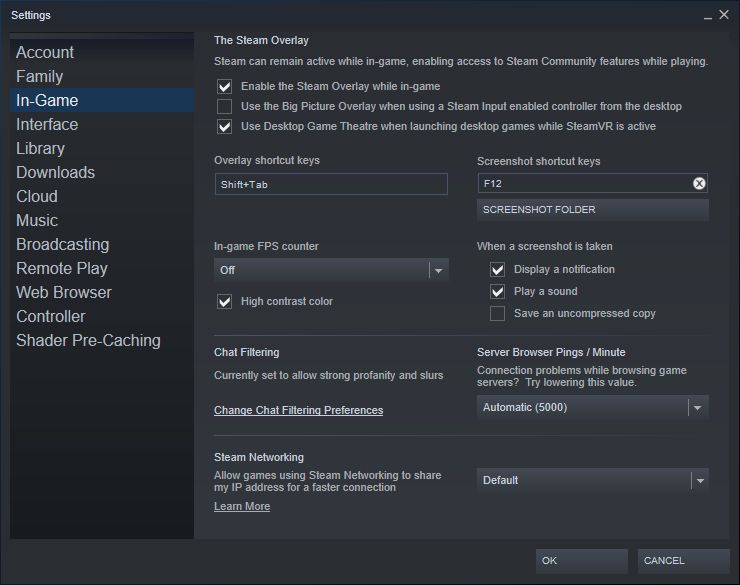
You can change the Steam shortcut for taking screenshots, disable the capture sound effect, and a few other settings. To do so:
- Open the Steam client.
- From the top menu, click Steam.
- Click Settings.
- From the left-hand menu, click In-Game.

Here you can set Screenshot shortcut keys, choose a Screenshots folder, and customize what to do When a screenshot is taken. If you want your screenshots to be saved in the highest quality possible, ensure you check Save an uncompressed copy, though be aware this will use more disk space.
You Can Take Screenshots via Your Controller
As we've demonstrated, Steam makes it incredibly easy to capture and manage your game screenshots. However, what if you're using a controller? Don't worry, you're catered for too. Just use Steam's Big Picture mode and you can bind a button on your controller to take a screenshot. That way, you don't have to fiddle around with your keyboard.
![How to Find IMSI Number on iPhone [Helps with iOS Unlock][Updated] data:post.title](https://blogger.googleusercontent.com/img/b/R29vZ2xl/AVvXsEjLjHwhnfUXNJTuiylqmlurhLRVAEVi803j6xcnvN8EZwF5_XUynz1y0Ko-vwpx6O3nT5hogTELahedGzgQpXM5Y99fcBliinyBu8ACw8_DVV3FpPLkIqR0u7v_HM39rAkpV5MyJiG1h5s/s72-c/find+imsi+iphone.jpg)