An external hard drive is a great way to increase your PS4's storage capacity and quickly play your PS4 games on a different PS4 or PS5. You're also in control of which games you want on your PS4's system and extended storage.
Here's how you can move your PS4 games and apps between your system and extended storage.
What Do I Need to Move My PS4 Games Between System and Extended Storage?

To make sure everyone's on the same page, we're going to start from scratch.
To move content between your PS4's system and extended storage, you're going to need a PS4 that you've updated to version 4.50 or higher and an external hard drive that's between 250GB and 8TB, and uses USB 3.0 or higher and a USB-A connection.
You can check what software version your PS4 has: just head to your PS4's Settings, select System, and then System Information. It should say next to System Software.
We've also got a guide outlining the best external hard drives for the PS4, so be sure to check that out if you're undecided on which external hard drive to buy.
It's also important to note that you can only move your PS4 games (i.e., game data, DLC, game updates) and not your saved data. Nor can you save or move any video clips, screenshots, or themes onto your extended storage device.
Now that you're ready, let's get started!
How Do I Move My PS4 Games Between System and Extended Storage?
Follow this step-by-step process to move your games back and forth between your PS4's system and extended storage.
Step 1: Format Your External Hard Drive As Extended Storage

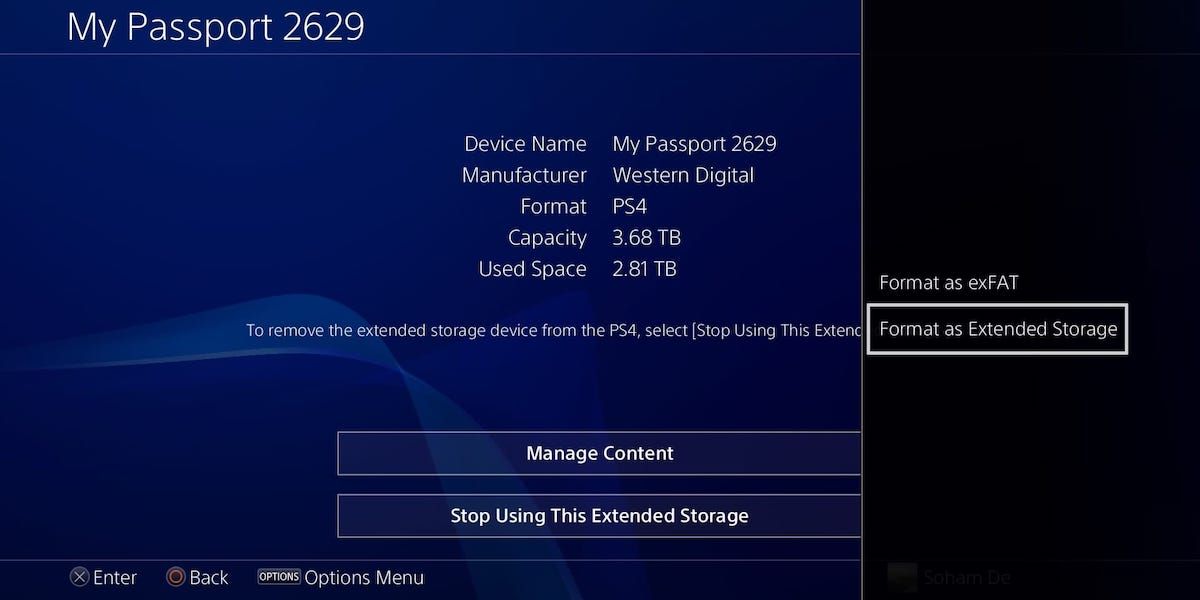
Follow this pathway from your PS4's home screen: Settings > Devices > USB Storage Devices > (select your USB storage device) > Format as Extended Storage.
Follow the prompts to confirm everything and format your external hard drive. If the option to format your device as extended storage isn't appearing by default, press the Options button on your PS4 controller, and it should appear.
Note that doing this will erase anything you already have on your USB device, so it's best to use a brand new one or double-check you've got everything backed up.
Step 2: Move Your PS4 Games Between Your System Storage and Extended Storage

The process for moving your PS4 games and apps to either system or extended storage is very similar. Follow which variation you need:
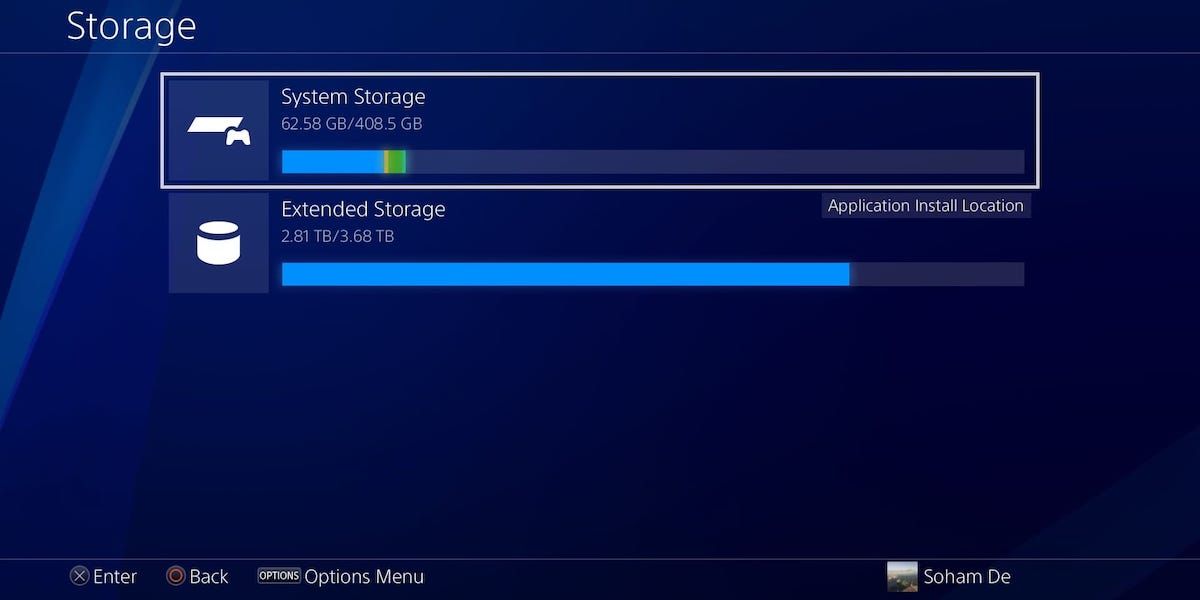
In your PS4's Settings, select Storage.
If you want to transfer content to an extended storage device, select System Storage. If you want to transfer content to your PS4's system storage, select Extended Storage.
Select Applications, and press the Options button on your PS4 controller. Depending on which way you're moving data, you'll either see Move to Extended Storage or Move to System Storage. Select whichever option appears.
You can choose which games and apps to move, with options to select or deselect all. Tick the items you want to move, select Move, and then OK.
Wait for your content to move, and you're done! You can also hit Circle on your controller to cancel the moving process at any time.
Step 3: Set Your Application Install Location

Though it doesn't take long to move your application data from one place to another, you don't want to have to do this for every single new game you get.
Thankfully, you can set the default install location of your games and apps to either your system storage or your extended storage.
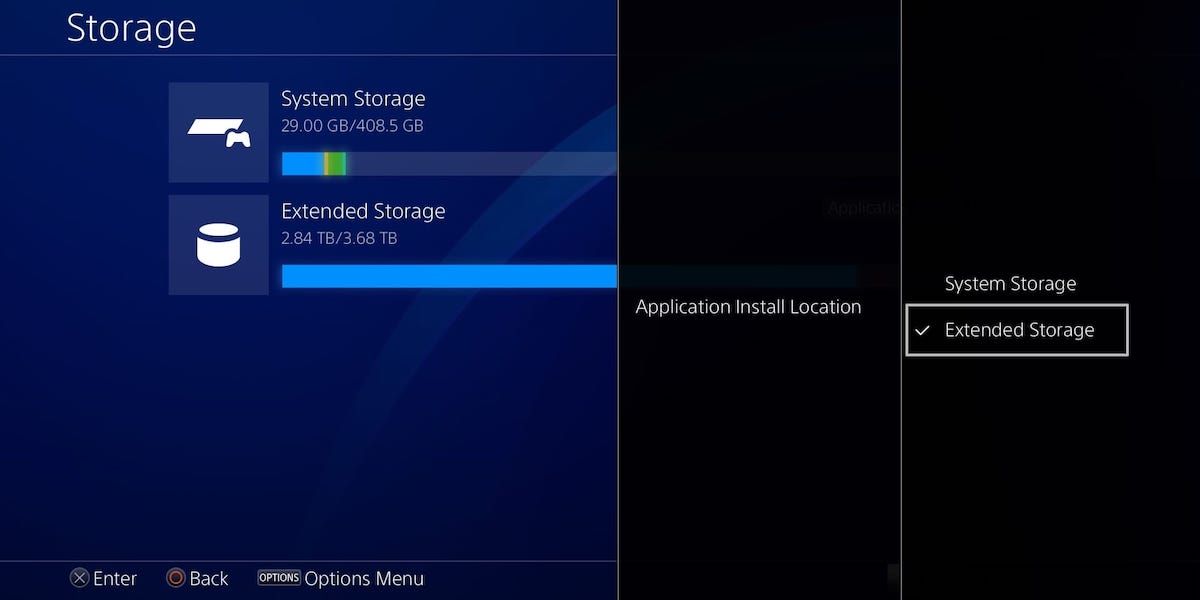
Head back to your PS4's Storage options, press the Options button, and select Application Install Location.
Here, you can choose to set your system storage or your extended storage as the default install location for all games, apps, and non-system software updates.
Make Sure You Use Your Extended Storage Device Safely
Now you can move your PS4 game data between your system and extended storage!
This is a great tool to have and gives you control of what data you want on which device. Just be sure to use your extended storage device safely, so you don't risk losing any data.