Google Tasks has made significant strides. It has tried to become richer in terms of functions by adding new features to the platform. Maybe you've asked yourself how to use Google Tasks effectively or how to use it as a productivity app?
Well, you can use some tips that can surely make you more involved with Google Tasks. These tips are just features that can turn Google Tasks into a productivity app. Let's have a look:
1. Add and Remove Recurring Tasks
You may not be familiar with this tip since it has more personal use than professional use. Google Tasks allows you to set repeating tasks. To add a repeating task, you just have to hit the Repeat button below the Add Tasks option. A dialogue box will appear asking you to add details.
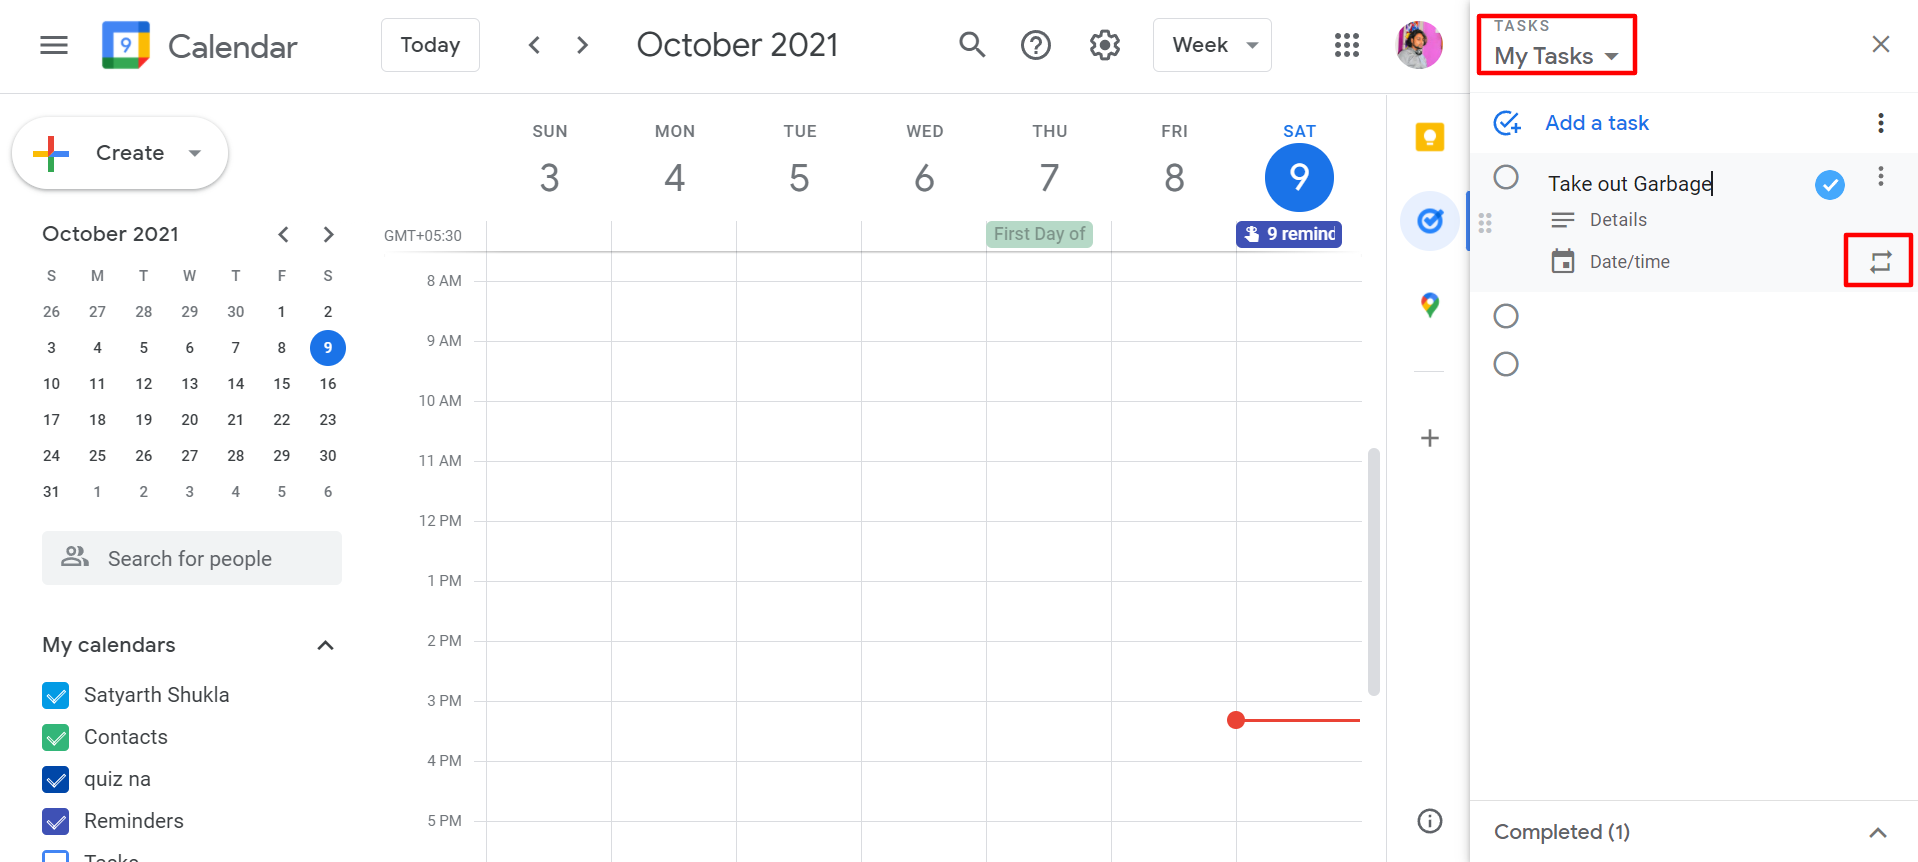
Add something simple such as taking out the garbage on a regular basis, which is a task you need to do often. If you edit this task, you will be able to set a time and a date before you hit enter.
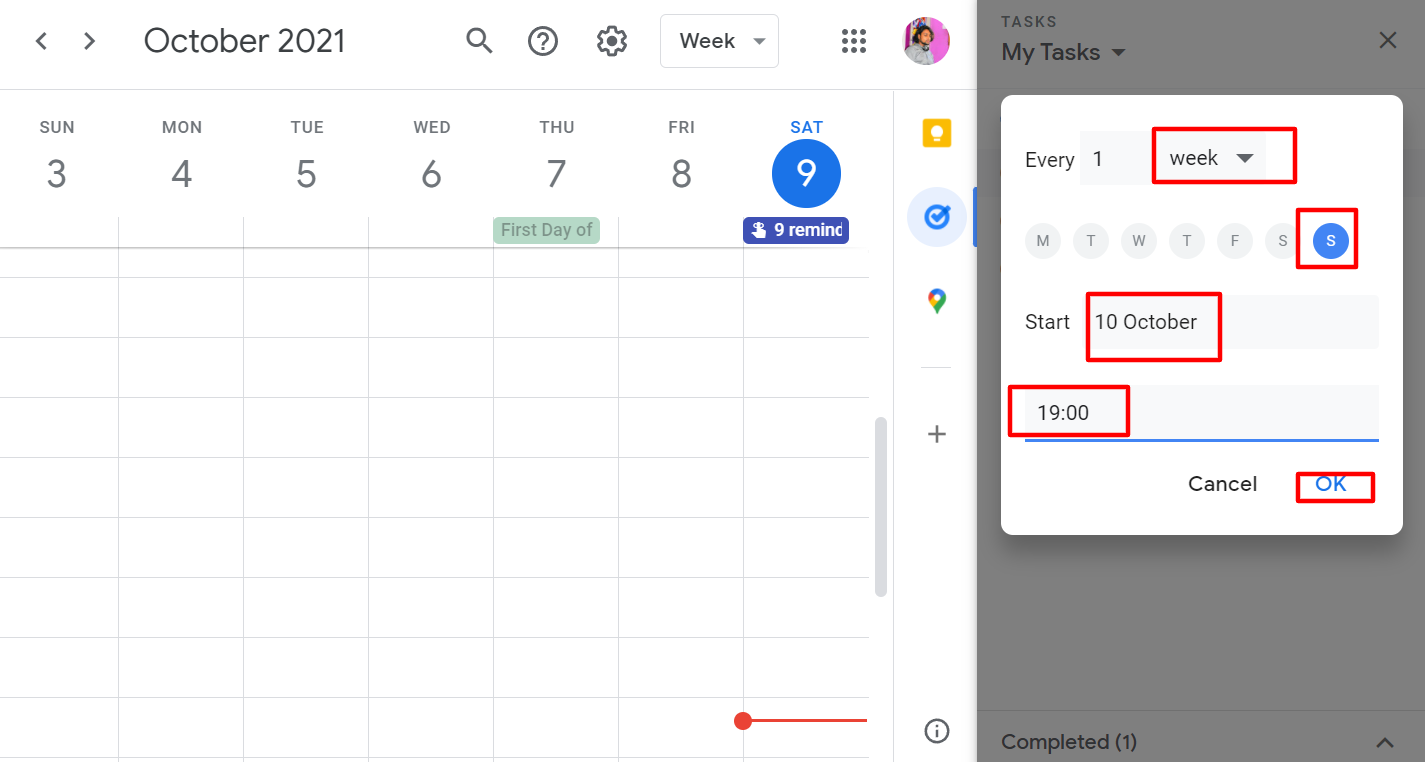
You can start doing this every Sunday. Taking out the trash on Sunday evening is typically the time when you want to do it. You can now see that there is a repeat feature at the bottom of the page.
Thus, you can schedule this task to occur every Sunday. You can select multiple options, such as by day, week, month, or year. Here, you desire to do it every week, so you select Sunday. It'll be on October 10th, so select Ok.
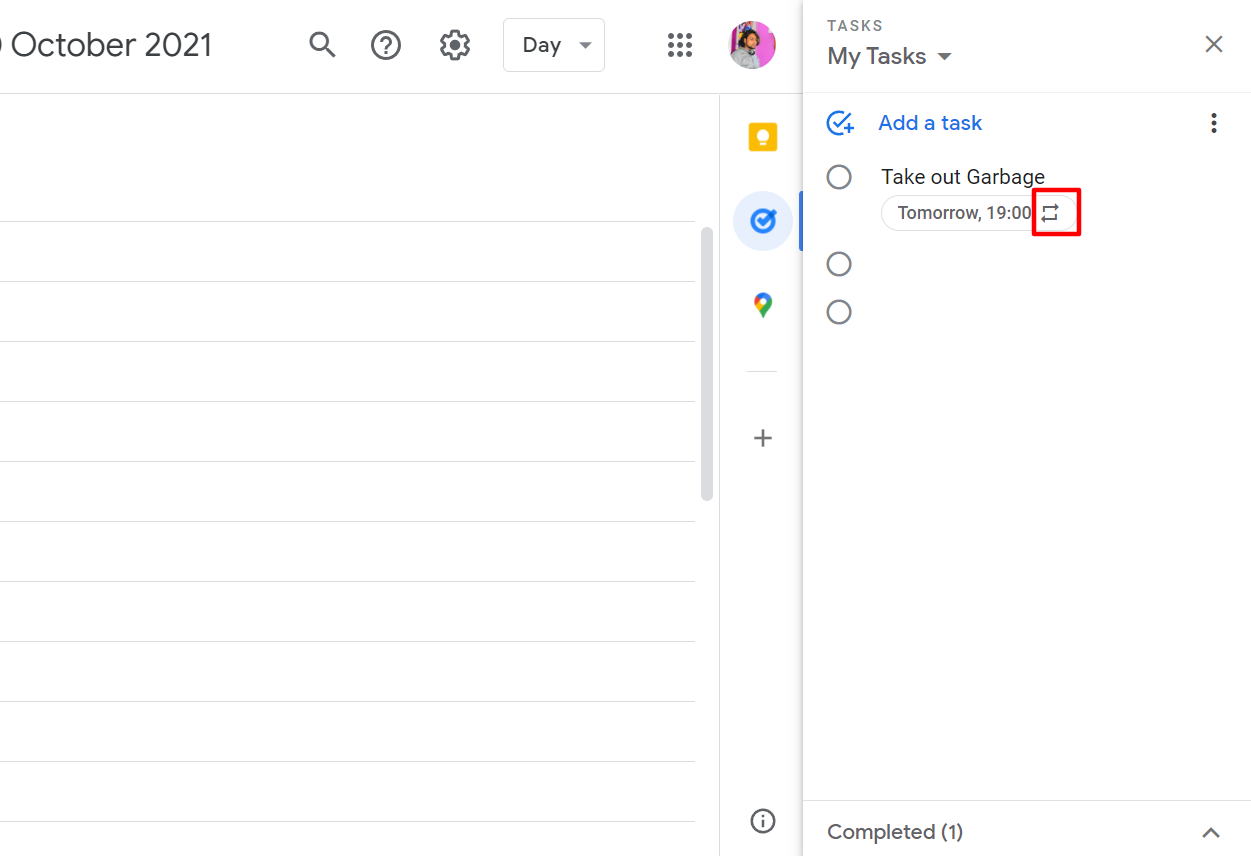
Now it's there for you. If you go to My Tasks, your task appears there on October 10th, Sunday. You will see the small icon there as well. This indicates that it is a recurring task. By marking it as complete, it disappears from your task list but will reappear here on Sunday.
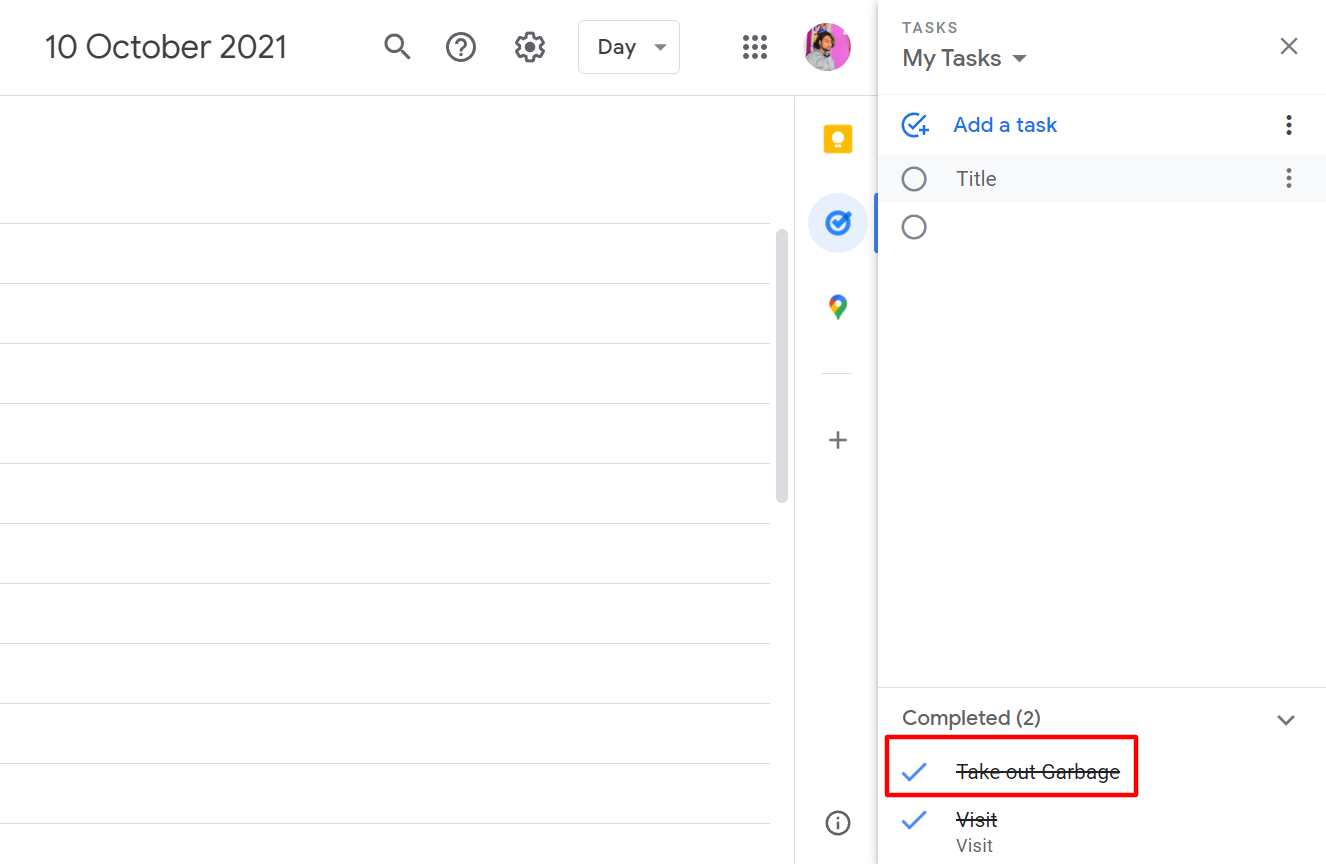
Below, you'll always find the Completed area. To remove the repeater, go to the Completed section where you can remove future tasks.
2. Add a Due Date Time
The ability to add a specific due time is also rarely used. This is different from the ability to add a due date. Imagine you plan on emailing Susan in the morning. It's not enough to simply set it for the 8th of October, you'll need to make sure to do it before noon. You can do this by selecting Set time from the menu. You can enter the date either as text or simply by punching it in, say 10 am. Next, click OK.
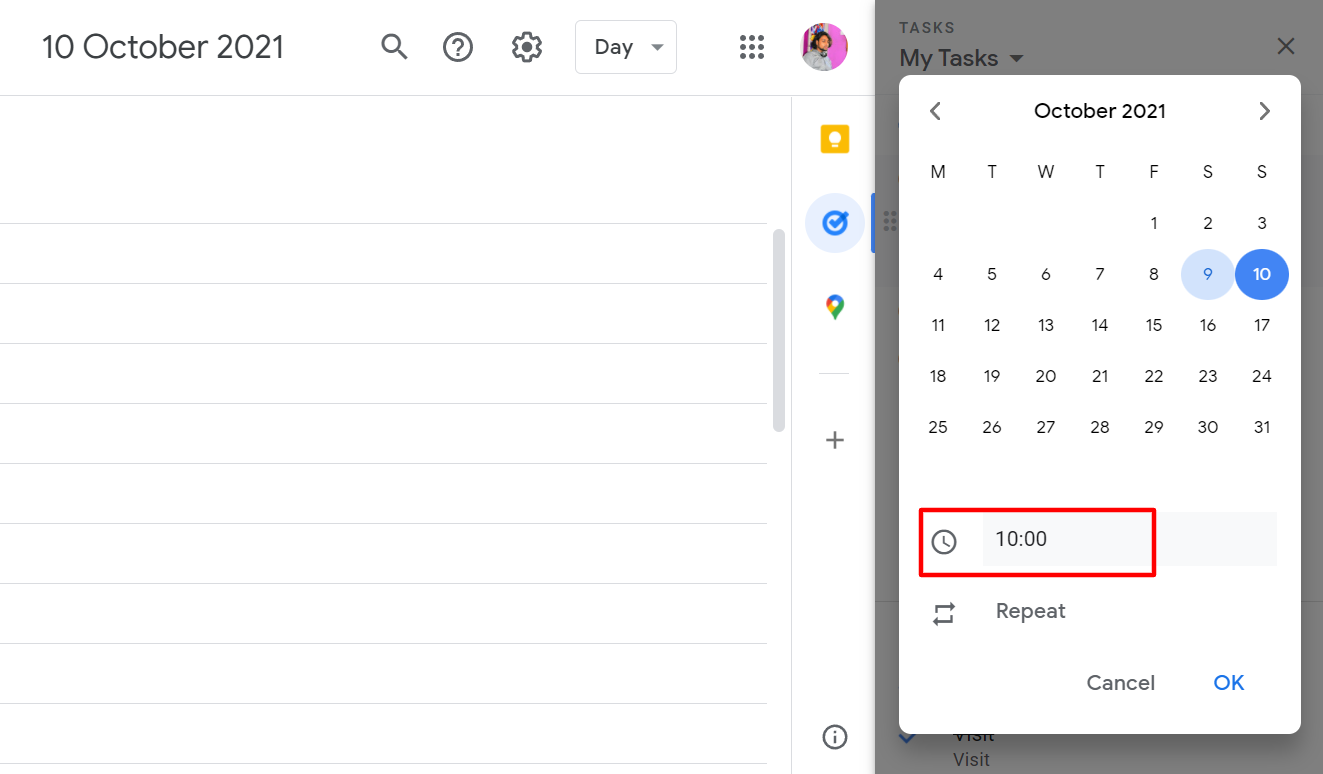
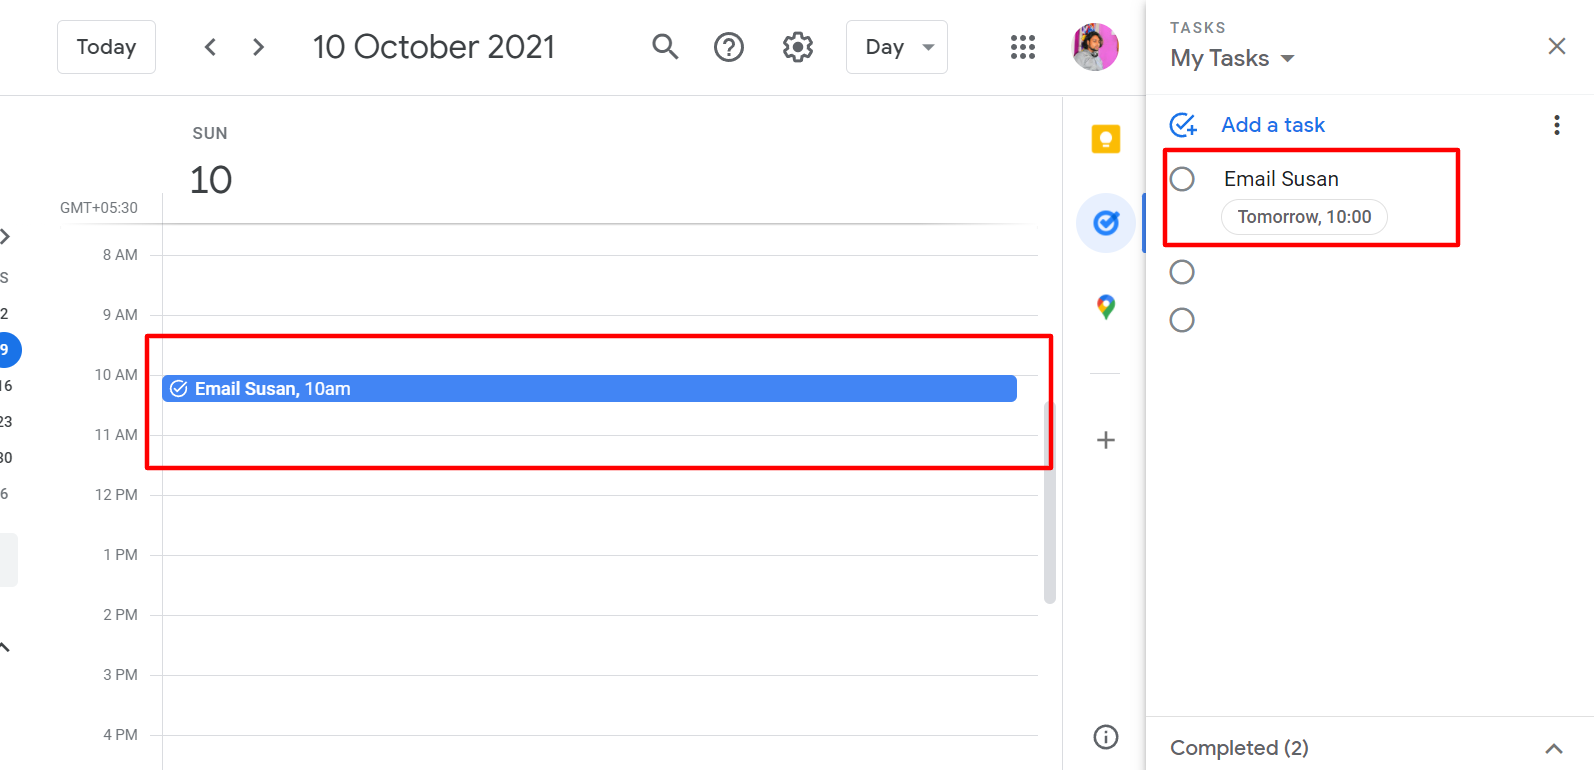
You can now see it on the left side in your Tasks bar. Your calendar will also show it. The Tasks calendar within Google Calendar shows everything that has a specific time if it's enabled. So in addition to receiving a reminder, you'll also see it on your calendar.
3. Create Subtasks
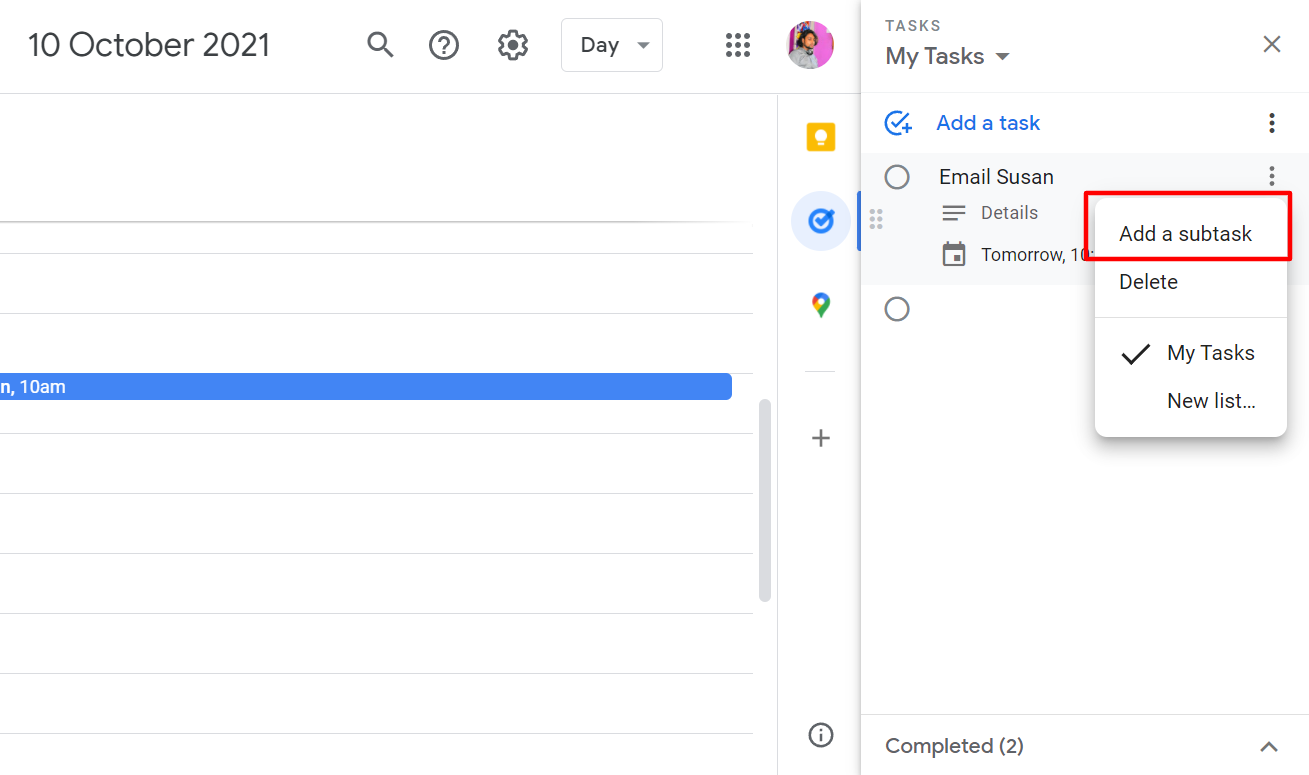
Often, you will be managing a project within Google Tasks, or a due task of some kind. The only difference this time is you'll be able to add subtasks by clicking on the three-dot menu.
The subtasks will appear under Add date/time option. It will be much like a mini task. Mini Task 1, Mini Task 2, and Mini Task 3. The other tasks you add to your task list will work their way up as part of this mini-project. You can add them there.
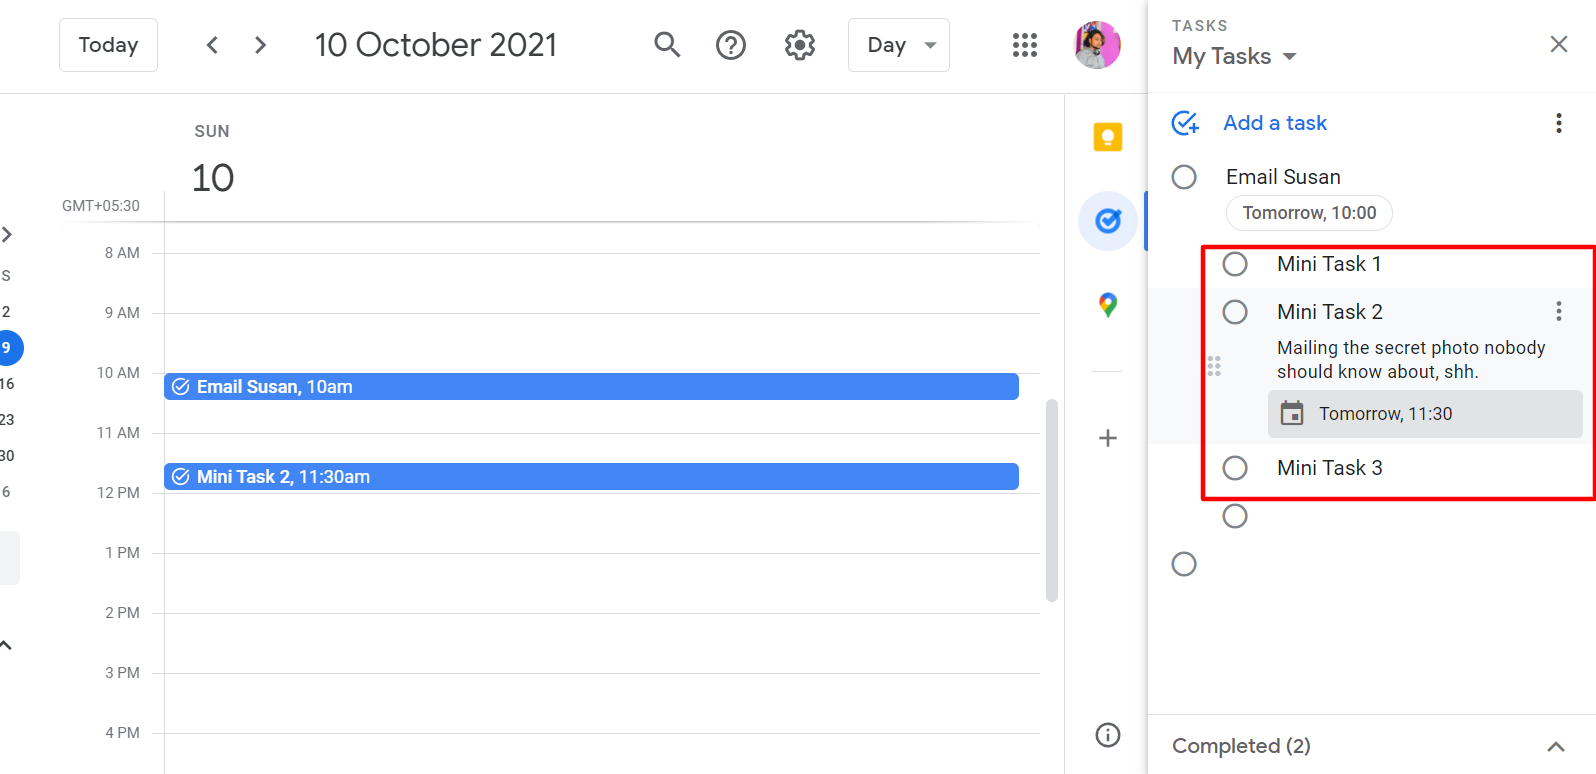
This is something very powerful. The task appears as a separate task when you look at it on your Tasks side-panel. As a result, you can go into Mini Task and assign it a specific due date. You can give more details and specify specific details for this particular task. They will always remain together, though.
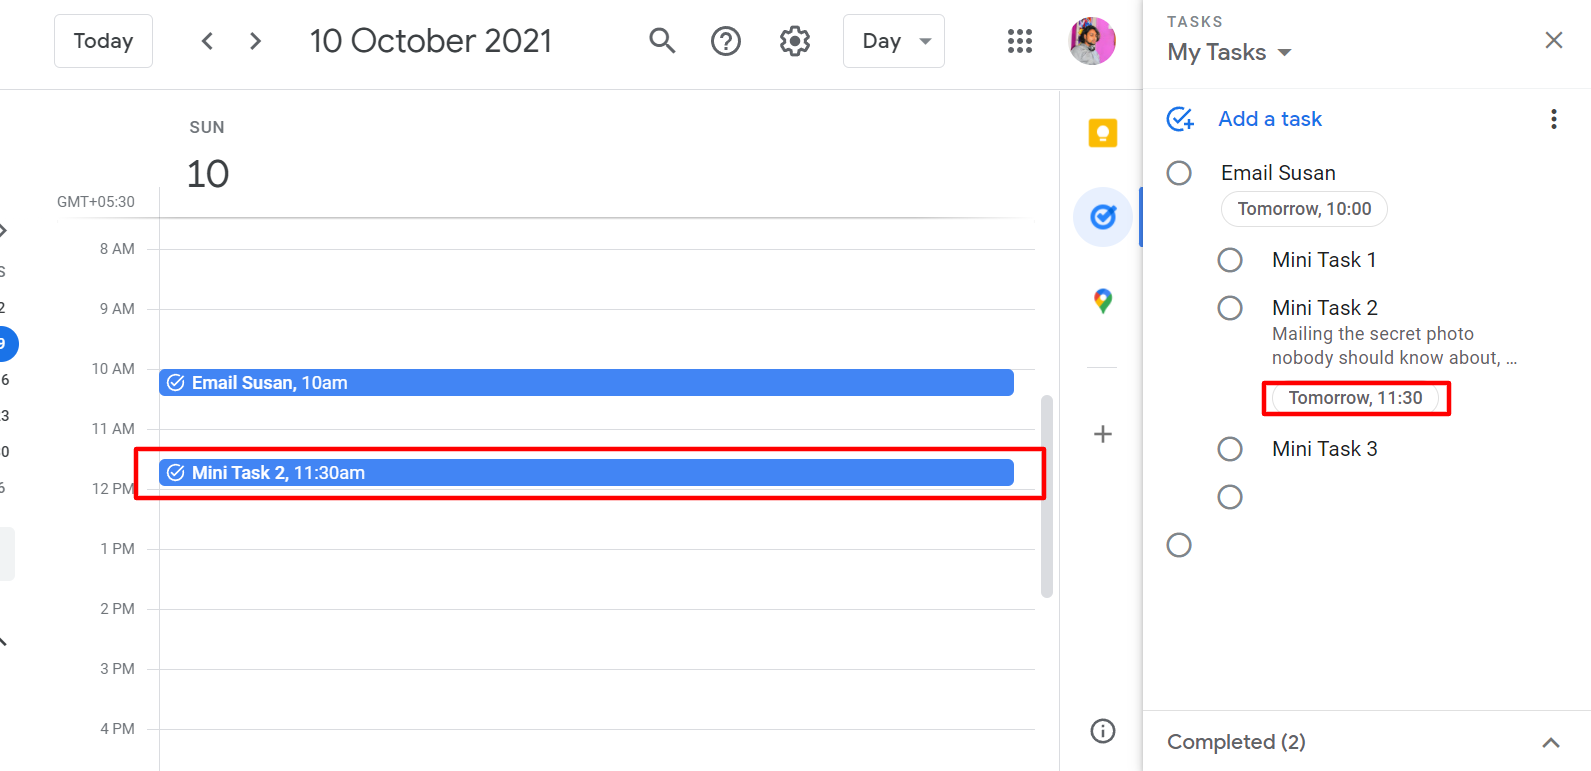
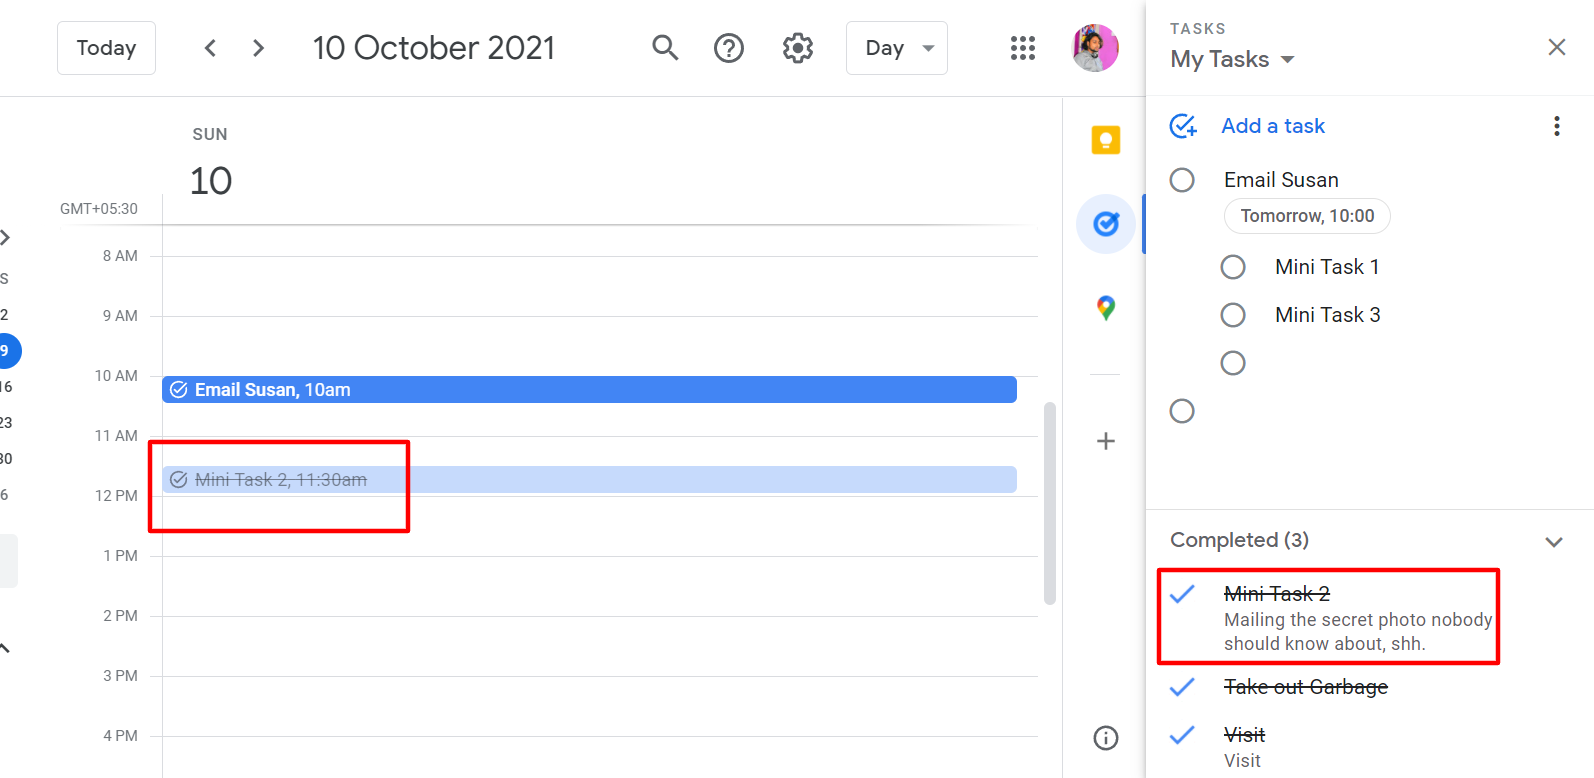
In other words, if you give it a due date like the end of the week, it won't detach from other subtasks. Despite the fact that some have no due date, these are subtasks that are still linked. You can also begin checking them off as you complete them. Say you completed task number two first, you can cut it off first. So there is no necessary order that you ought to follow for this to work.
4. Use Multiple Lists
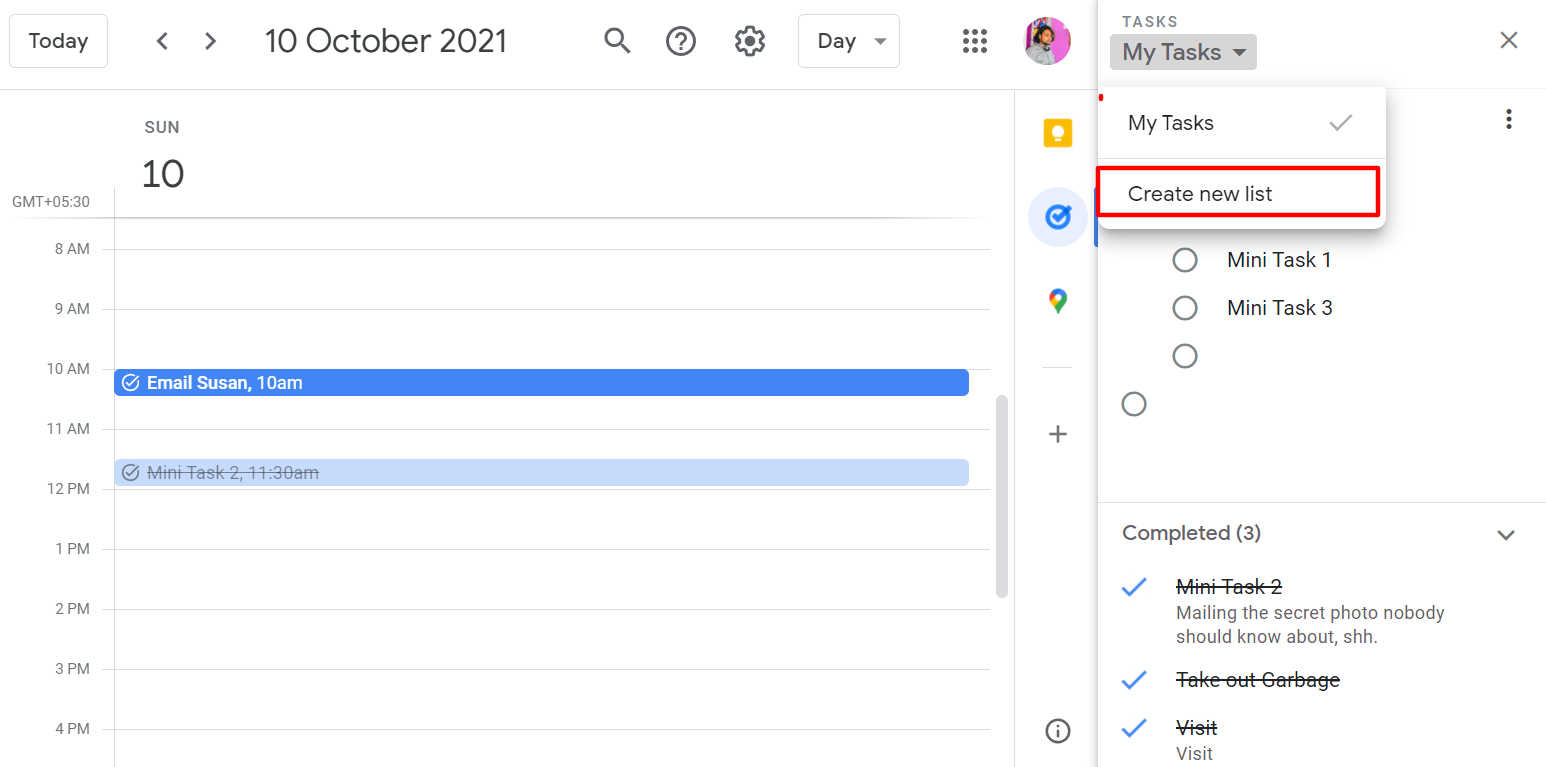
You can create multiple lists within Google Tasks. Google makes a list of My Tasks by default, but you can make other lists as well. To create a new list, just click on the dropdown arrow at the side of My Tasks and hit Create New List.
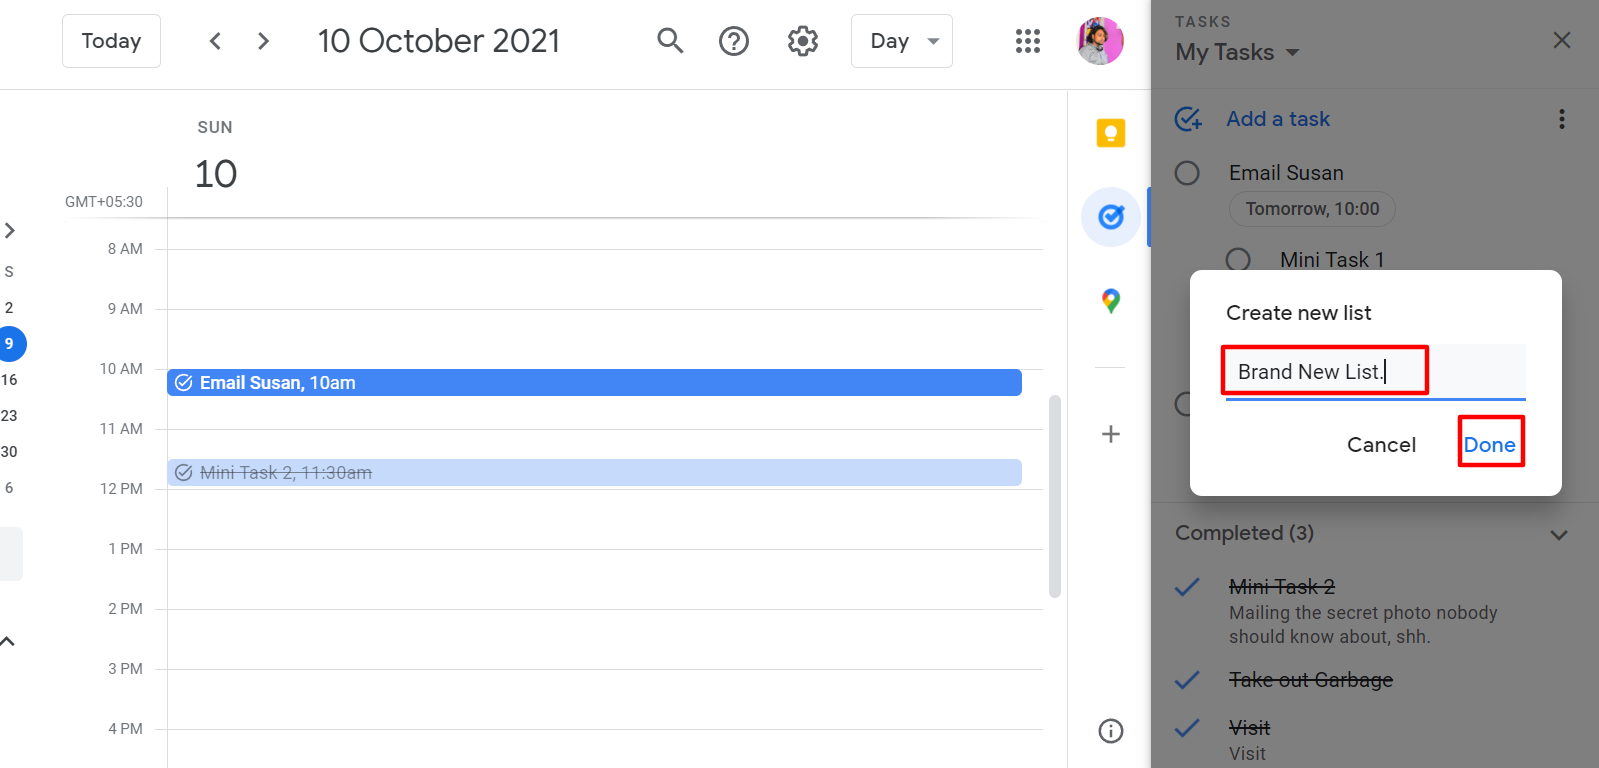
For instance, you can call this Brand New List and hit Done. You can then separate your personal and business lists.
You can now check out the Brand New List. It is currently empty. Feel free to add a new task to it for other days.
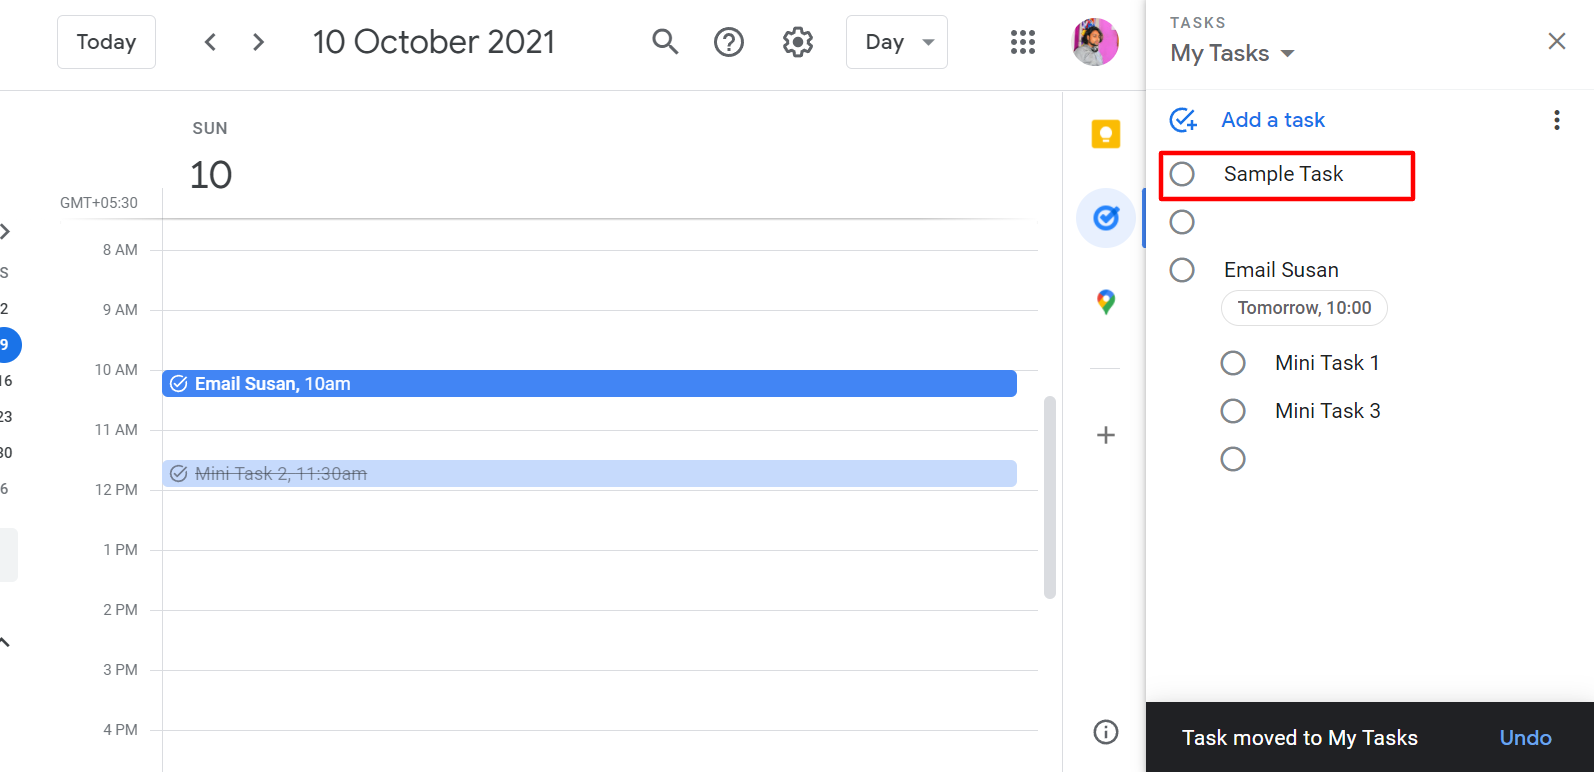
Imagine that you've created this task, but then completely forgot about it. What you wanted was to add it to My Tasks. Fortunately, it is quite easy.
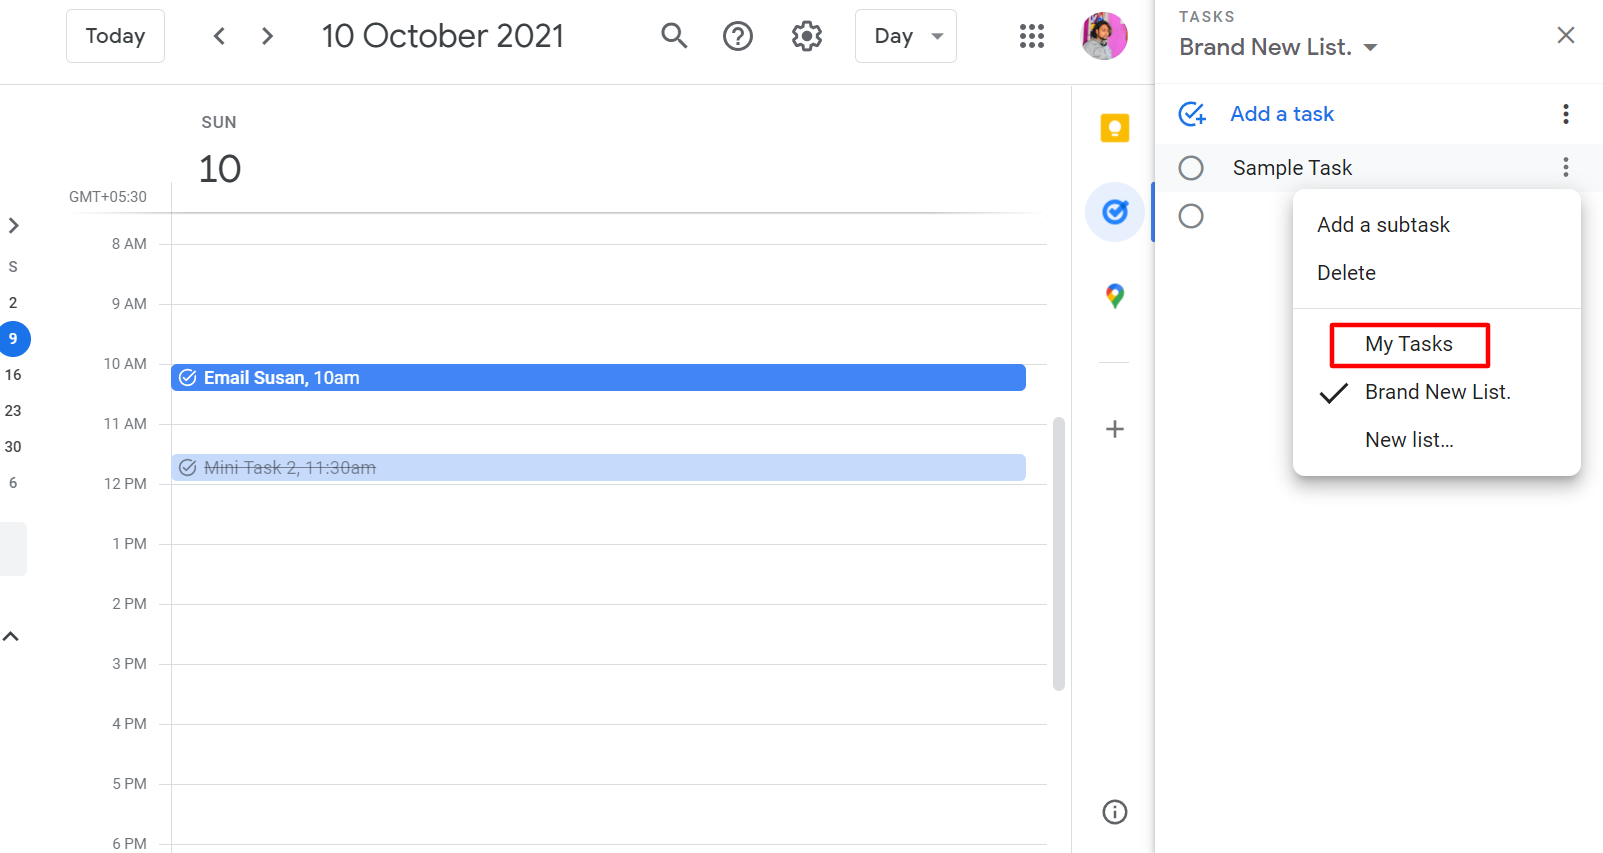
If you go over to the three-dot menu, you will see all your lists. You can select the particular list to move your task into.
5. Create Tasks From Gmail
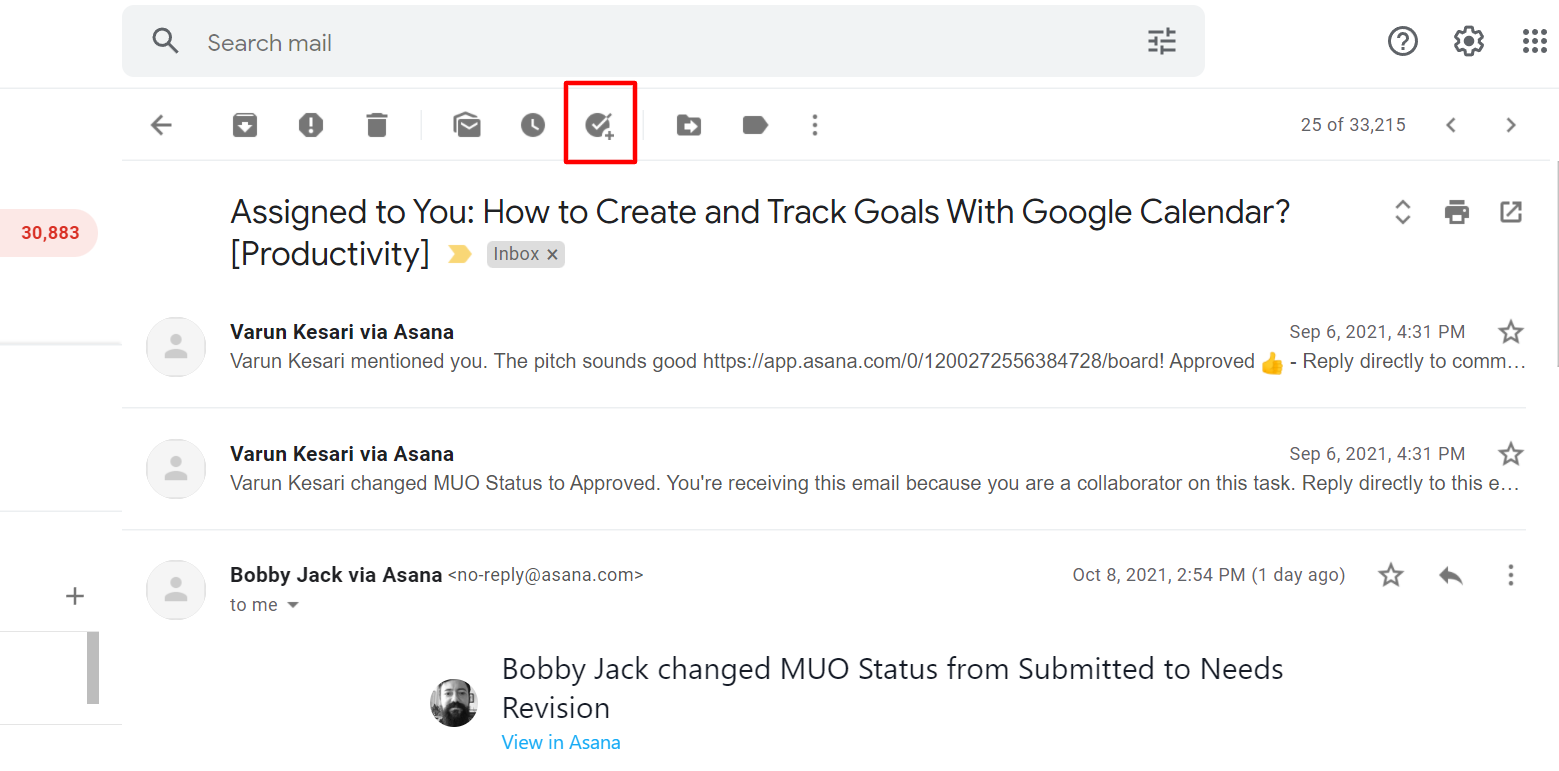
There are times when you would like to turn an email into a task in your Gmail. There's a little tick mark icon at the top of every email, and you can choose it to add it to a task.
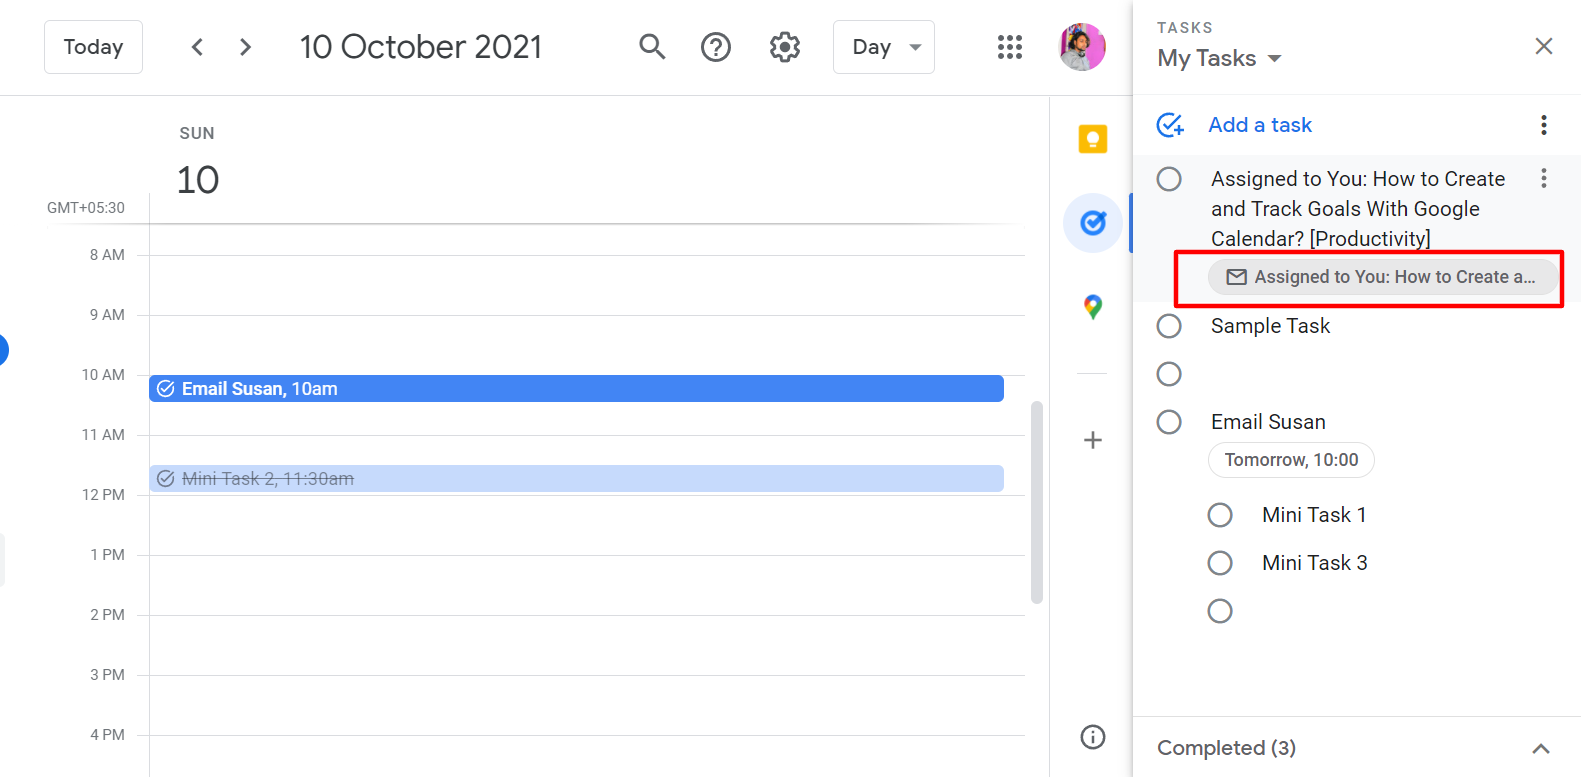
The taskbar appears automatically, and the email is added to it as a task. The task is also labeled by default. And beneath Date/Time, it will use the subject line of the email as the title of the task.
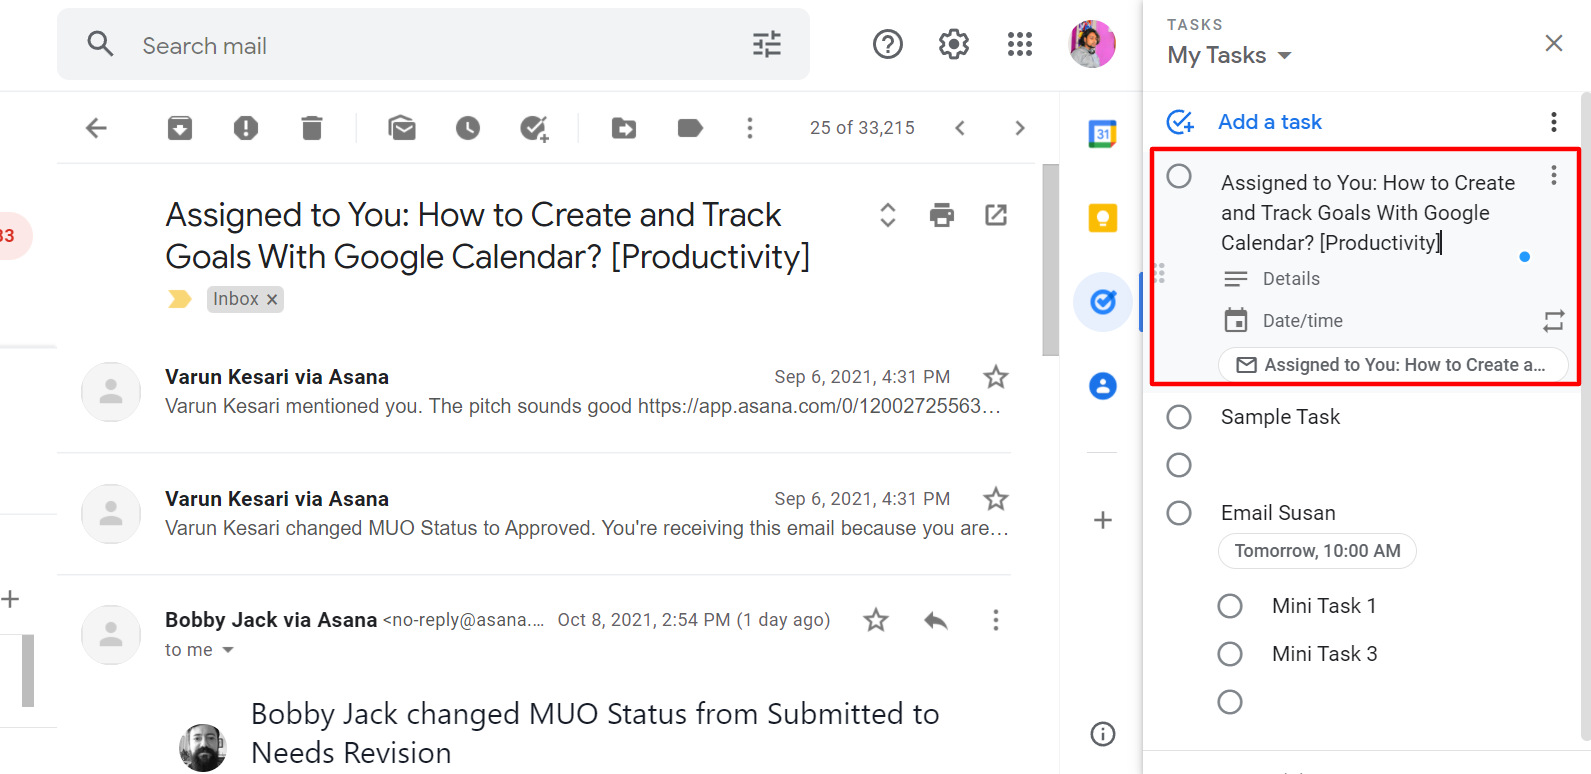
Then you can add further details if you wish. Of course, you can come in here and rename this. The real benefit is that it will give you a direct link to this email. So you can go back and reference it whenever you want.
Let's say you come across this on your to-do list and you think, “What were the tasks in that email?”
On the left-hand side of your screen, just click on the link which reads the subject line of the email. This will immediately open the Gmail window and the concerned email. You can convert any email to a task by selecting the tick mark button over your email. This is a really powerful tool that saves time.
Google Tasks Is More Than Just a To-Do List App
Apart from being an organizing and to-do list app, Tasks can also act as a productivity app. It is great as the features are quite simple and quickly accessible. Plus, you can also use Tasks with other apps like Google Calendar and Gmail.
![How to Find IMSI Number on iPhone [Helps with iOS Unlock][Updated] data:post.title](https://blogger.googleusercontent.com/img/b/R29vZ2xl/AVvXsEjLjHwhnfUXNJTuiylqmlurhLRVAEVi803j6xcnvN8EZwF5_XUynz1y0Ko-vwpx6O3nT5hogTELahedGzgQpXM5Y99fcBliinyBu8ACw8_DVV3FpPLkIqR0u7v_HM39rAkpV5MyJiG1h5s/s72-c/find+imsi+iphone.jpg)