You can use CSS selectors to target and style elements within a web page. A standard selector might target a specific paragraph or all headings at a certain level. Pseudo selectors take things a step further, allowing you to target parts of the page with more nuance.
Pseudo-classes target different states of an element: when the pointer hovers over a link, for example. Pseudo-elements allow you to target a specific part of an element, such as the first line of a paragraph.
So, without any further ado, let’s explain the basics of pseudo-classes and pseudo-elements.
What Is a Pseudo-Class?
A pseudo-class is a CSS selector that selects HTML elements in a specific state. Some states refer to context, such as the first element of its type. Others are behavioral, such as when a link is being hovered over by the mouse pointer. They allow you to style content based on a user’s actions. The contextual states, in particular, help you write flexible, maintainable, and clean code. Behavioral states offer a shortcut for functionality you might otherwise have to use JavaScript for.
You can easily recognize pseudo-classes as they start with a colon ( : ). Let’s see a few instances of simple and user-action pseudo-classes.
Simple Pseudo-Class Example
First, let’s write HTML code.
<!DOCTYPE html>
<html lang="en">
 <head>
   <meta charset="UTF-8" />
   <title>Pseudo-class and Pseudo-element</title>
 </head>
 <body>
   <header>Lorem ipsum dolor, sit amet consectetur adipisicing elit.</header>

   <section>
    <p>
       Voluptatum fuga, impedit sequi totam numquam assumenda repellat
       tempora sapiente! Nihil unde vel recusandae, expedita aperiam tempora
       totam deserunt non porro reprehenderit.
     </p>

     <p>
       Dicta totam non iusto labore sapiente numquam hic tempora earum,
       minima repellendus pariatur fugit nobis ex adipisci, tempore vitae
       laboriosam harum. Quidem!
     </p>

     <p>
       Suscipit repellendus cupiditate dignissimos eveniet beatae quas
       laudantium, laboriosam minus iusto, corporis ullam alias porro sequi
       necessitatibus autem ipsam debitis libero sapiente!
     </p>

     <p>
       Iste iure deserunt vel? Nisi omnis quo quibusdam inventore delectus.
       Molestias exercitationem in quia possimus consectetur dolorum sequi
       veniam quo corporis ullam?
     </p>

     <p>
       Asperiores illum beatae dolores, dolore quae exercitationem laudantium,
       officia nam distinctio tempora deleniti itaque quibusdam iste quo eaque
       reiciendis nostrum saepe aperiam?
     </p>

   </section>
 </body>
</html>
Notice that there are several paragraphs within the same section. To style them individually, you could give a separate class to each one and use a CSS class selector. But this isn't very practical, particularly if the content may change frequently. Instead, you can use pseudo-classes that don’t exist in the HTML but still allow you to target and style the elements. Let’s see how it works:
CSS
body {
 font-size: 1em;
}
header {
 font-size: 3em;
}

/* Selecting the first paragraph */
p:first-child {
 font-size: 1.3em;
}

/* Selecting the last paragraph */
p:last-child {
 color: red;
 text-decoration: underline;
}

/* Selecting the nth paragraph */
p:nth-child(3) {
 color: blue;
 font-style: italic;
}
p:nth-child(4) {
 color: #666;
 font-size: 1.9em;
}
p:nth-child(5) {
 color: yellowgreen;
 font-weight: bold;
}
Output:
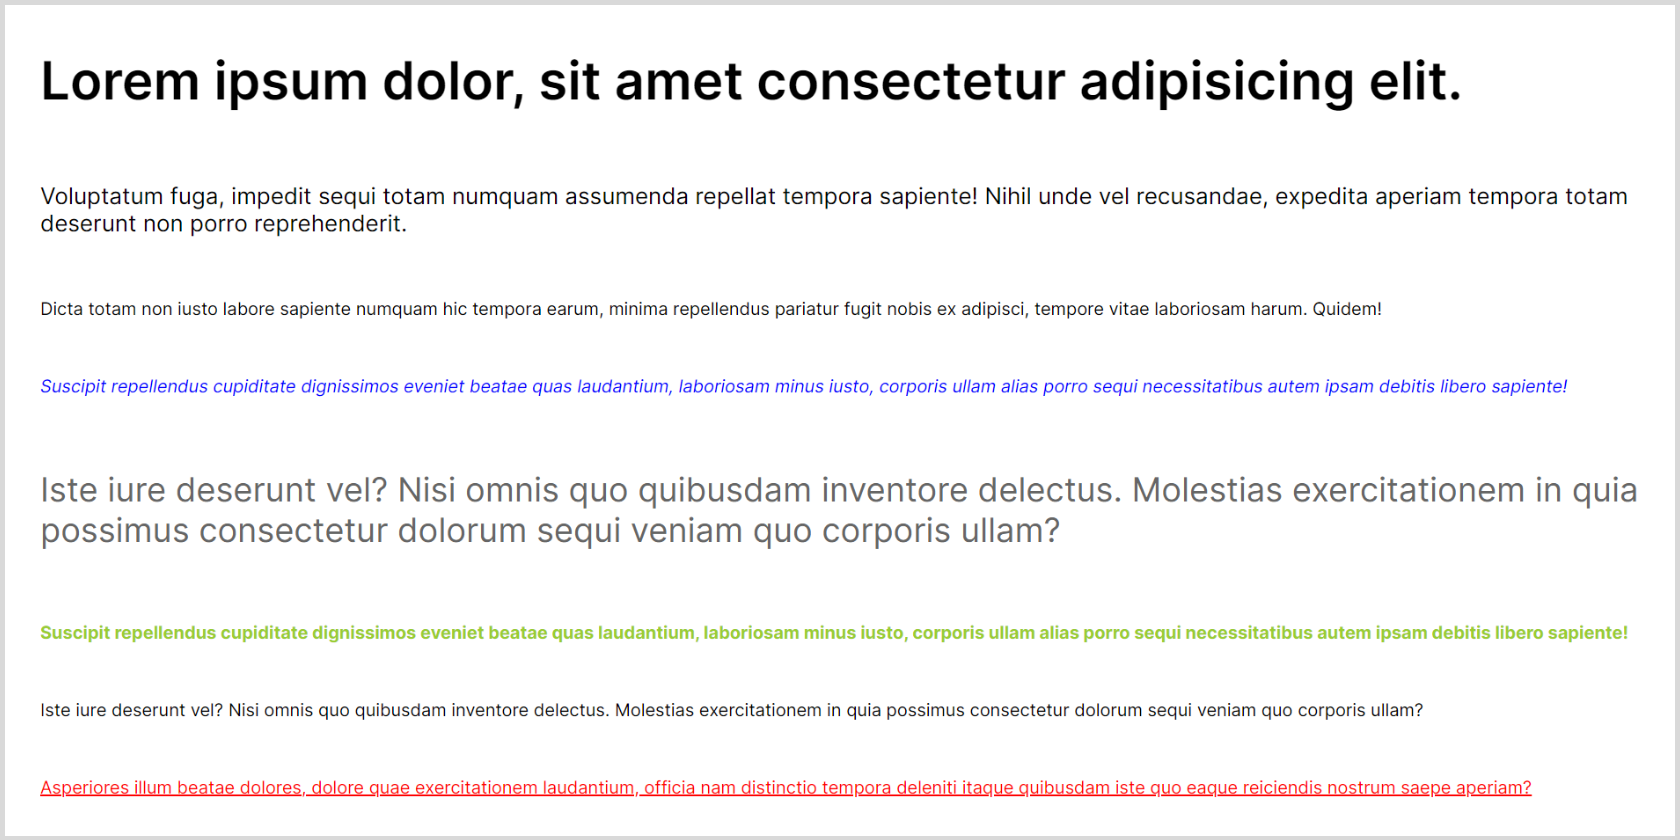
Using simple pseudo-classes like :first-child, :nth-child(x), and, :last-child we can easily select and style the paragraphs. Note that these pseudo-classes select the paragraphs themselves, not their child elements.
User-Action Pseudo-Class Example
User-action or behavioral pseudo-classes only apply when the user interacts with the document. One of the most popular examples includes :link, :visited, :hover, and :focus states. Let’s see the :hover state example for a link and an image.
HTML
<!DOCTYPE html>
<html lang="en">
 <head>
   <meta charset="UTF-8" />
   <title>Pseudo-class and Pseudo-element</title>
 </head>
 <body>
   <div class="image-box">
     <img class="image-back" src="images/By_Unsplash_Search.jpg" alt="Coding on a laptop" />
     <img class="img-front" src="images/By_Unsplash.jpg" alt="Search bar with blue background" />
   </div>
   <div>
     <a href="#">Learn more about Pseudo-classes</a>
   </div>
 </body>
</html>
In this example, there are two images and a link. The images are positioned in the same spot, so you can switch them by hiding one and showing the other.
CSS
body {
 font-family: 'Inter', sans-serif;
}
.image-box {
 position: relative;
 width: 70%;
 margin: 5em;
 color: #fff;
}
.image-box img {
 display: inline-block;
 position: absolute;
 left: 0;
 width: 70%;
}
.image-box img.img-front:hover{
 opacity:0;
 cursor: pointer;
}
a {
 position: absolute;
 bottom: 2em;
 left: 3em;
 text-decoration: none;
 color: #222;
 display: inline-block;
 font-size: 2.5em;
 font-weight: 600;
 border-bottom: 5px solid rgb(250, 0, 0);
}
a:hover {
 color: rgb(250, 0, 0);
 border-bottom: none;
}
This first example demonstrates the effect of hovering over the link. The CSS changes its color and border:

In this second example, you can see the effect of hovering over the image. It has its opacity set to 0 which effectively makes the image transparent.

What Is a Pseudo-Element?
A pseudo-element behaves similarly to a pseudo-class. Remember that a pseudo-class applies to an existing element. A pseudo-element, meanwhile, acts as if a new HTML element exists. Also, a pseudo-element starts with a double colon ( :: ). Let’s see how it works with an example.
HTML
<!DOCTYPE html>
<html lang="en">
 <head>
   <meta charset="UTF-8" />
   <title>Pseudo-class and Pseudo-element</title>
 </head>
 <body>
   <header>
     <div class="header-img">
       <img src="By_Unsplash.jpg" alt="Coding on a laptop" />
     </div>
   </header>
 </body>
</html>
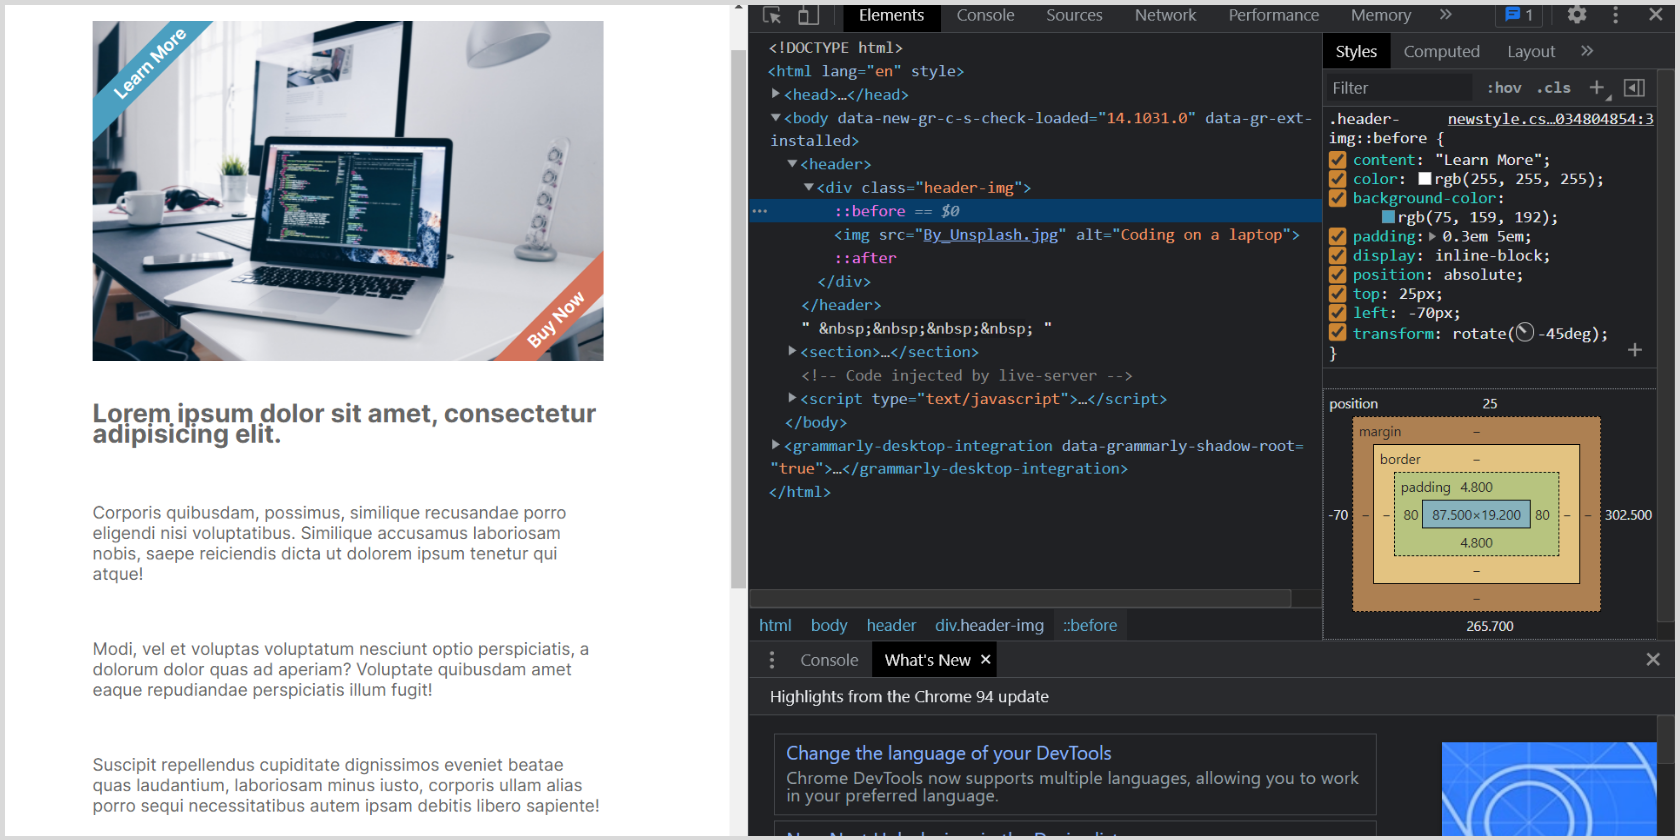
Now, we’ll use a ::before pseudo-element to add the text Learn More and an ::after pseudo-element to add the text Buy Now, using only CSS. We'll also apply the position property to place these pseudo-elements relative to the parent container.
body {
 font-family: 'Inter', sans-serif;
 color: #666;
}
img {
 width: 30em;
 vertical-align: middle;
}
.header-img::before {
 content: "Learn More";
 color: #fff;
 background-color: rgb(75, 159, 192);
 padding: 0.3em 5em;
 display: inline-block;
 position: absolute;
 top: 25px;
 left: -70px;
 transform: rotate(-45deg);
}
.header-img::after {
 content: "Buy Now";
 color: #fff;
 background-color: rgb(212, 115, 91);
 padding: 0.3em 5em;
 display: inline-block;
 position: absolute;
 bottom: 25px;
 right: -70px;
 transform: rotate(-45deg);
}
header {
 position: relative;
 overflow: hidden;
 font-weight: 600;
}
header,
section {
 width: 30em;
}
The final effect overlays ‘ribbon’-like labels to the top-left and bottom-right of the image:
Get Your Hands on Pseudo-Classes and Pseudo-Elements
CSS pseudo-classes and pseudo-elements, when used properly, open doors to many possibilities. You may feel overwhelmed at first, but practicing this technique is key to improving your web design skills. The key is to always test your designs thoroughly, making use of features such as Google Chrome’s DevTools.
We hope that you’ve learned the basics of pseudo-classes and pseudo-elements. Remember that learning never stops! So, keep on exploring new CSS selectors and try to implement and test them in your upcoming project.