Creating system restore points is a good way to protect your Windows 10 data. It helps you return your PC to its previous state. Using a restore point can also help remove any recently downloaded files that are infected with malware.
The only problem is that creating multiple system restore points consumes too much disk space. So, you might want to decide which system restore points are worth keeping and which ones you should delete.
Here's how you delete system restore points on your PC.
1. Delete Multiple System Restore Points Using Disk Cleanup
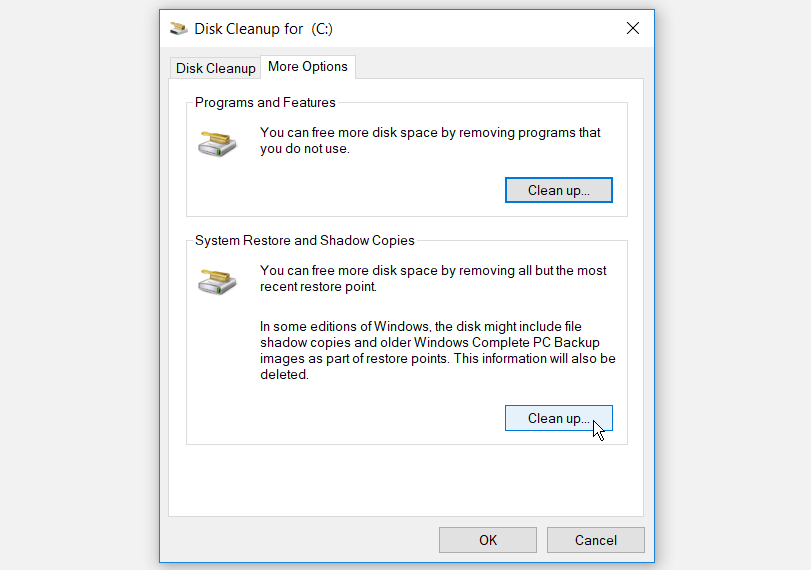
If you want to delete all but the recent system restore point, you can use the Disk Cleanup tool. To get started, here are the steps you can follow:
- Press Windows key + R, type cleanmgr, and press Enter.
- Select the drive you want to clean up and press OK.
- Press the Clean up system files button.
- In the next window, navigate to the More Options tab.
- Press the Clean up button under the System Restore and Shadow Copies option.

Press OK and restart your PC to apply these changes.
2. Delete Multiple System Restore Points Using System Protection Settings
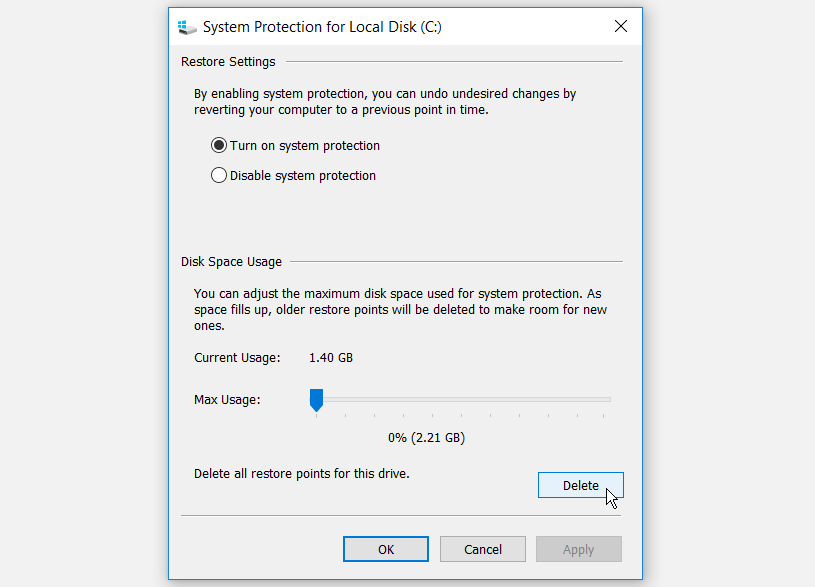
If you want to delete multiple restore points, you can do this via System Protection Settings. However, note that you won’t be able to restore your PC to its previous state if you do this.
- Press Windows key + R, type SystemPropertiesProtection, and press Enter.
- Navigate to the System Protection tab.
- Select the drive from where you want to delete system restore points.
- Press the Configure button.
- In the next window, press the Delete button.

Press Apply and then press OK.
3. Delete Specific Restore Points Using the Command Prompt
Deleting system restore points is safe, but you need to be mindful about which restore points you should delete. The Command Prompt can help you pick and delete specific restore points.
Here’s how you can use this tool:
- Press Windows Key + R to open the Run command dialog box.
- Type CMD and press Ctrl + Shift + Enter to open an elevated Command Prompt.
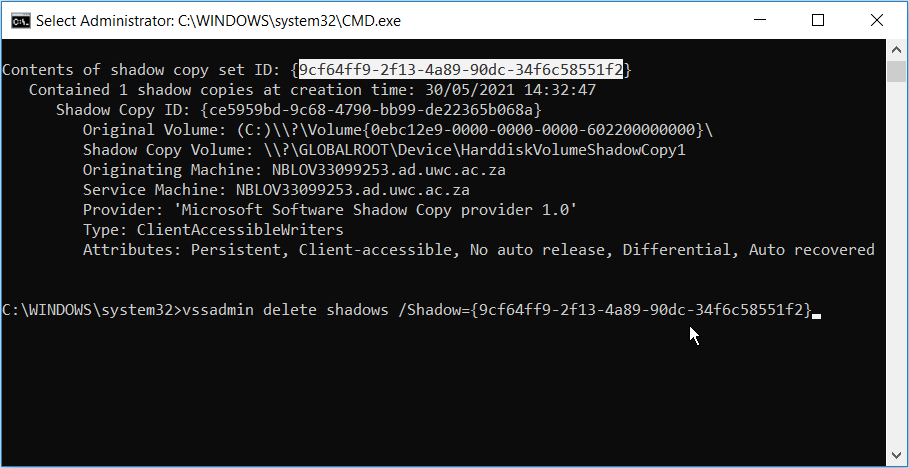
- Enter the command below and press Enter to show a complete list of system restore points on your PC.
vssadmin list shadowsYour system restore points will be labeled by Shadow Copy IDs. To delete a specific restore point, copy its shadow ID and execute the following command:
vssadmin delete shadows /Shadow={shadow copy ID}
Press Enter and then press Y to continue.
Should you wish to delete all your system restore points, enter the following command and press Enter:
vssadmin delete shadows /all4. Delete Specific Restore Points Using a Third-Party Tool
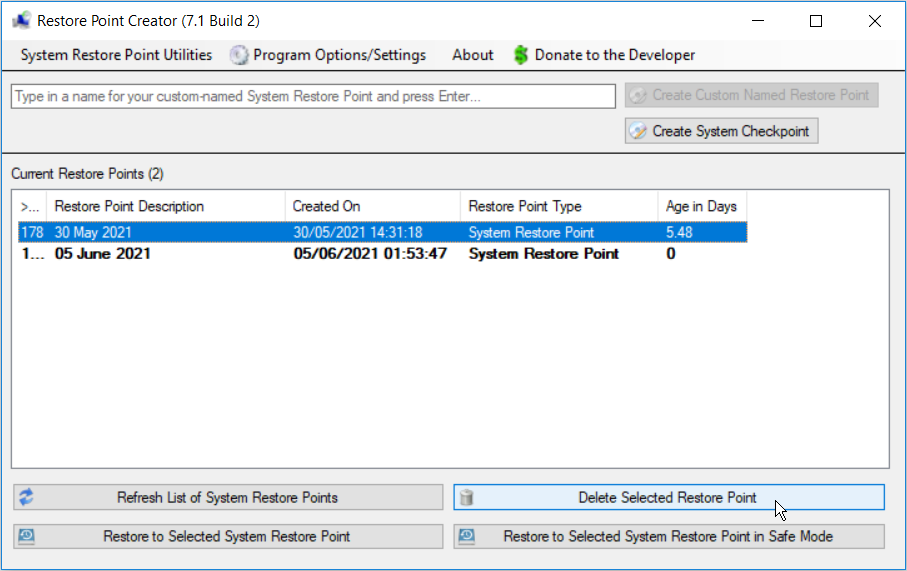
Another way to delete your specific restore points is by using a third-party tool. Restore Point Creator is a great tool you can use for this. It’s a free and lightweight app that’s fully compatible with Windows 10. It provides an intuitive interface that makes it easy to create and manage your restore points.
- To get started, download and install Restore Point Creator.
- Run the tool and select the specific restore point you want to delete.
- Press the Delete Selected Restore Point button on the bottom-right corner of the screen.

Should you wish to delete multiple restore points, highlight all of them and press the Delete Selected Restore Point button.
Return Your PC to Its Previous State With a System Restore Point
System restore points can rescue you in case something goes wrong with your PC. You simply use the restore point, and your PC returns to its normal state. What’s important is to manage these restore points and delete the ones you don’t need.
Also, you shouldn’t worry about manually creating multiple restore points to keep your data safe. You can automatically create daily restore points. Should you wish to delete a specific daily system restore point, simply apply any of the methods we’ve provided.