Snap Layouts are just one of the productivity tools Microsoft delivered in Windows 11. While the ability to Snap your active windows into different layouts with more options doesn't seem that exciting, it's a handy new time-saving option for those who regularly work with multiple windows open.
So, how do the Windows 11 Snap Layouts work? Let's find out.
What Are Windows 11 Snap Layouts?
Windows 11 Snap Layouts are a new set of layout options that move your application windows into different screen positions.
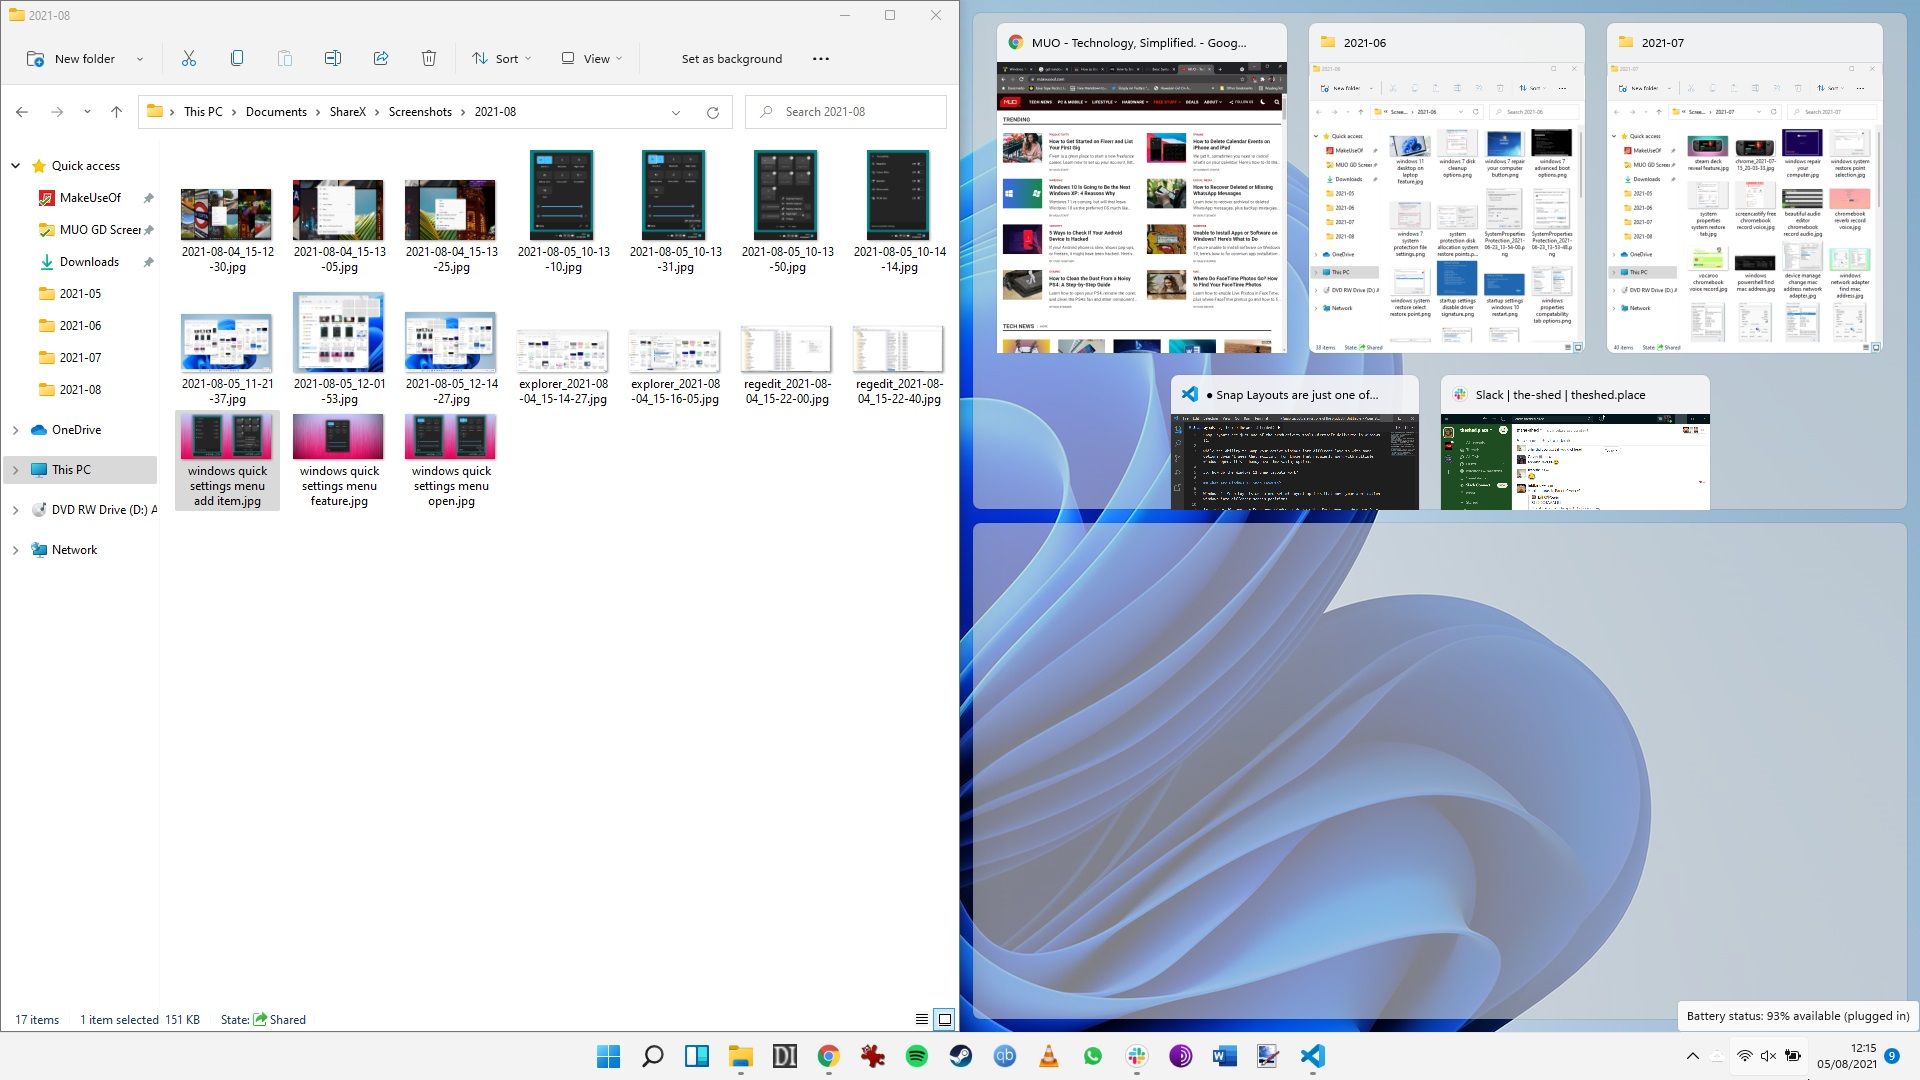
You can see this feature in Windows 10, where you can Snap your windows side-by-side. Furthermore, when you Snap your window to one side of the screen, a small dialog appears opposite, allowing you to select the second window. Windows 10 Snap was a great improvement on previous iterations, allowing for horizontal and vertical Snapping, along with quarter screen Snapping if you drag an application into the corner.

In 2019, the old Windows favorite PowerToys was relaunched. As part of the package, Windows users could download the FancyZones utility, drastically increasing the range of Snap options with Snap zones, customizable areas, and much more.
Seeing the popularity of FancyZones, Microsoft took the step to integrate much of its functionality into Windows 11. The result is Windows 11 Snap Layouts, a series of integrated application window positions you can access from the window title bar.
How to Use Windows 11 Snap Layouts
Using Snap Layouts in Windows 11 is a very simple process. As the tool is integrated into the operating system, you don't need to download or configure anything. The Snap Layout options will vary depending on your screen size, but the overall gist of the tool is the same for everyone.
- Open a new File Explorer window.
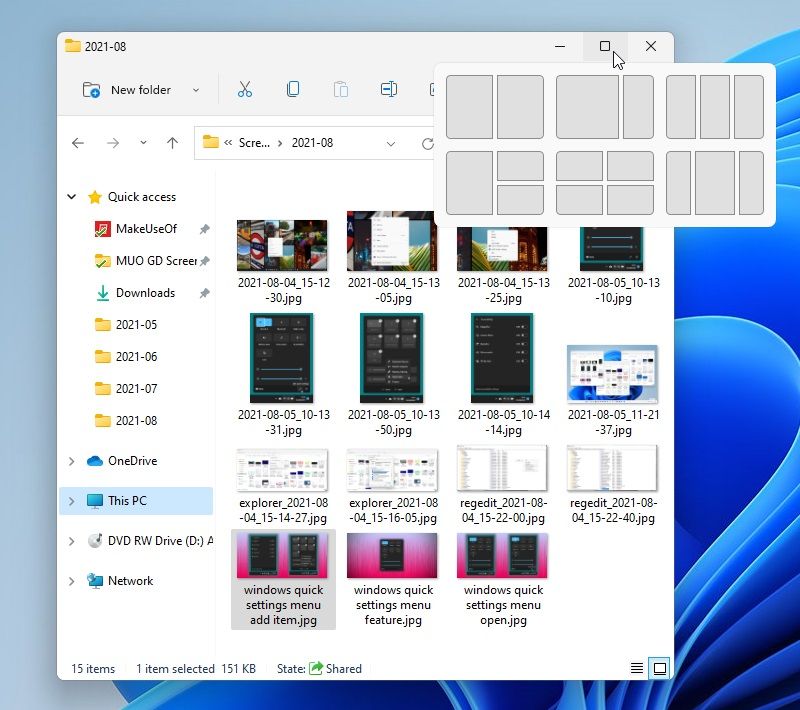
- Hover over the Maximize window icon in the top right corner.
- The Snap Layouts will appear. Select a Snap Layout that suits your window configuration.
- The first window will move into position. Now, select the other windows you want to appear in the other Snap Layout zones.

Alternatively, you can use Snap Layouts with your keyboard. In the window you want to Snap, press Win + Arrow Key in the direction you want to position the window. After you move the first window, the Snap dialog will appear in the empty space.
Currently, you can choose from six different Snap Layouts:
- An equal screen split
- An 80/20 screen split
- Three equal columns
- Three unequal columns
- A 50/25/25 screen split
- A quarter screen split
Customizing Windows 11 Snap Layouts Settings
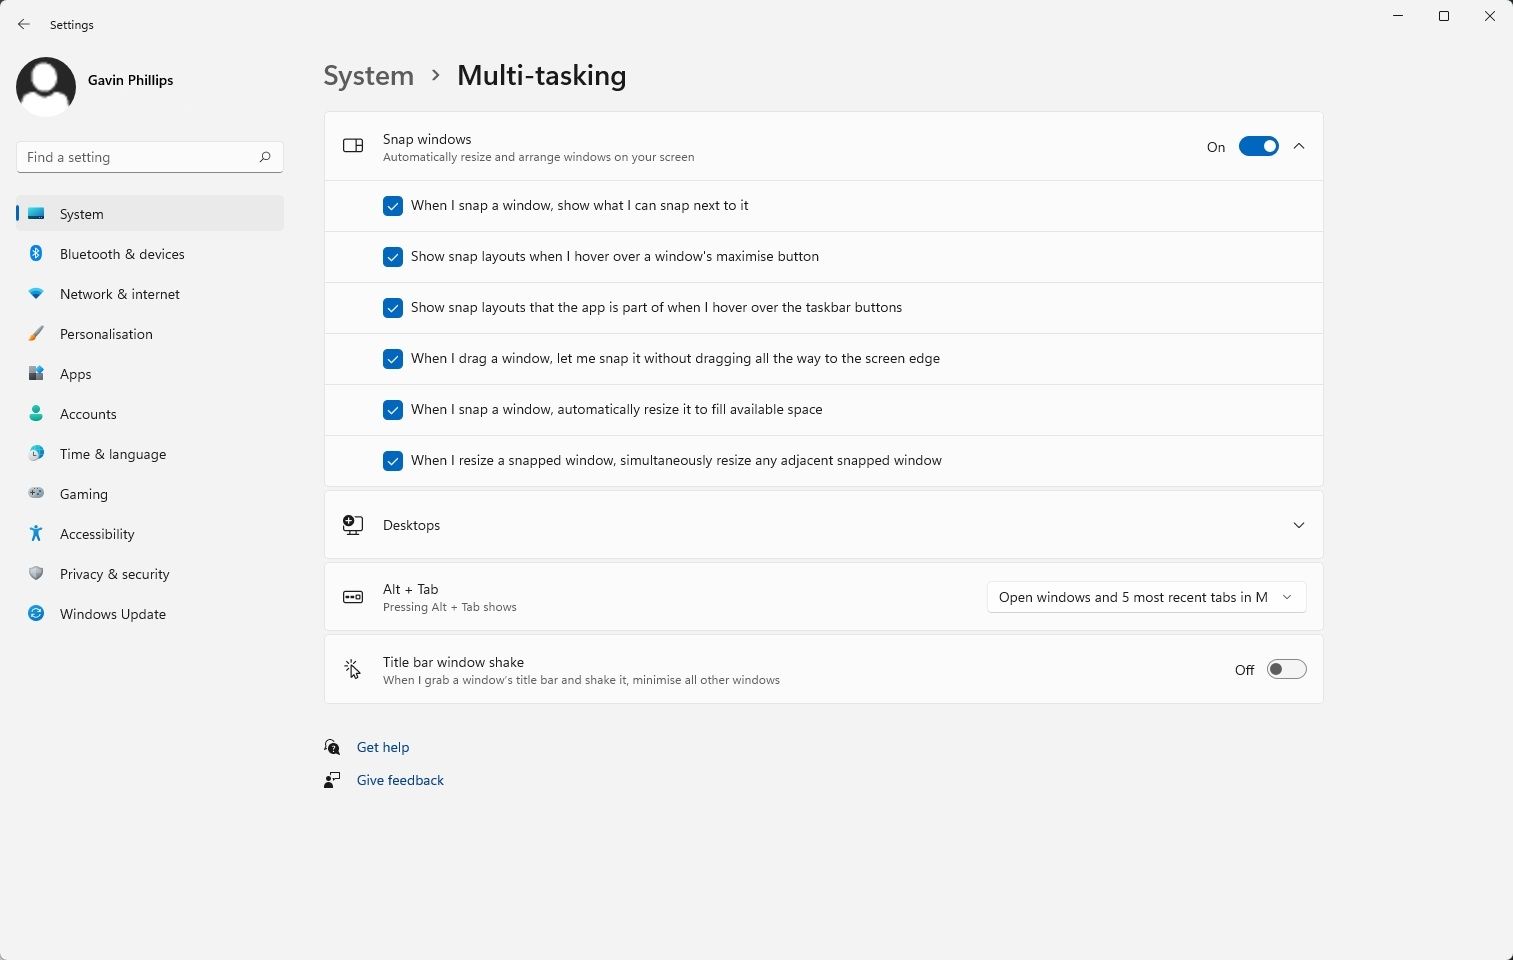
There are a few Windows 11 Snap Layouts options you customize via the Windows Settings app.
For example, you can switch the Windows 11 Snap Layouts option off entirely or alter how Snap Layouts reacts when two or more windows are snapped.
- Press Win + I to open the Settings app.
- Type snap in the Setting search bar, then select Snap Settings.
- Check or uncheck any options you wish to use or remove.

Windows 11 Snap Layouts vs. PowerToys FancyZones
Now, the big question for many Windows users is whether Microsoft's Snap Layouts integration is better than PowerToys FancyZones, the tool that inspired the updated Snap functionality.
It's an interesting question. The integration of Snap Layouts directly into Windows 11 undoubtedly makes it easier to use and is a productivity boost, which is, of course, a massive plus. The six layouts currently available to Windows 11 users aren't much, but we would expect that functionality to rise in the future (not forgetting that Windows 11 is still very much in development).
However, does it have FancyZones beat?
While FancyZones requires an additional download, it is still a Microsoft tool (and open-source one at that). Furthermore, FancyZones has one tool that Snap Layouts doesn't (yet): customizable templates.
One of FancyZones biggest draws, especially for those working with larger screens, is the customizable screen Snap Layouts. FancyZones custom layouts also allow you to create overlapping zones. So if you know that you have an area of a window or program you don't use, you can set a specific region to overlap with another, maximizing your screen real-estate.
FancyZones comes with a few more options, too. For example, with FancyZones, you can automatically move a window to its last known zone or make sure that a snapped window restores to its original size (something which can become very irritating with regular Windows Snap).
How to Create a Custom Snap Layout With FancyZones
Before moving on, here's a quick guide on how you can create a custom Snap Layout using PowerToys FancyZones.
As mentioned above, PowerToys is a free and open-source Microsoft tool you can download to add some cool functions to Windows. It works with both Windows 10 and Windows 11, though with the latter, you might find some bits broken here and there as developers continue to adapt to the new operating system.

- Head to the PowerToys Release Page, then download and install the latest version of the tool.
- After installation, the PowerToys application will launch. Select FancyZones from the list.
- Now, under Editor, select Launch layout editor.
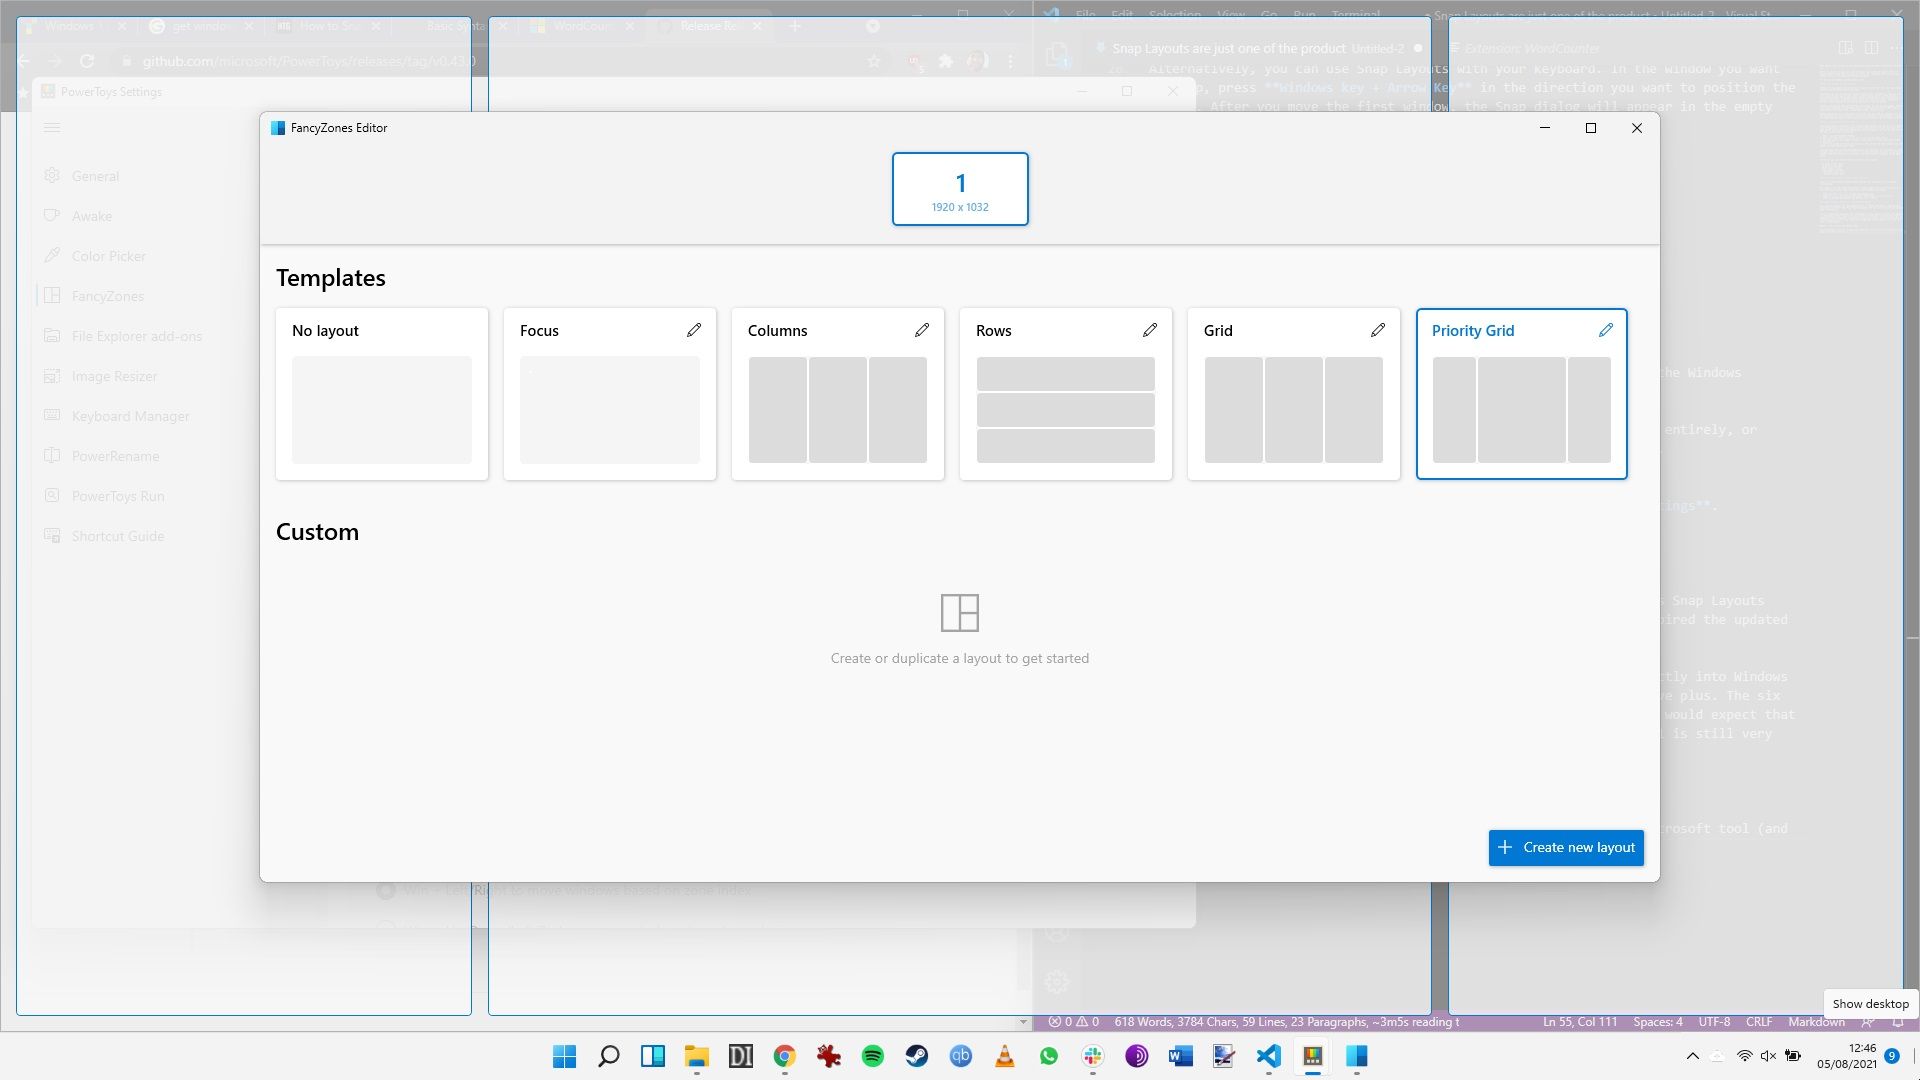
- The FancyZones Editor will launch. In the bottom right corner, select Create new layout.
- In the new window, set a name for your custom layout, then select either Grid or Canvas. Canvas is the option that allows overlapping zones.
- You can now move your Snap Layouts zones around the screen. Adjust the zone size by dragging the edges. If you want to add another zone, press the big blue plus button in the window that appears in the center of your screen.
- When you're done, select Save & apply.
Keep FancyZones open, and you can begin using your custom Snap Layouts.
Windows 11 Snap Layouts Are a Productivity Boost
Integrating more Snap Layouts into Windows 11 is a great move. Making it easier to access a wider range of layouts at the touch of a button will make it that bit quicker to organize your screen before a busy work session. Even if it is only seconds saved, they all add up.
However, there is clearly still some work to be done to bring Snap Layouts up to the same standard as FancyZones. So, if you want more advanced screen snapping with customizable Snap Layouts, FancyZones is the tool for you.