When it comes to recording what’s happening on your Mac screen, ScreenFlow has long been a go-to app thanks to its comprehensive feature set and easy-to-use editing interface.
To the already present multiple screen capture option, ScreenFlow 10 adds the ability to simultaneously record multiple cameras and mics. So you can create professional-looking videos on the fly.
We’ll show you how to get started with ScreenFlow, to record a screencast and/or video footage, and then run you through the main editing options so you can tweak it to perfection.
Grant Recording Permissions
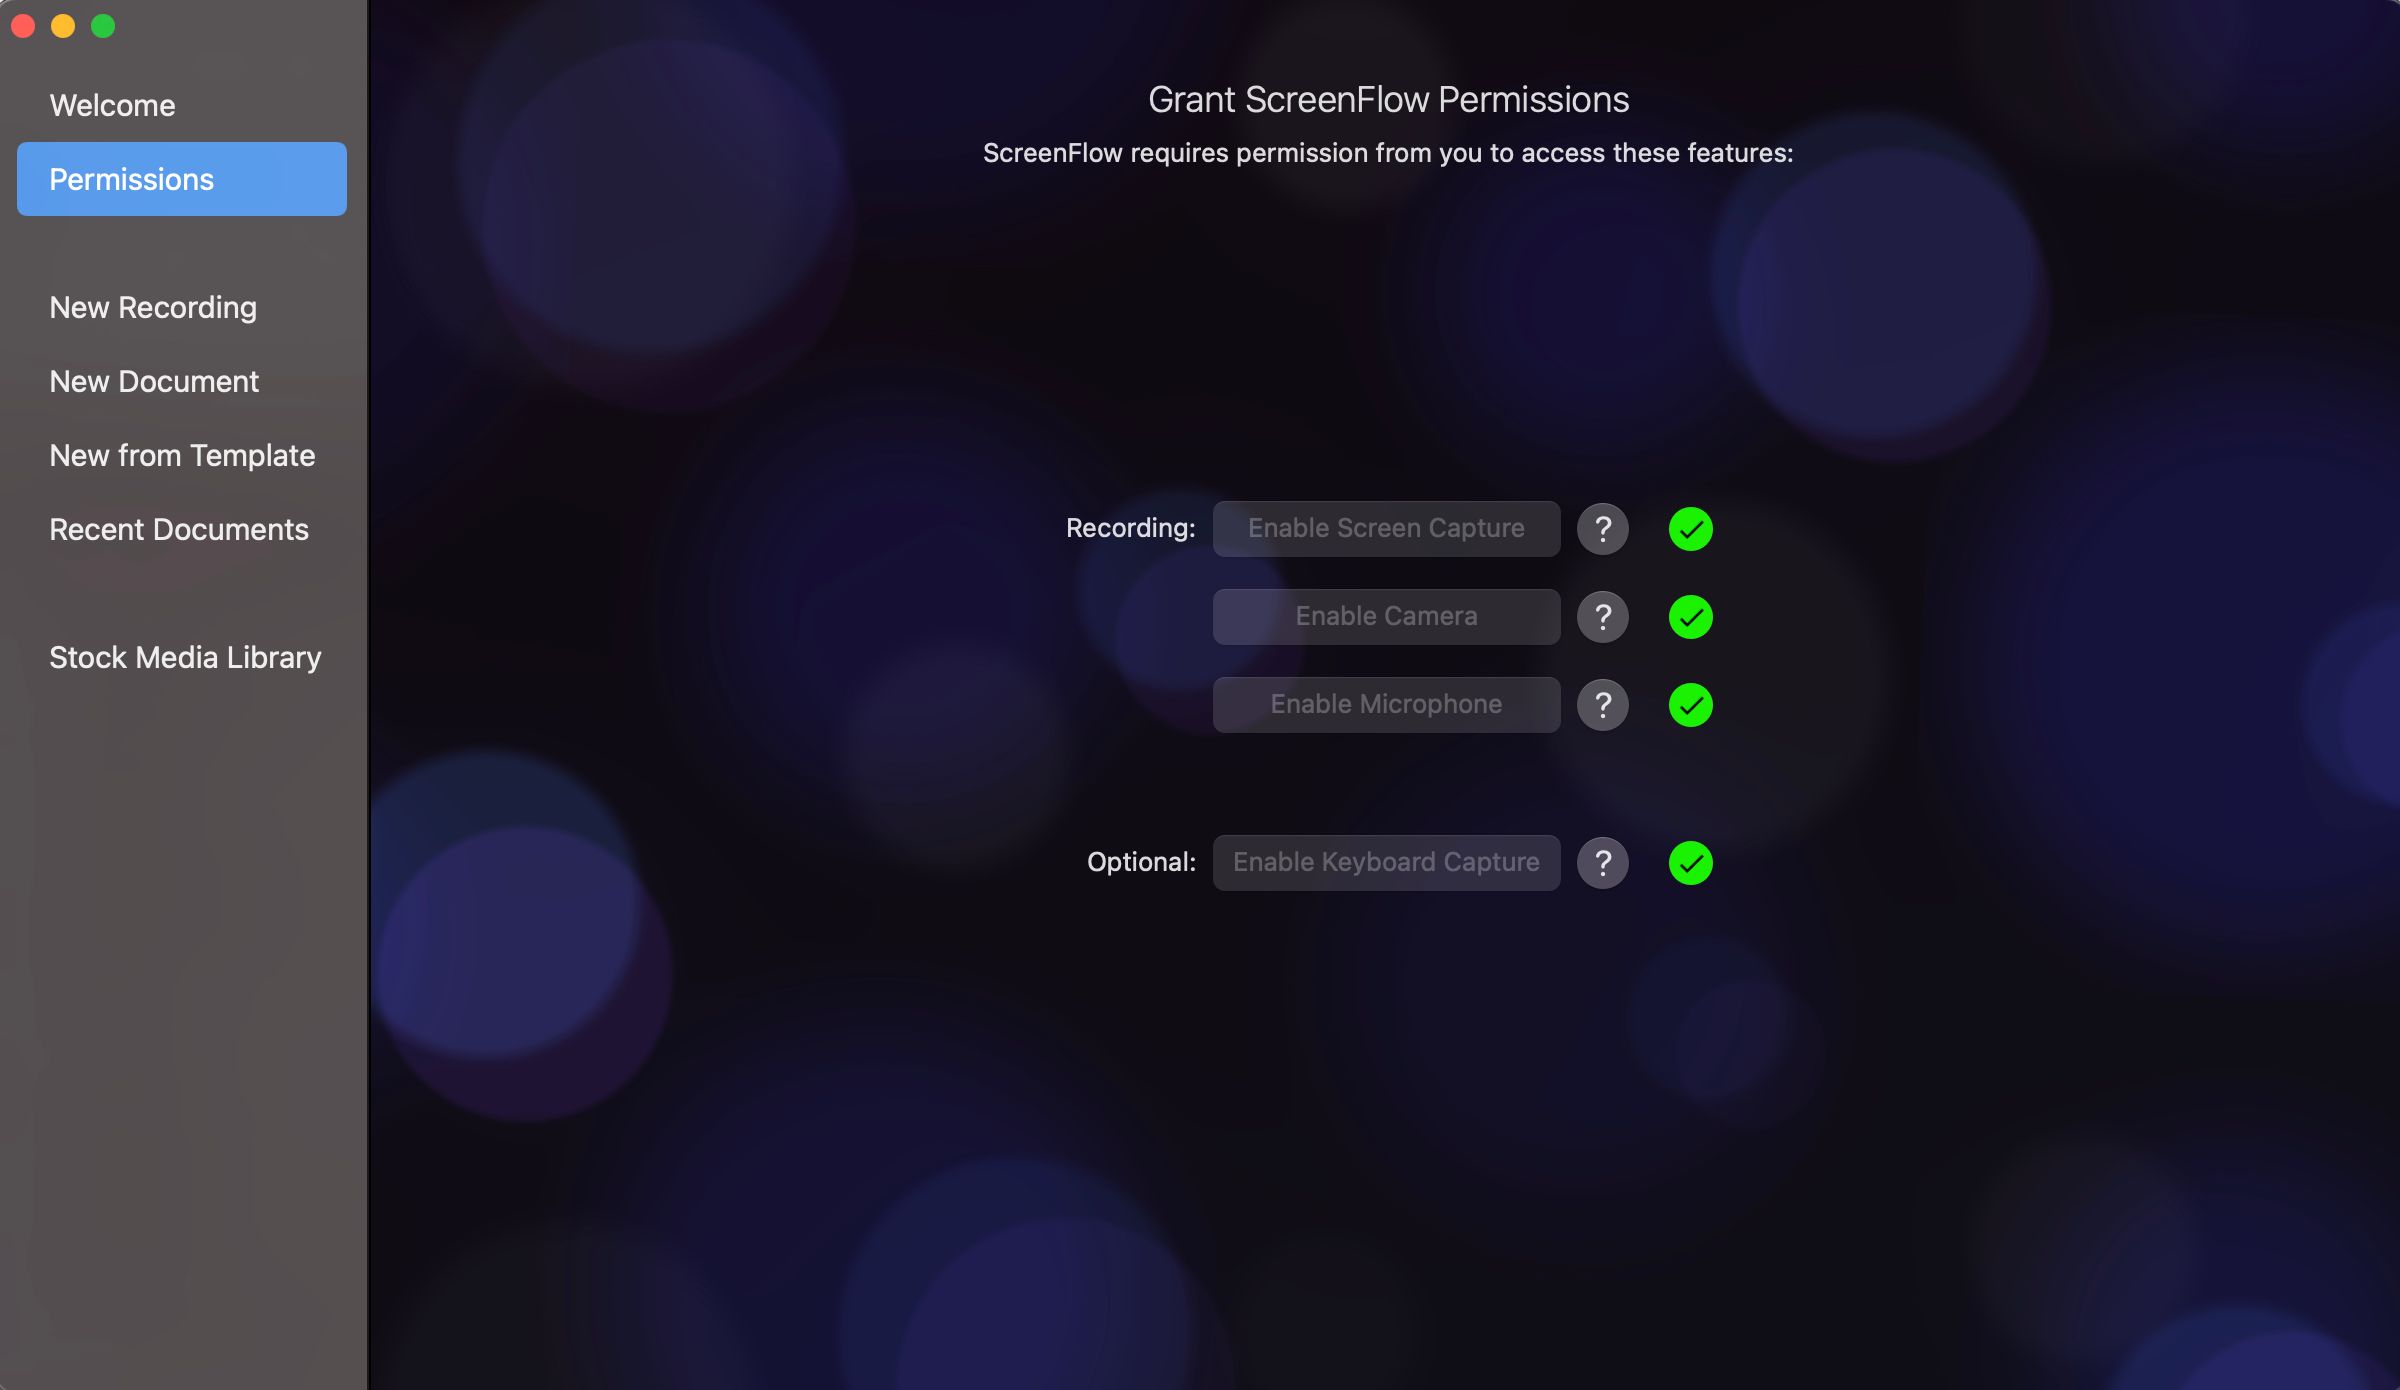
When you first open up ScreenFlow, you'll be asked for grant permissions for it to record your screen, camera, and microphone. In the Permissions section, just click on in turn Enable Screen Capture, Enable Camera, and Enable Microphone. This will take you to the Security & Privacy section of System Preferences where you can tick the box next to ScreenFlow.
In addition, there's the option to allow ScreenFlow to capture your key presses so that you can show them in your screencasts. If you're fine with this, click on Enable Keyboard Capture and you'll then need to grant permission for ScreenFlowHelper in the Accessibility section of System Preferences.
Select Recording Devices
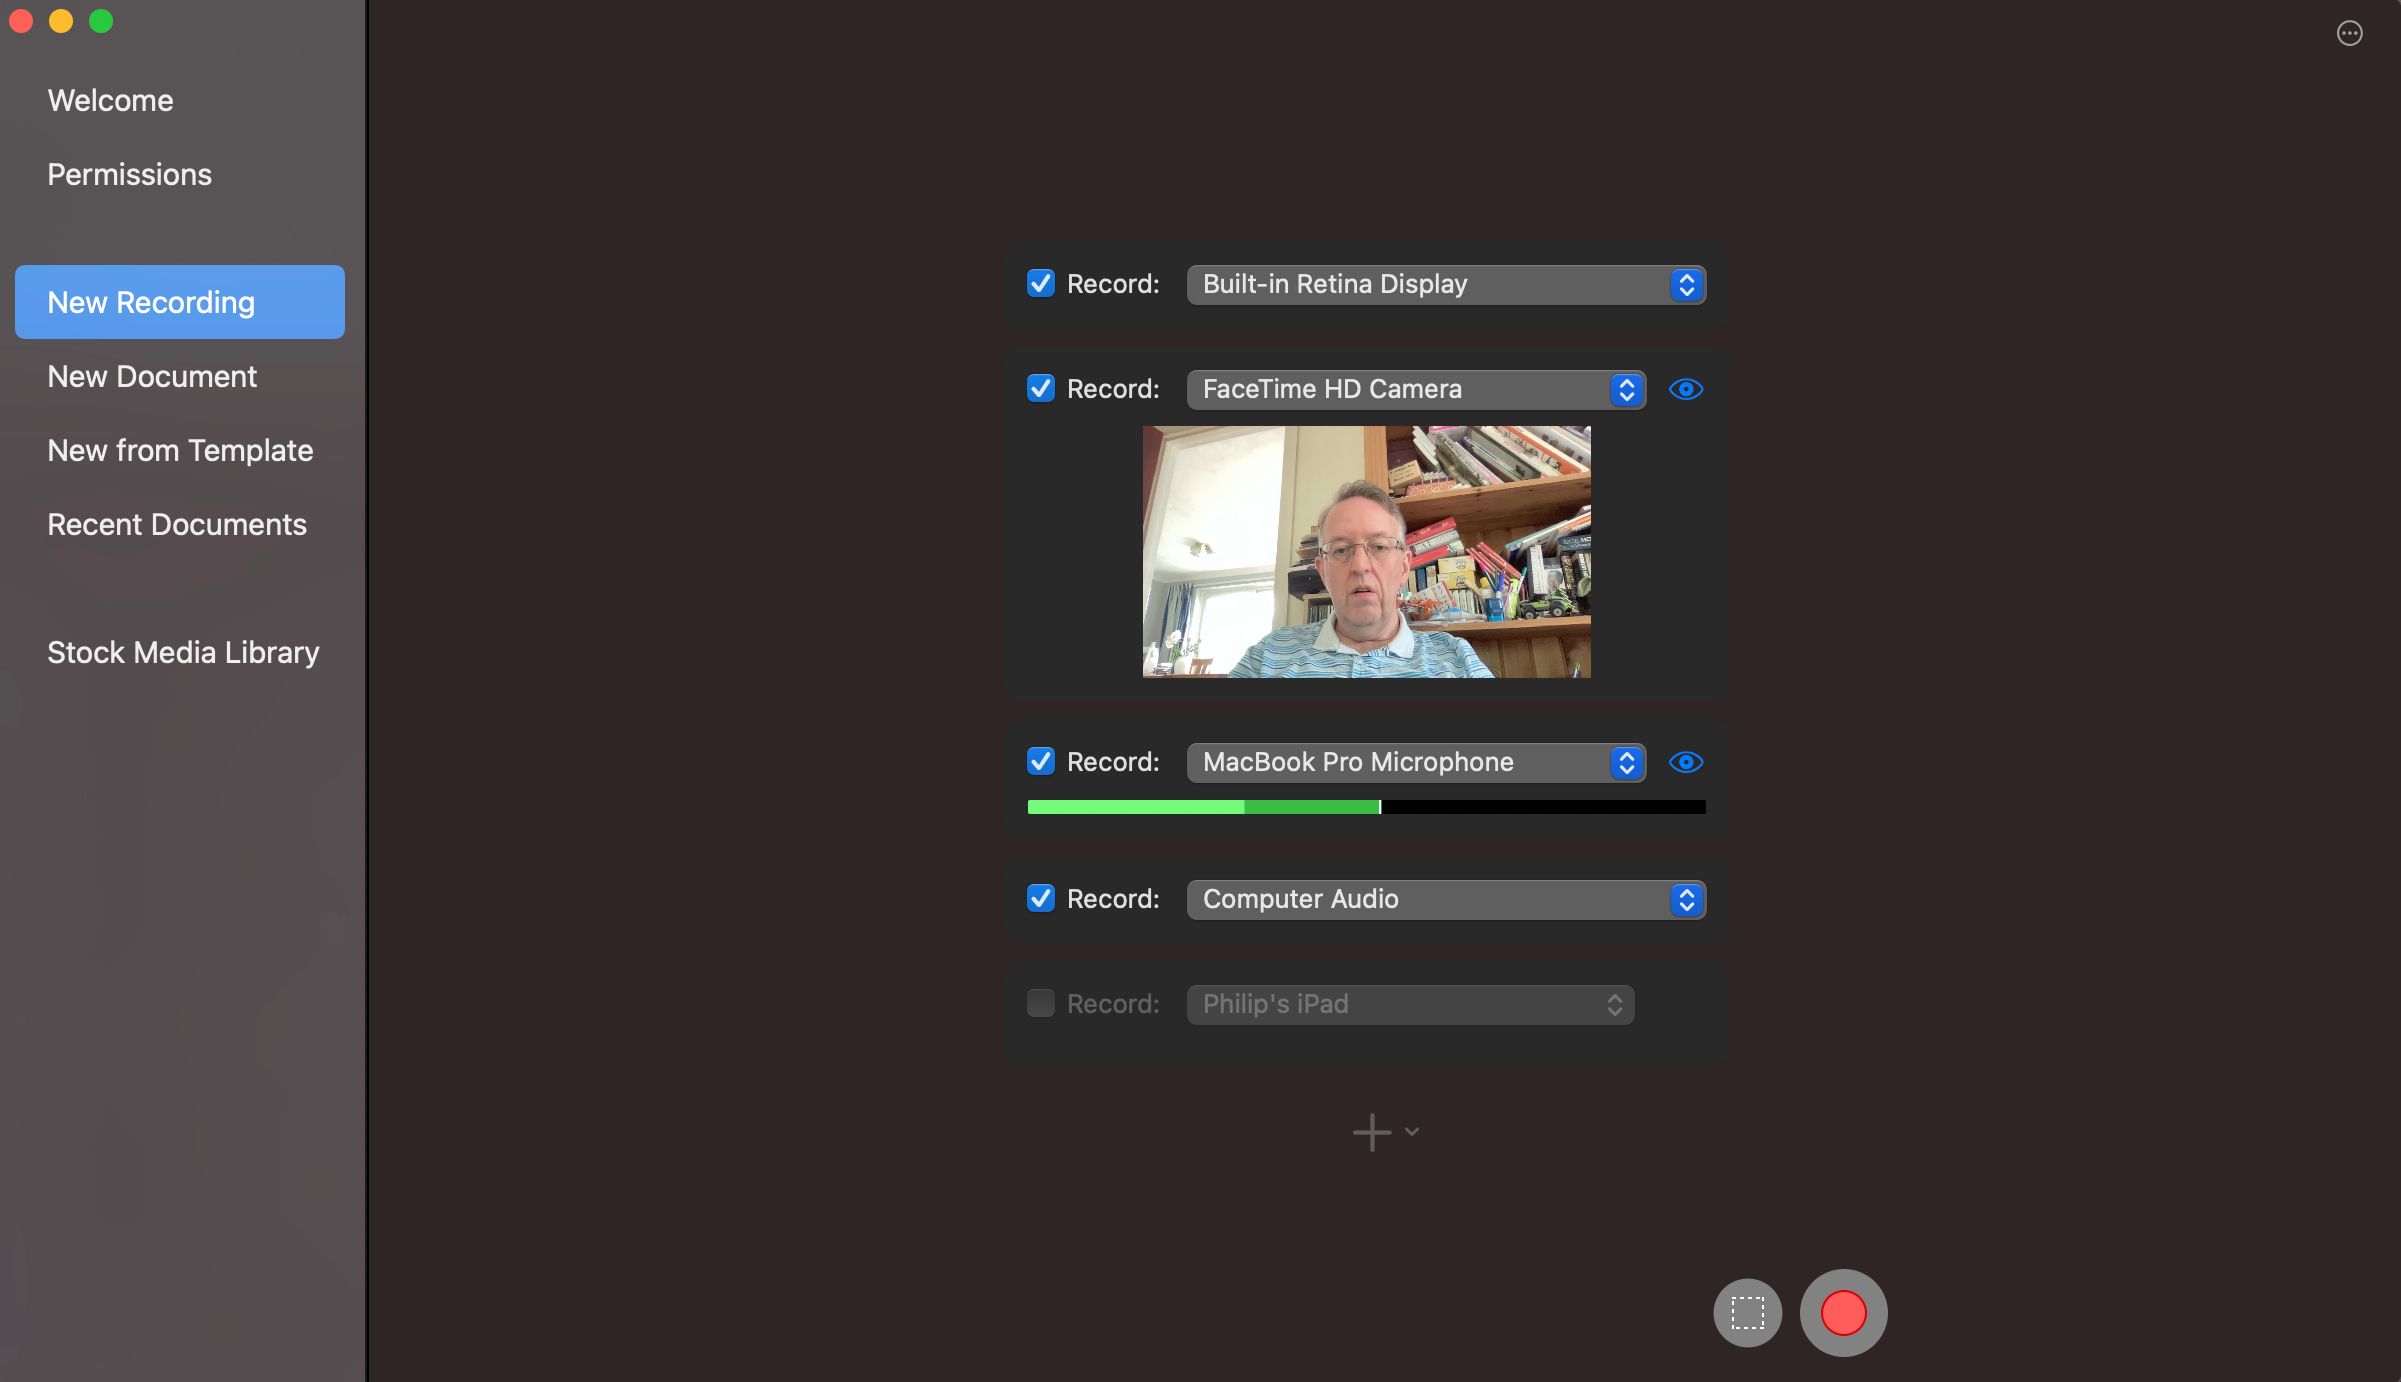
With permissions granted, you're now ready to start recording. Click on New Recording and you will see any displays, cameras, and microphones you have connected. Select which devices you want to capture by ticking the box next to each one.
By default, the computer audio will be separated into tracks for each individual app; this is very useful for fine-tuning your audio later in the ScreenFlow editor and will enable you to mute any annoying notification sounds while you were recording. If you don't want this, however, you can click the three dots icon to the right of Computer Audio and untick the box.
Note that the screen of an iOS device connected by a USB cable can also be captured by ScreenFlow. There's no option to directly capture its live camera feed, but you can work around this by installing an iOS app such as Full Screen Camera to show the device's clean camera view (with no icons etc.) on its screen.
Start Recording
When you've selected all the devices you want to capture, either hit the large red button to start recording, or the rectangle icon to choose the area of the screen you want to capture and then hit the red button. You'll then get a five-second countdown before recording begins on all selected devices.
If you want to see a live preview of your camera, you can click the ScreenFlow camera icon in the desktop menu bar and select Show Recording Monitor…, but note that it will be captured in your screen recording.
When you're ready to stop recording, press Shift + Cmd + 2. The recorded tracks will then appear in a new document in the ScreenFlow editor, already synced up in the timeline. (If you already have another document open, you'll get the option to insert the recording into that or create a new one.)
Edit Your Recordings
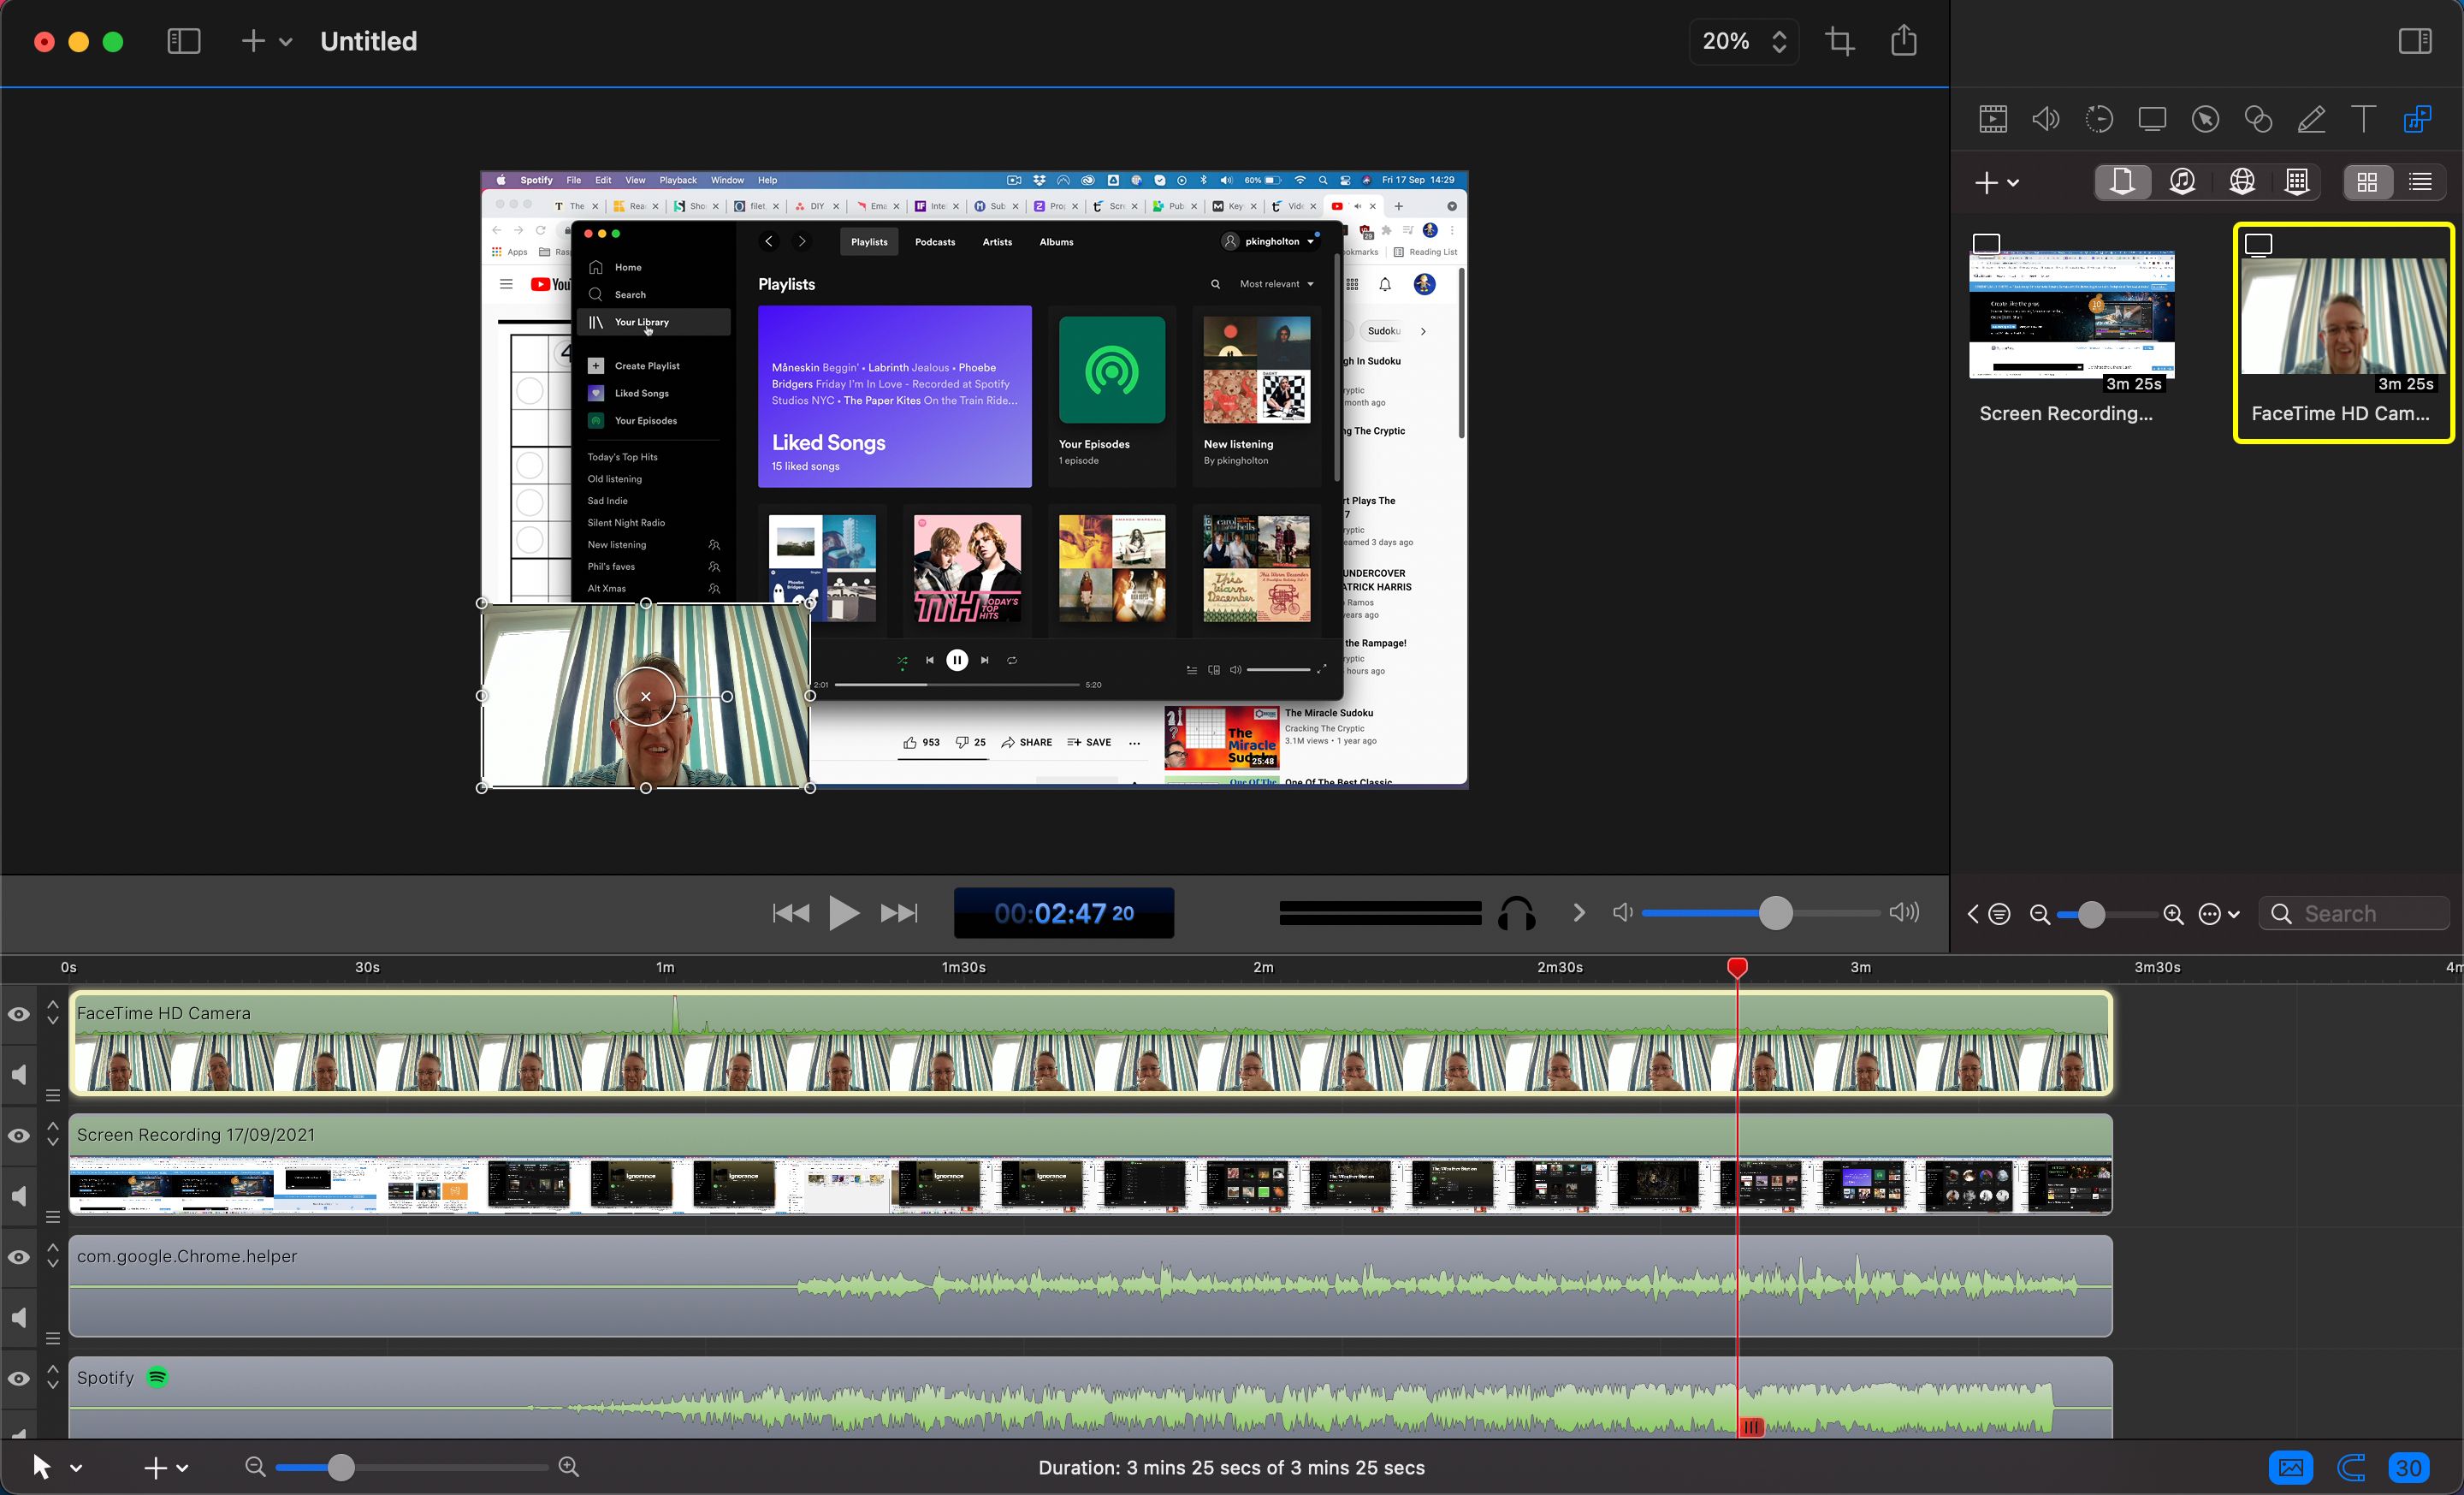
Now comes the fun and creative part. Similar to in iMovie, the recordings of your screen, camera, audio, and any other devices will appear as tracks in the timeline at the bottom of the screen. The canvas at the top gives you a preview of how your video will look, while the inspector panel on the right contains a host of options.
Note that in the timeline, the recorded tracks are layered from top to bottom on the canvas, so the top track will overlay anything below it. To change the order, click the three lines icon to the left of a track and drag it up or down. You can also hide/unhide the track on the canvas (eye icon) and mute the audio (speaker icon).
On the canvas, you can drag the selected track to reposition it and use the window handles to resize it. You can also drag the central pan handle to rotate it.
Video Options
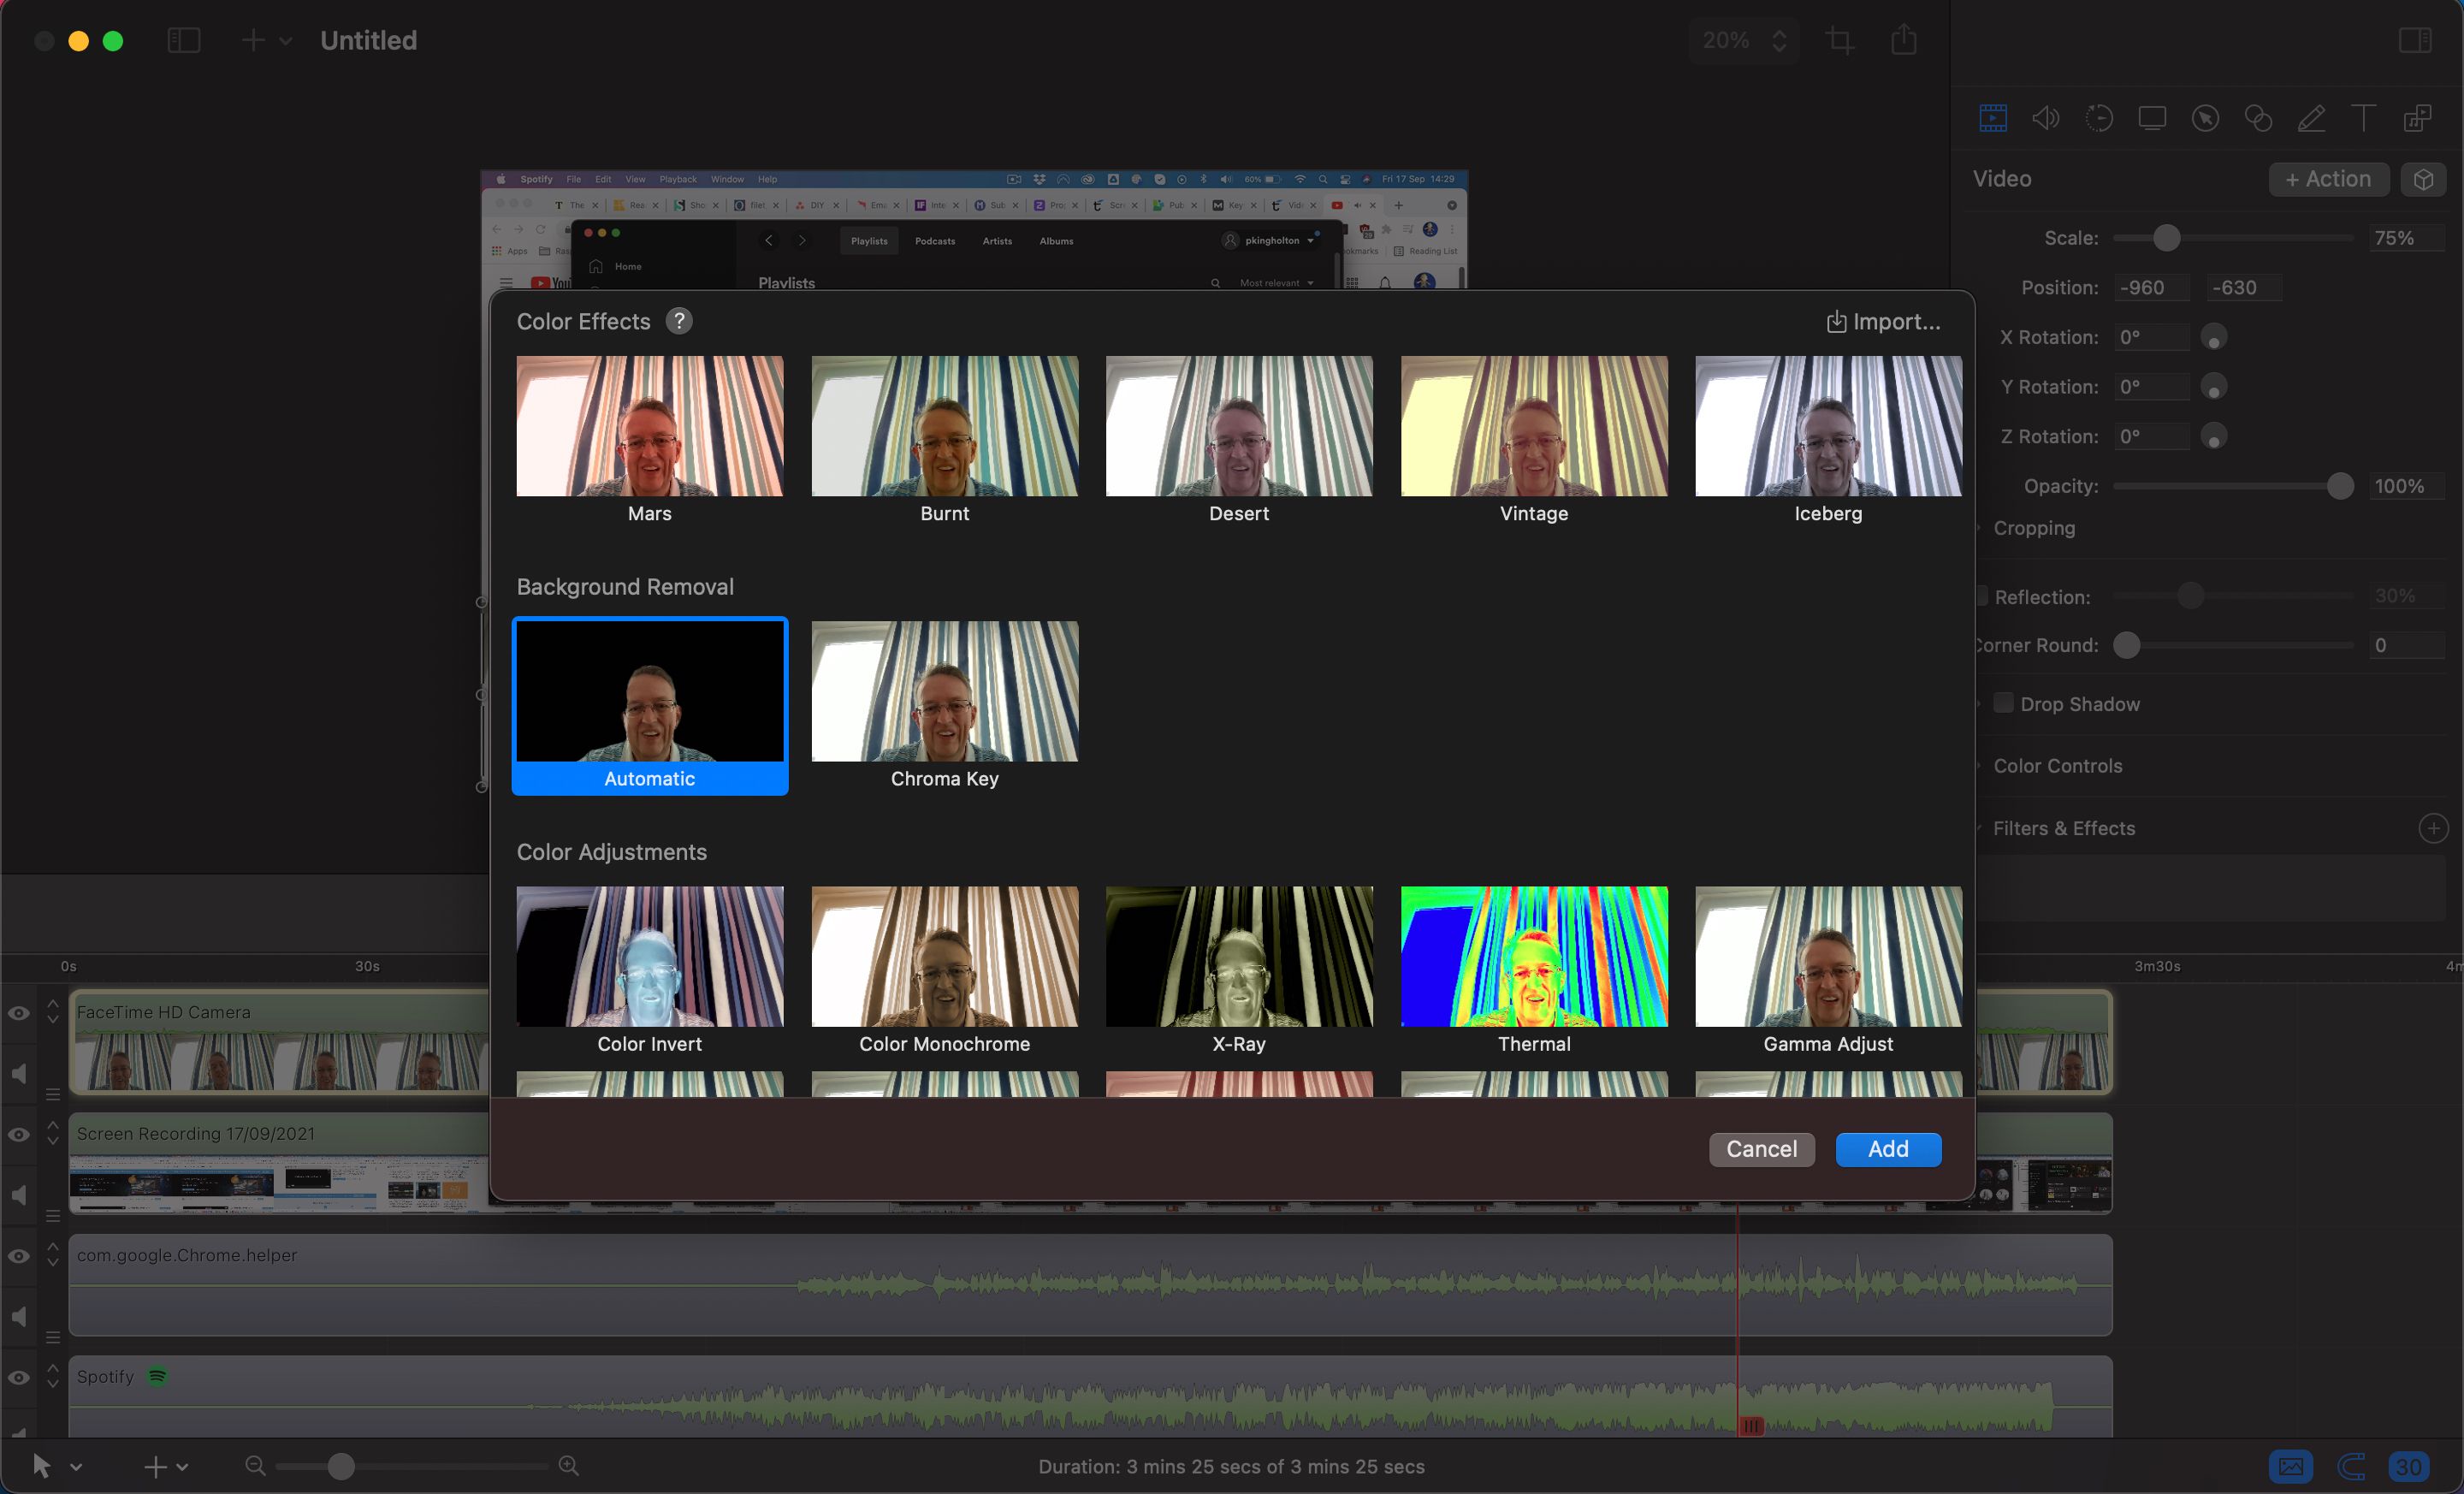
If you've recorded video from a camera, you can use the video options to adjust it: select the Video icon in the inspector panel on the right. As well as positioning, scaling, and cropping, options include adding a drop shadow or reflection to its window on the canvas.
Click the + symbol next to Filters & Effects to see the wide range of possibilities. These include some pretty wild color adjustments such as X-Ray and Thermal, and styles such as Comic Effect.
The Background Removal effects section is perhaps one of the most useful. As well as the Chroma Key option for using a green screen, there's an Automatic Background Removal setting that uses AI to remove the background; it works pretty well too, best with a less busy backdrop.
Audio Adjustment
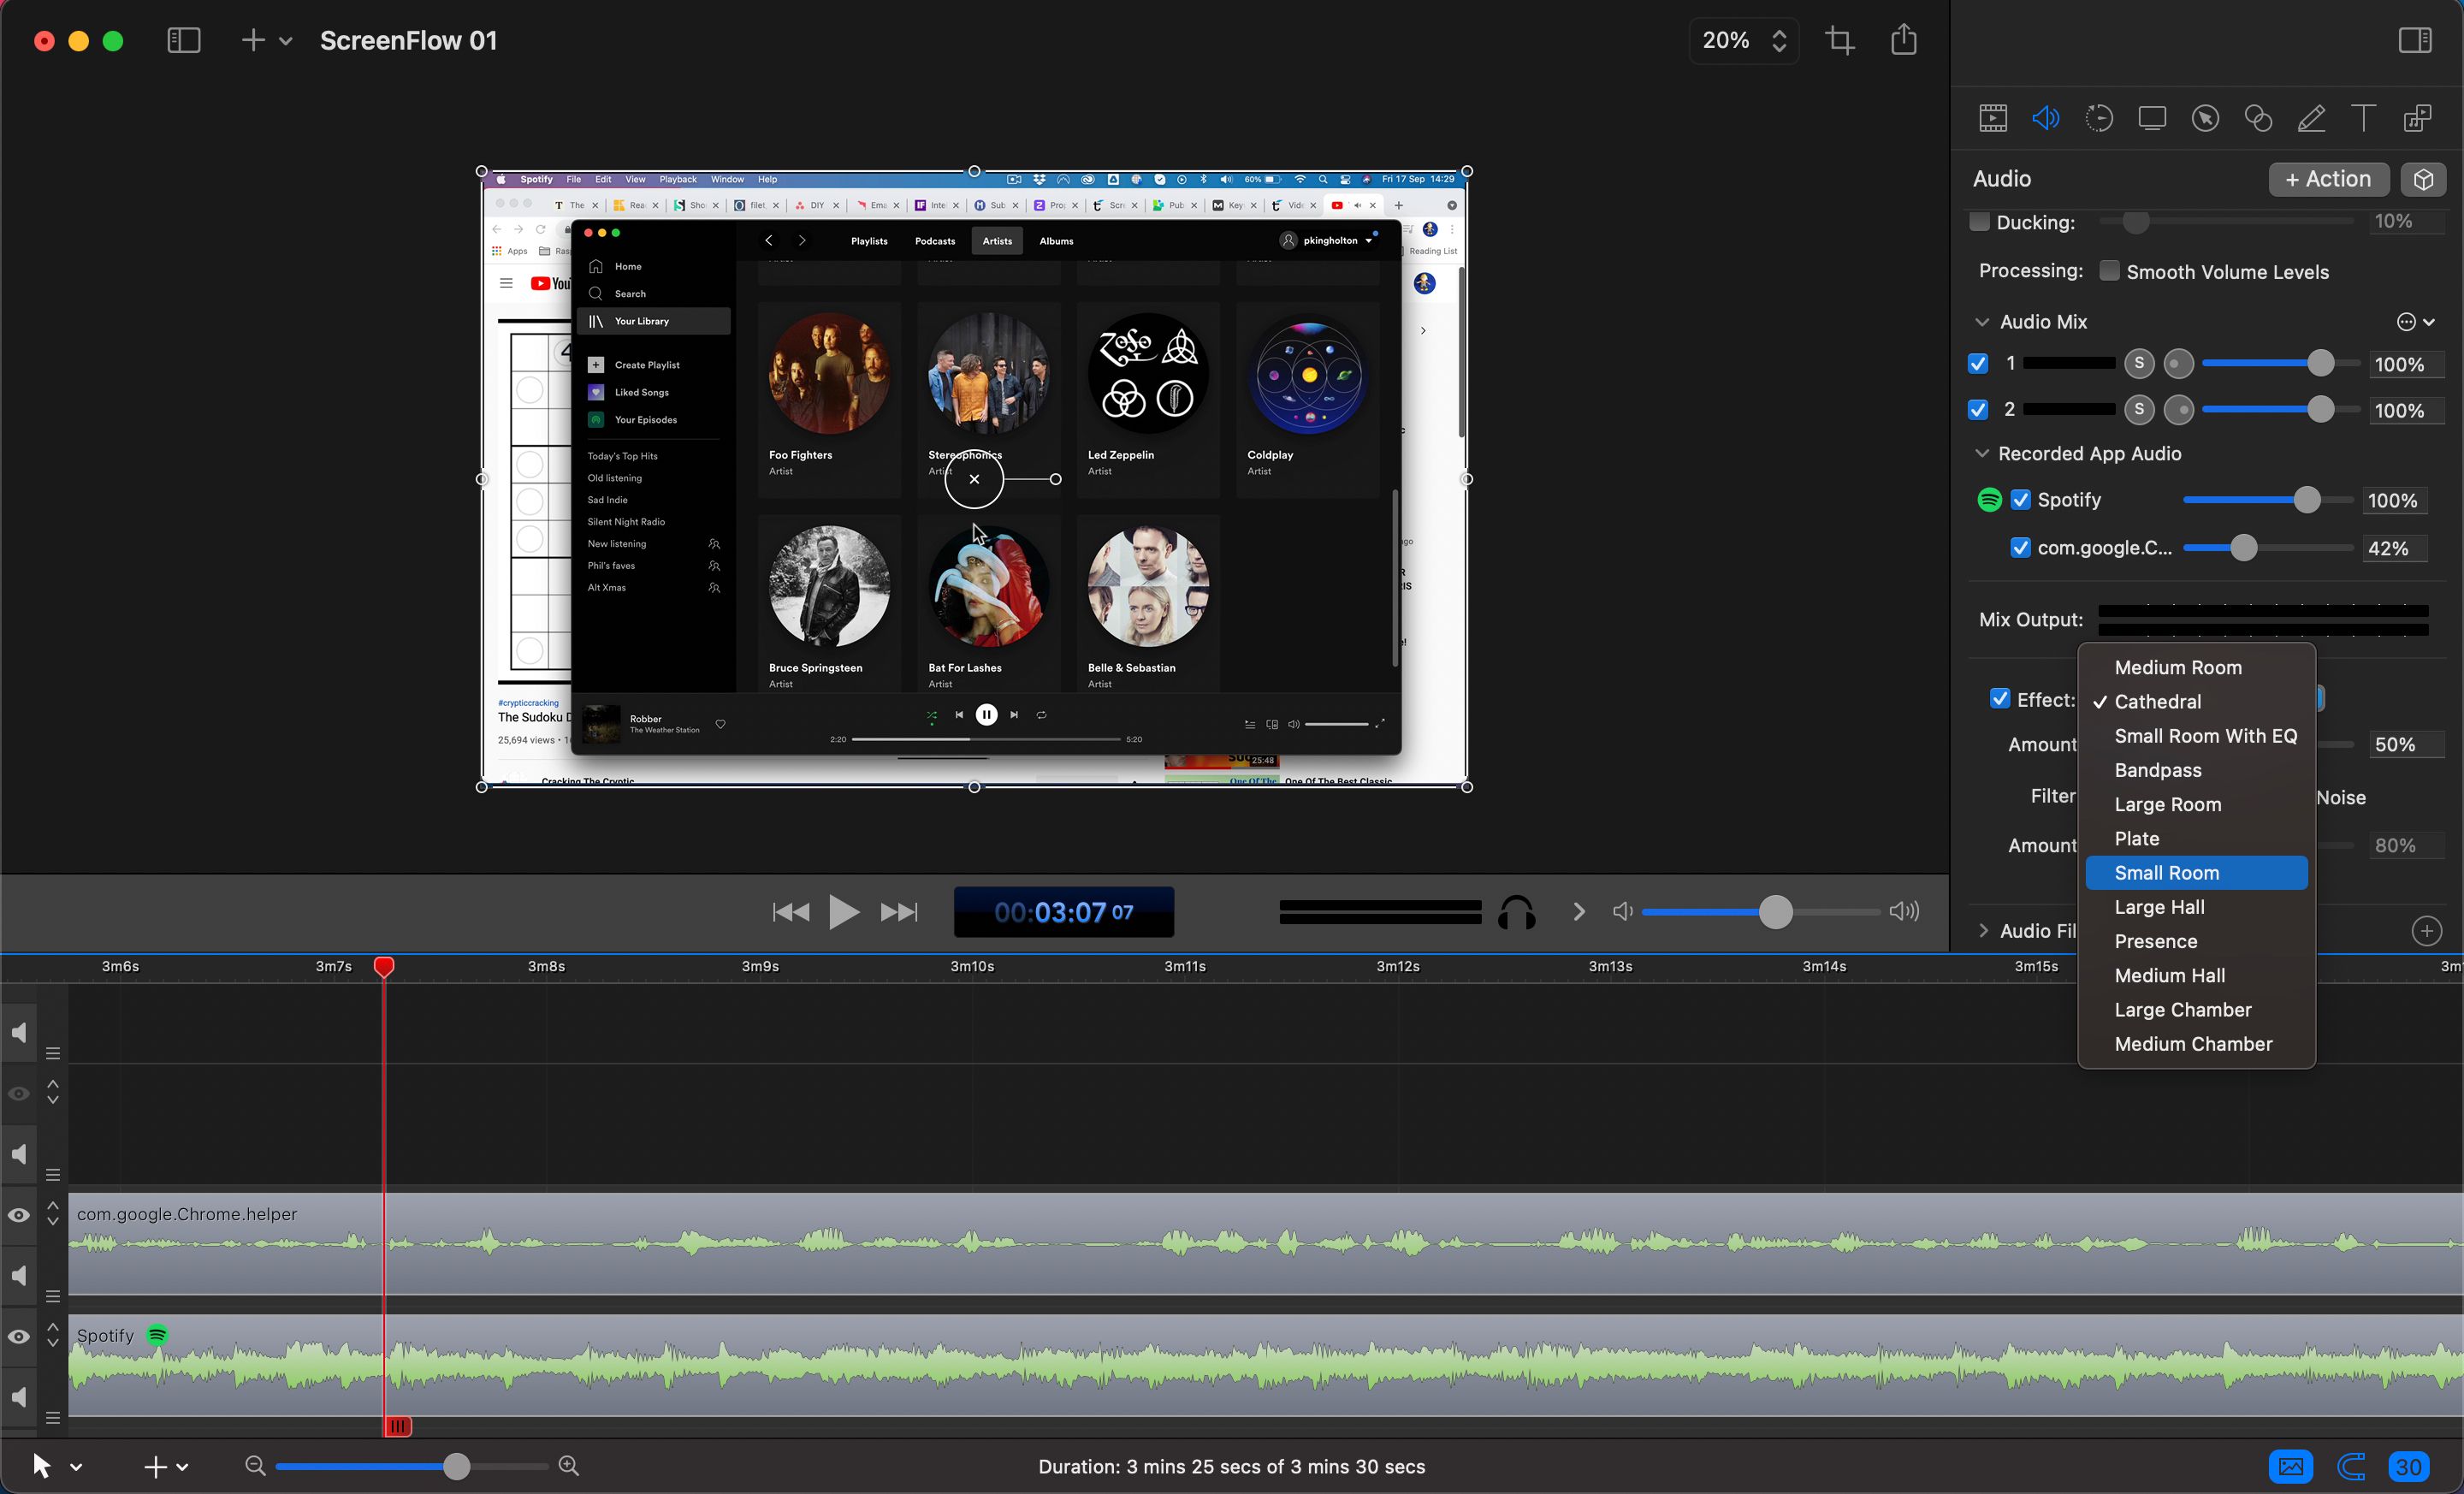
Clicking the Audio icon in the inspector allows you to adjust the audio levels for the currently selected track in the timeline, which could be an individual app audio track You can also add various reverb effects, and filters such as compression and pitch-shifting.
Video Motion
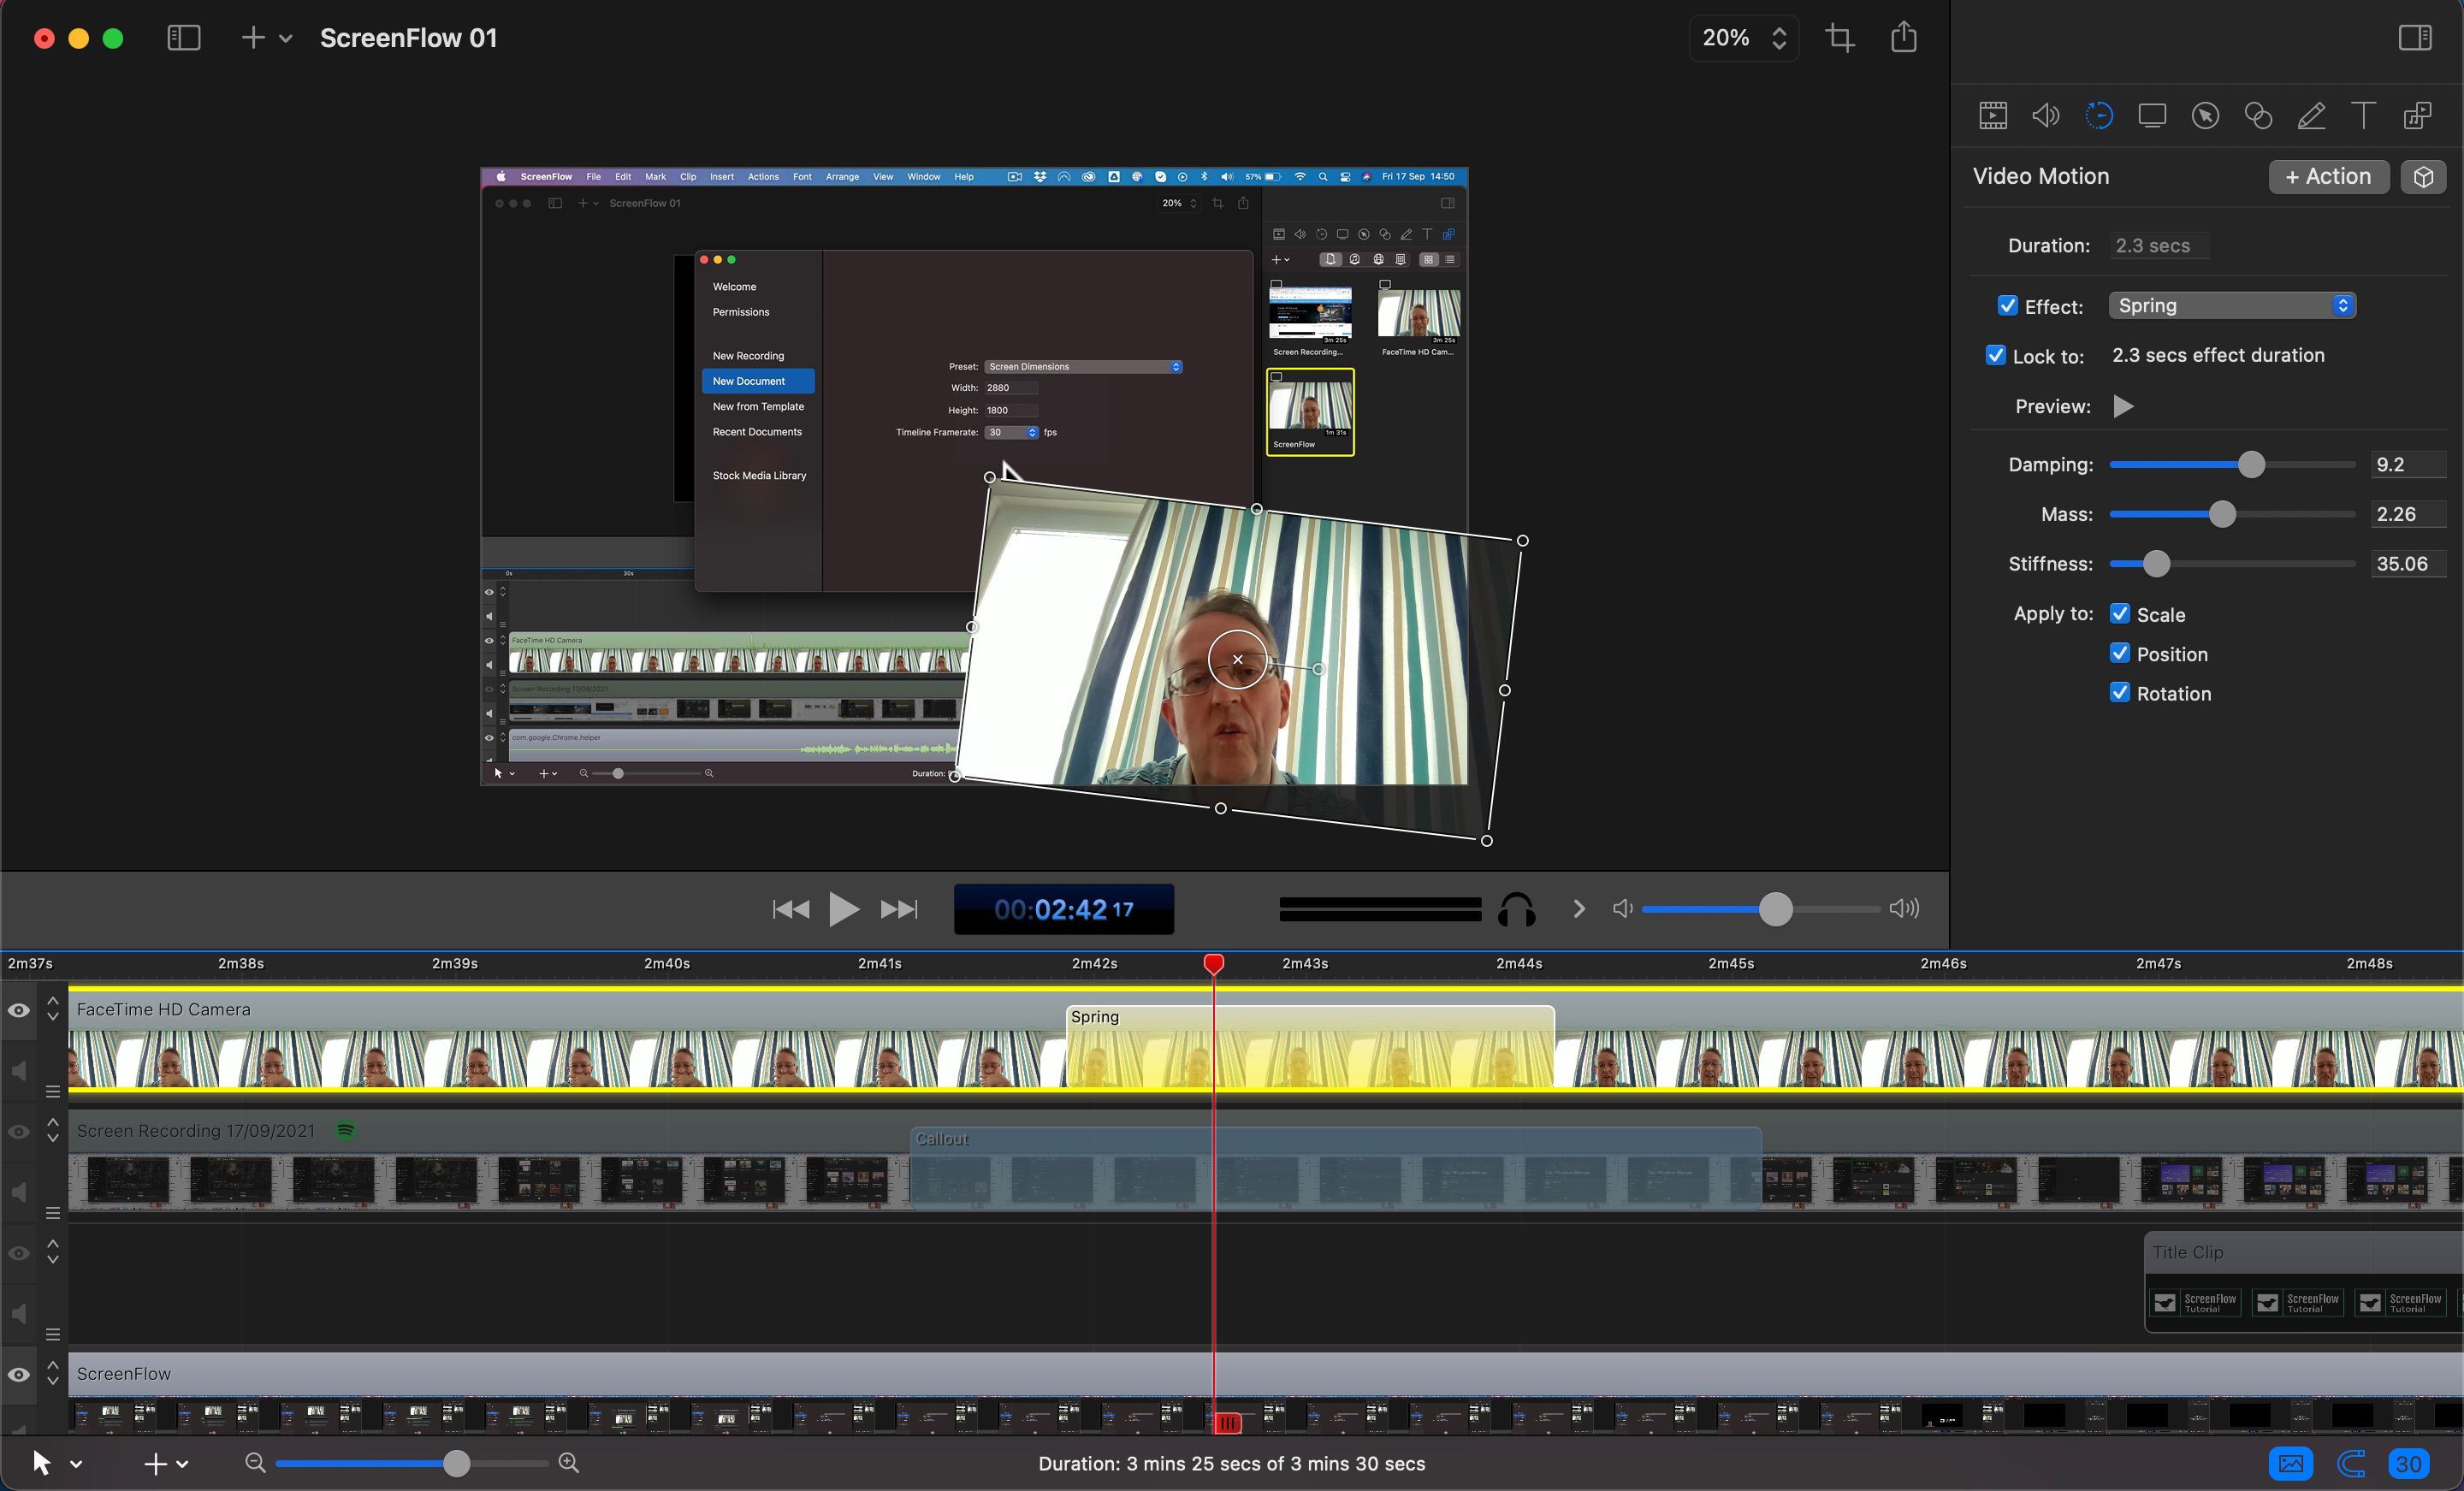
The Video Motion icon gives you access to three built-in video animation effects: Gravity, Spring, and Pulse. Click + Action and choose one from the drop-down menu to add it into the currently selected track at the playhead position. For Gravity or Spring, you'll need to reposition, resize, and/or rotate the track's window at the end of the effect.
Screen Recording Options
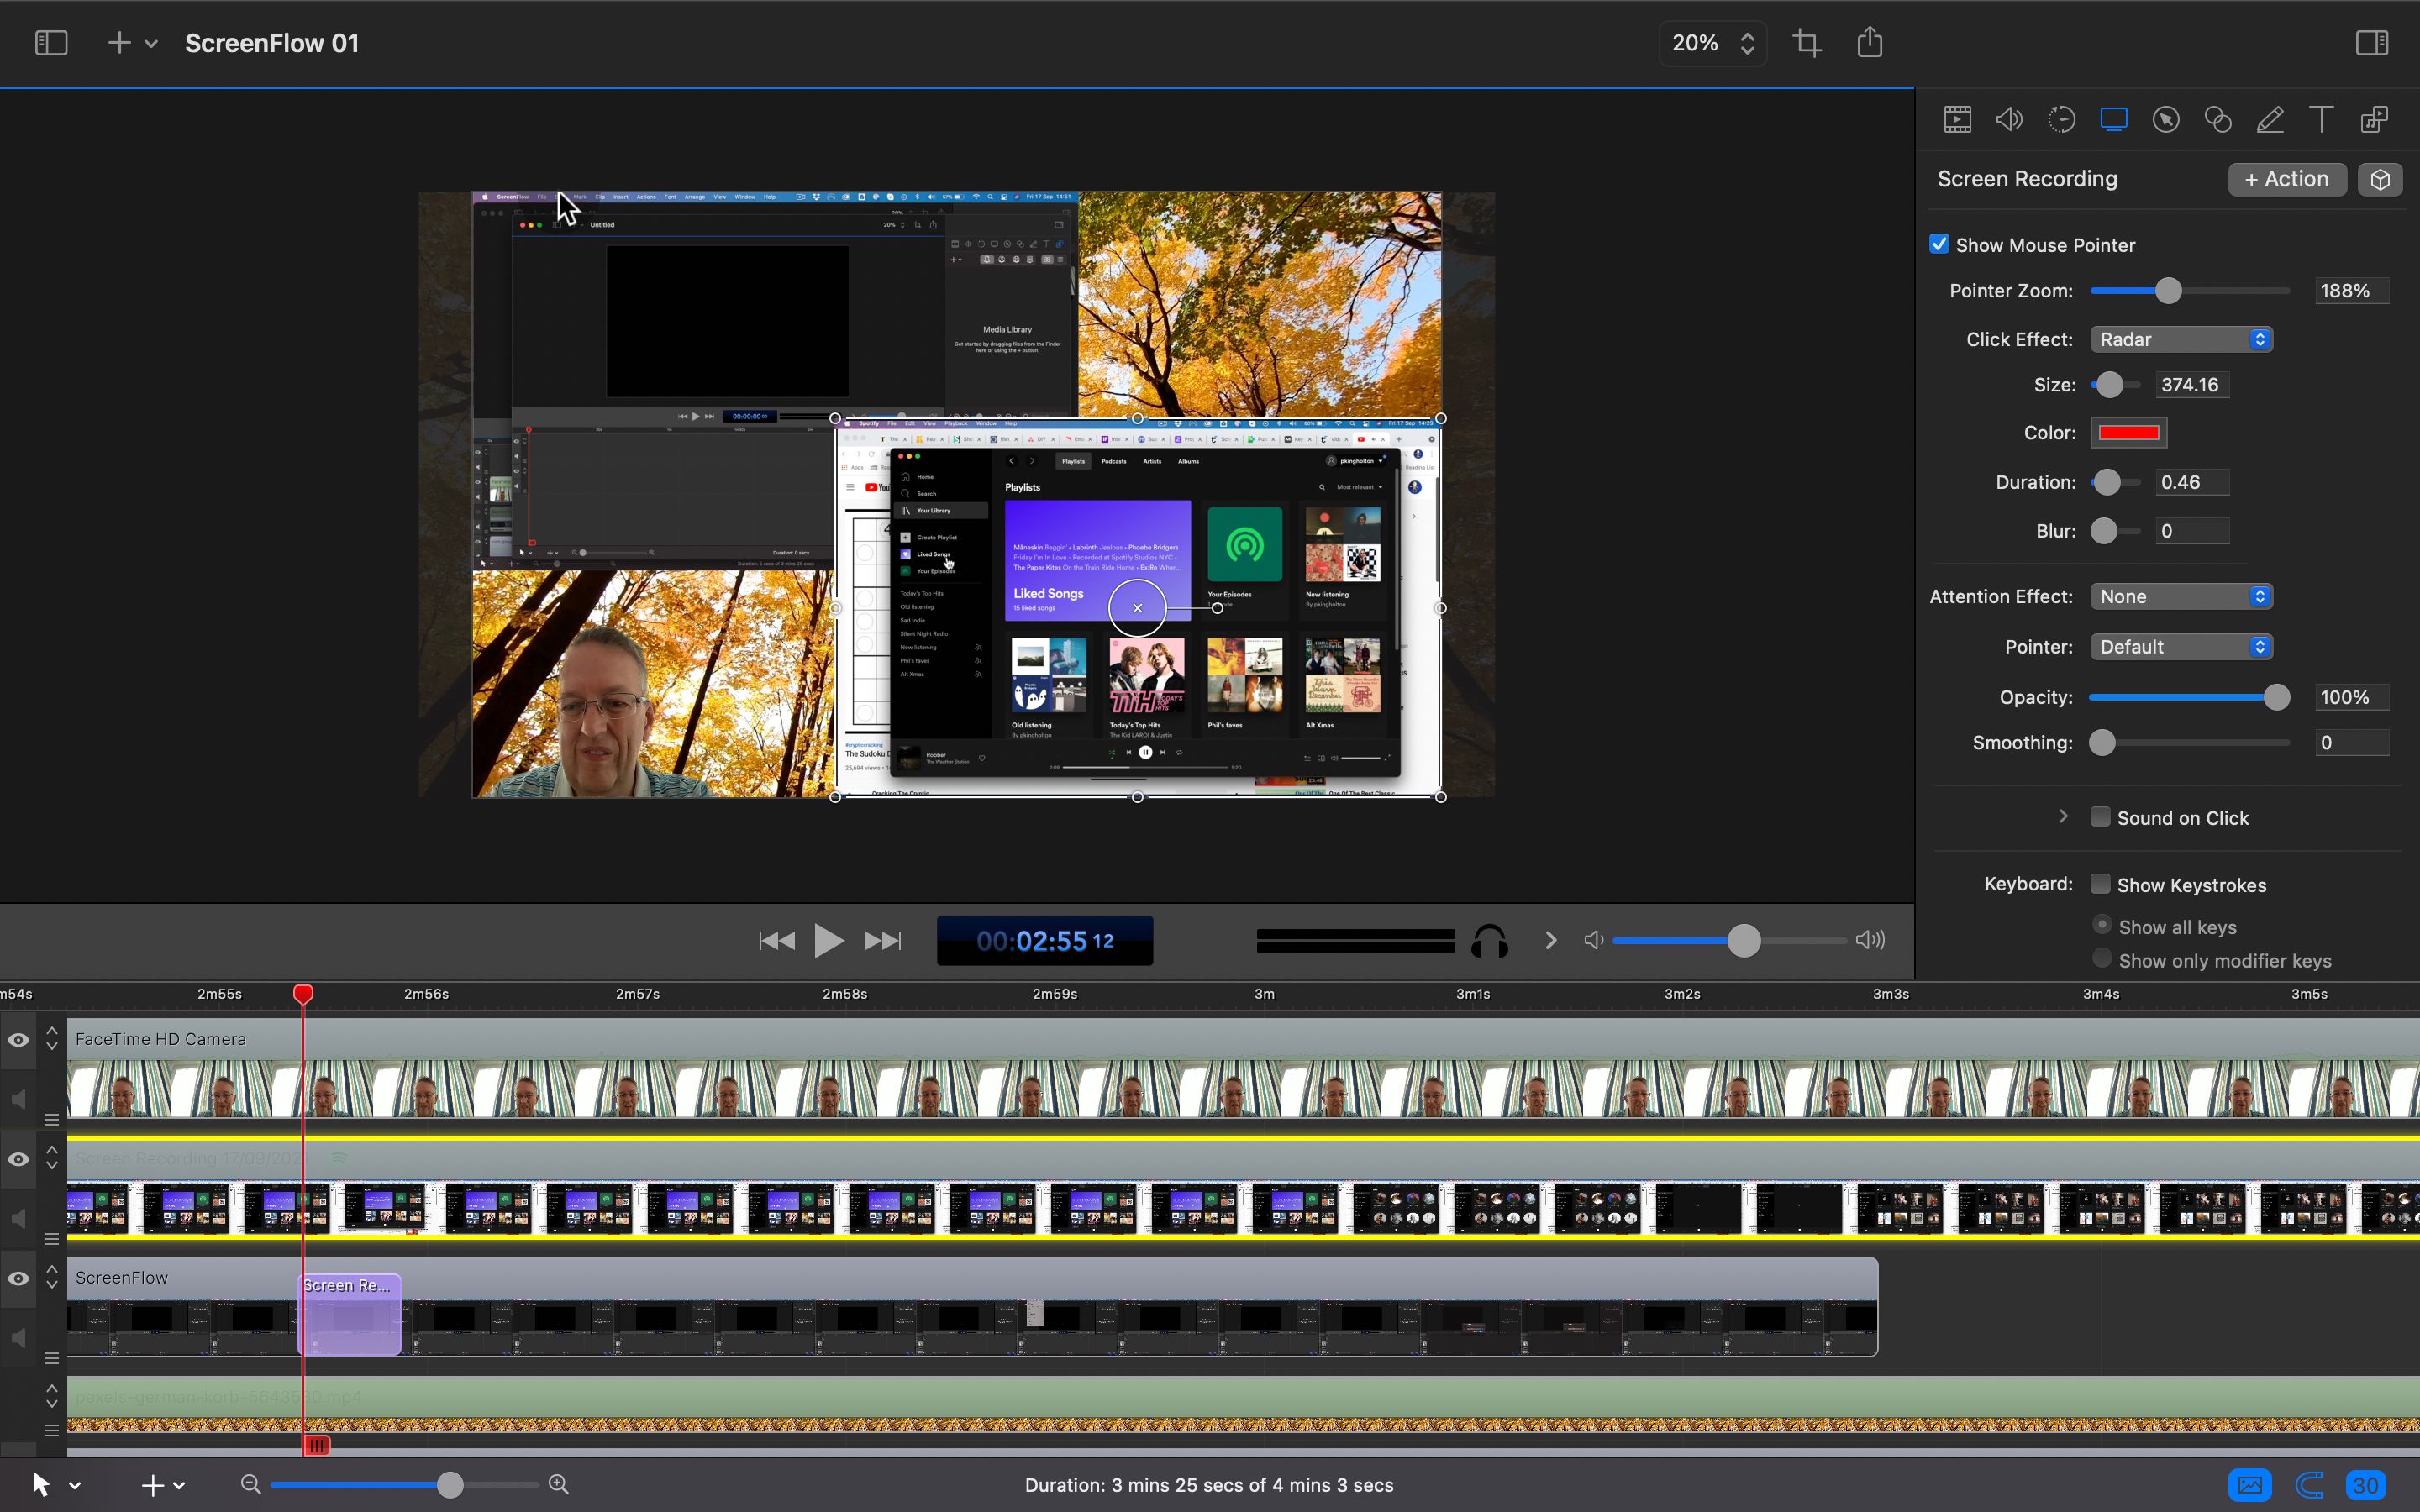
The Screen Recording section of the inspector offers some handy options, such as showing and enlarging the mouse pointer, adding a circle around it, and illustrating clicks. You can also show key presses, provided you enabled their recording in the permissions.
Screen Callouts
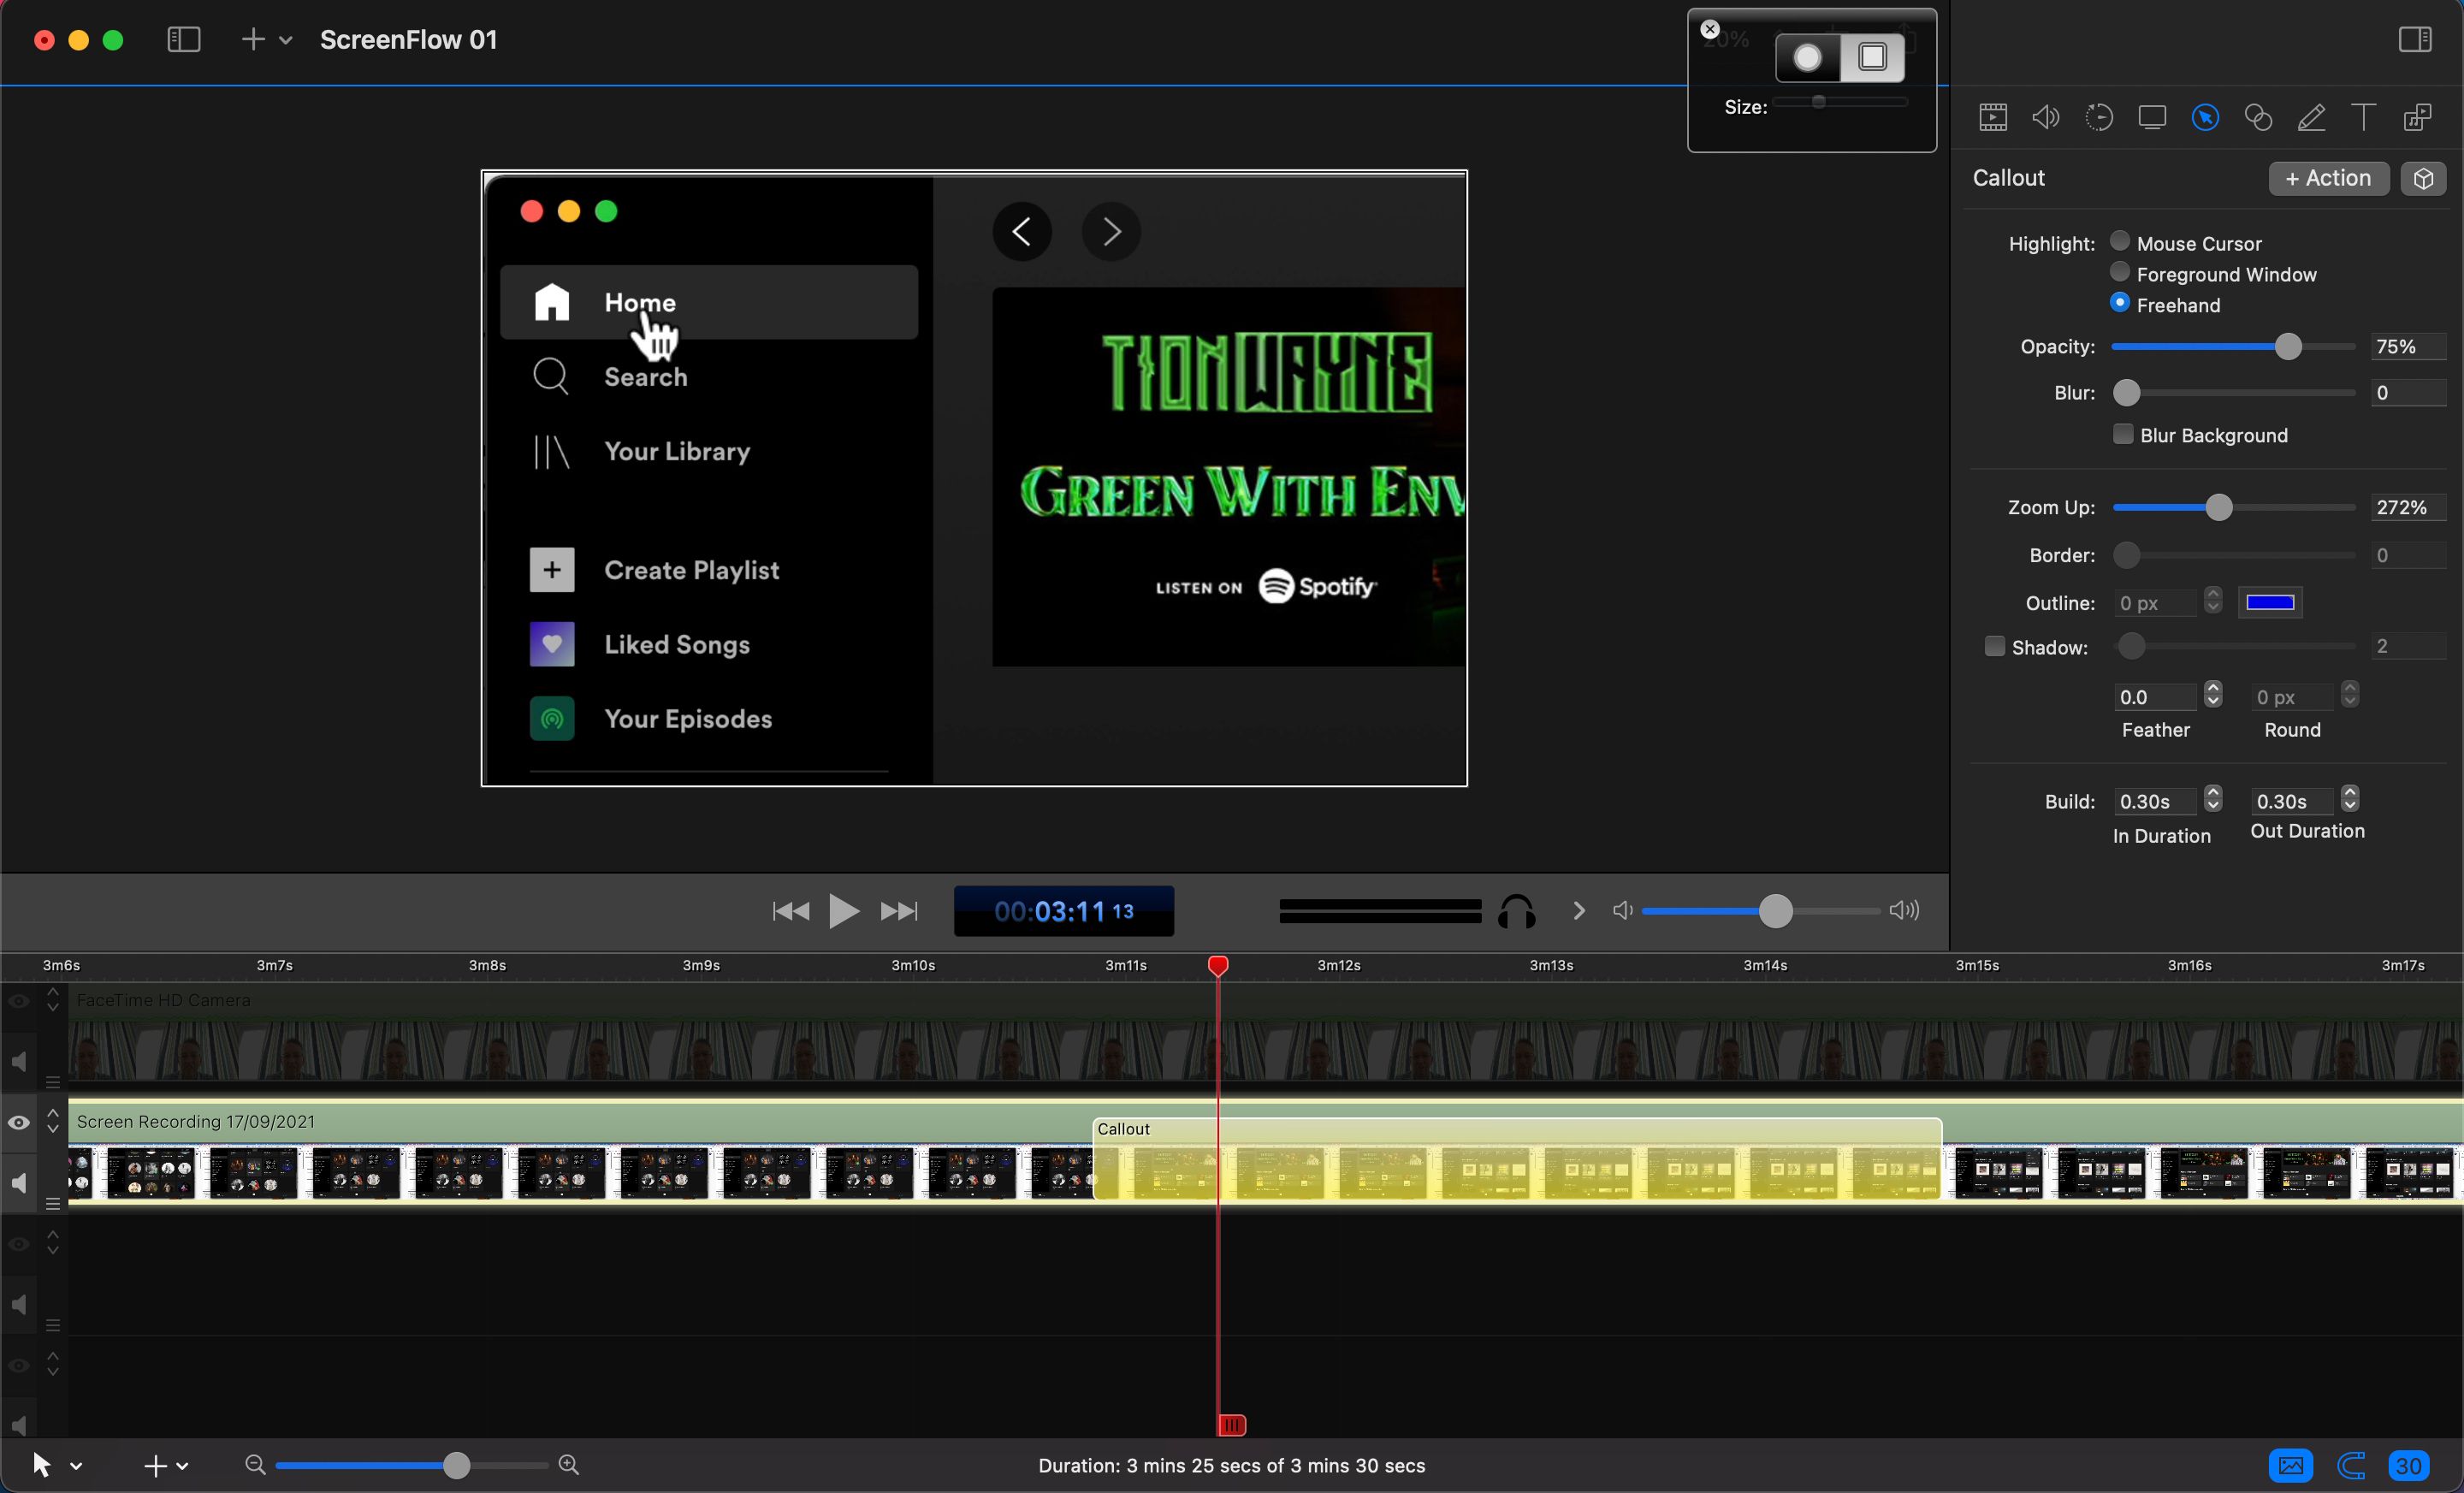
The Callout section of the inspector is one of the most useful for screencasting, enabling you highlight an area and zoom in. Clicking + Action gives you a choice of highlighting the mouse cursor, foreground window, or a freehand circle or rectangle. You can also choose the zoom level.
Touch Callouts
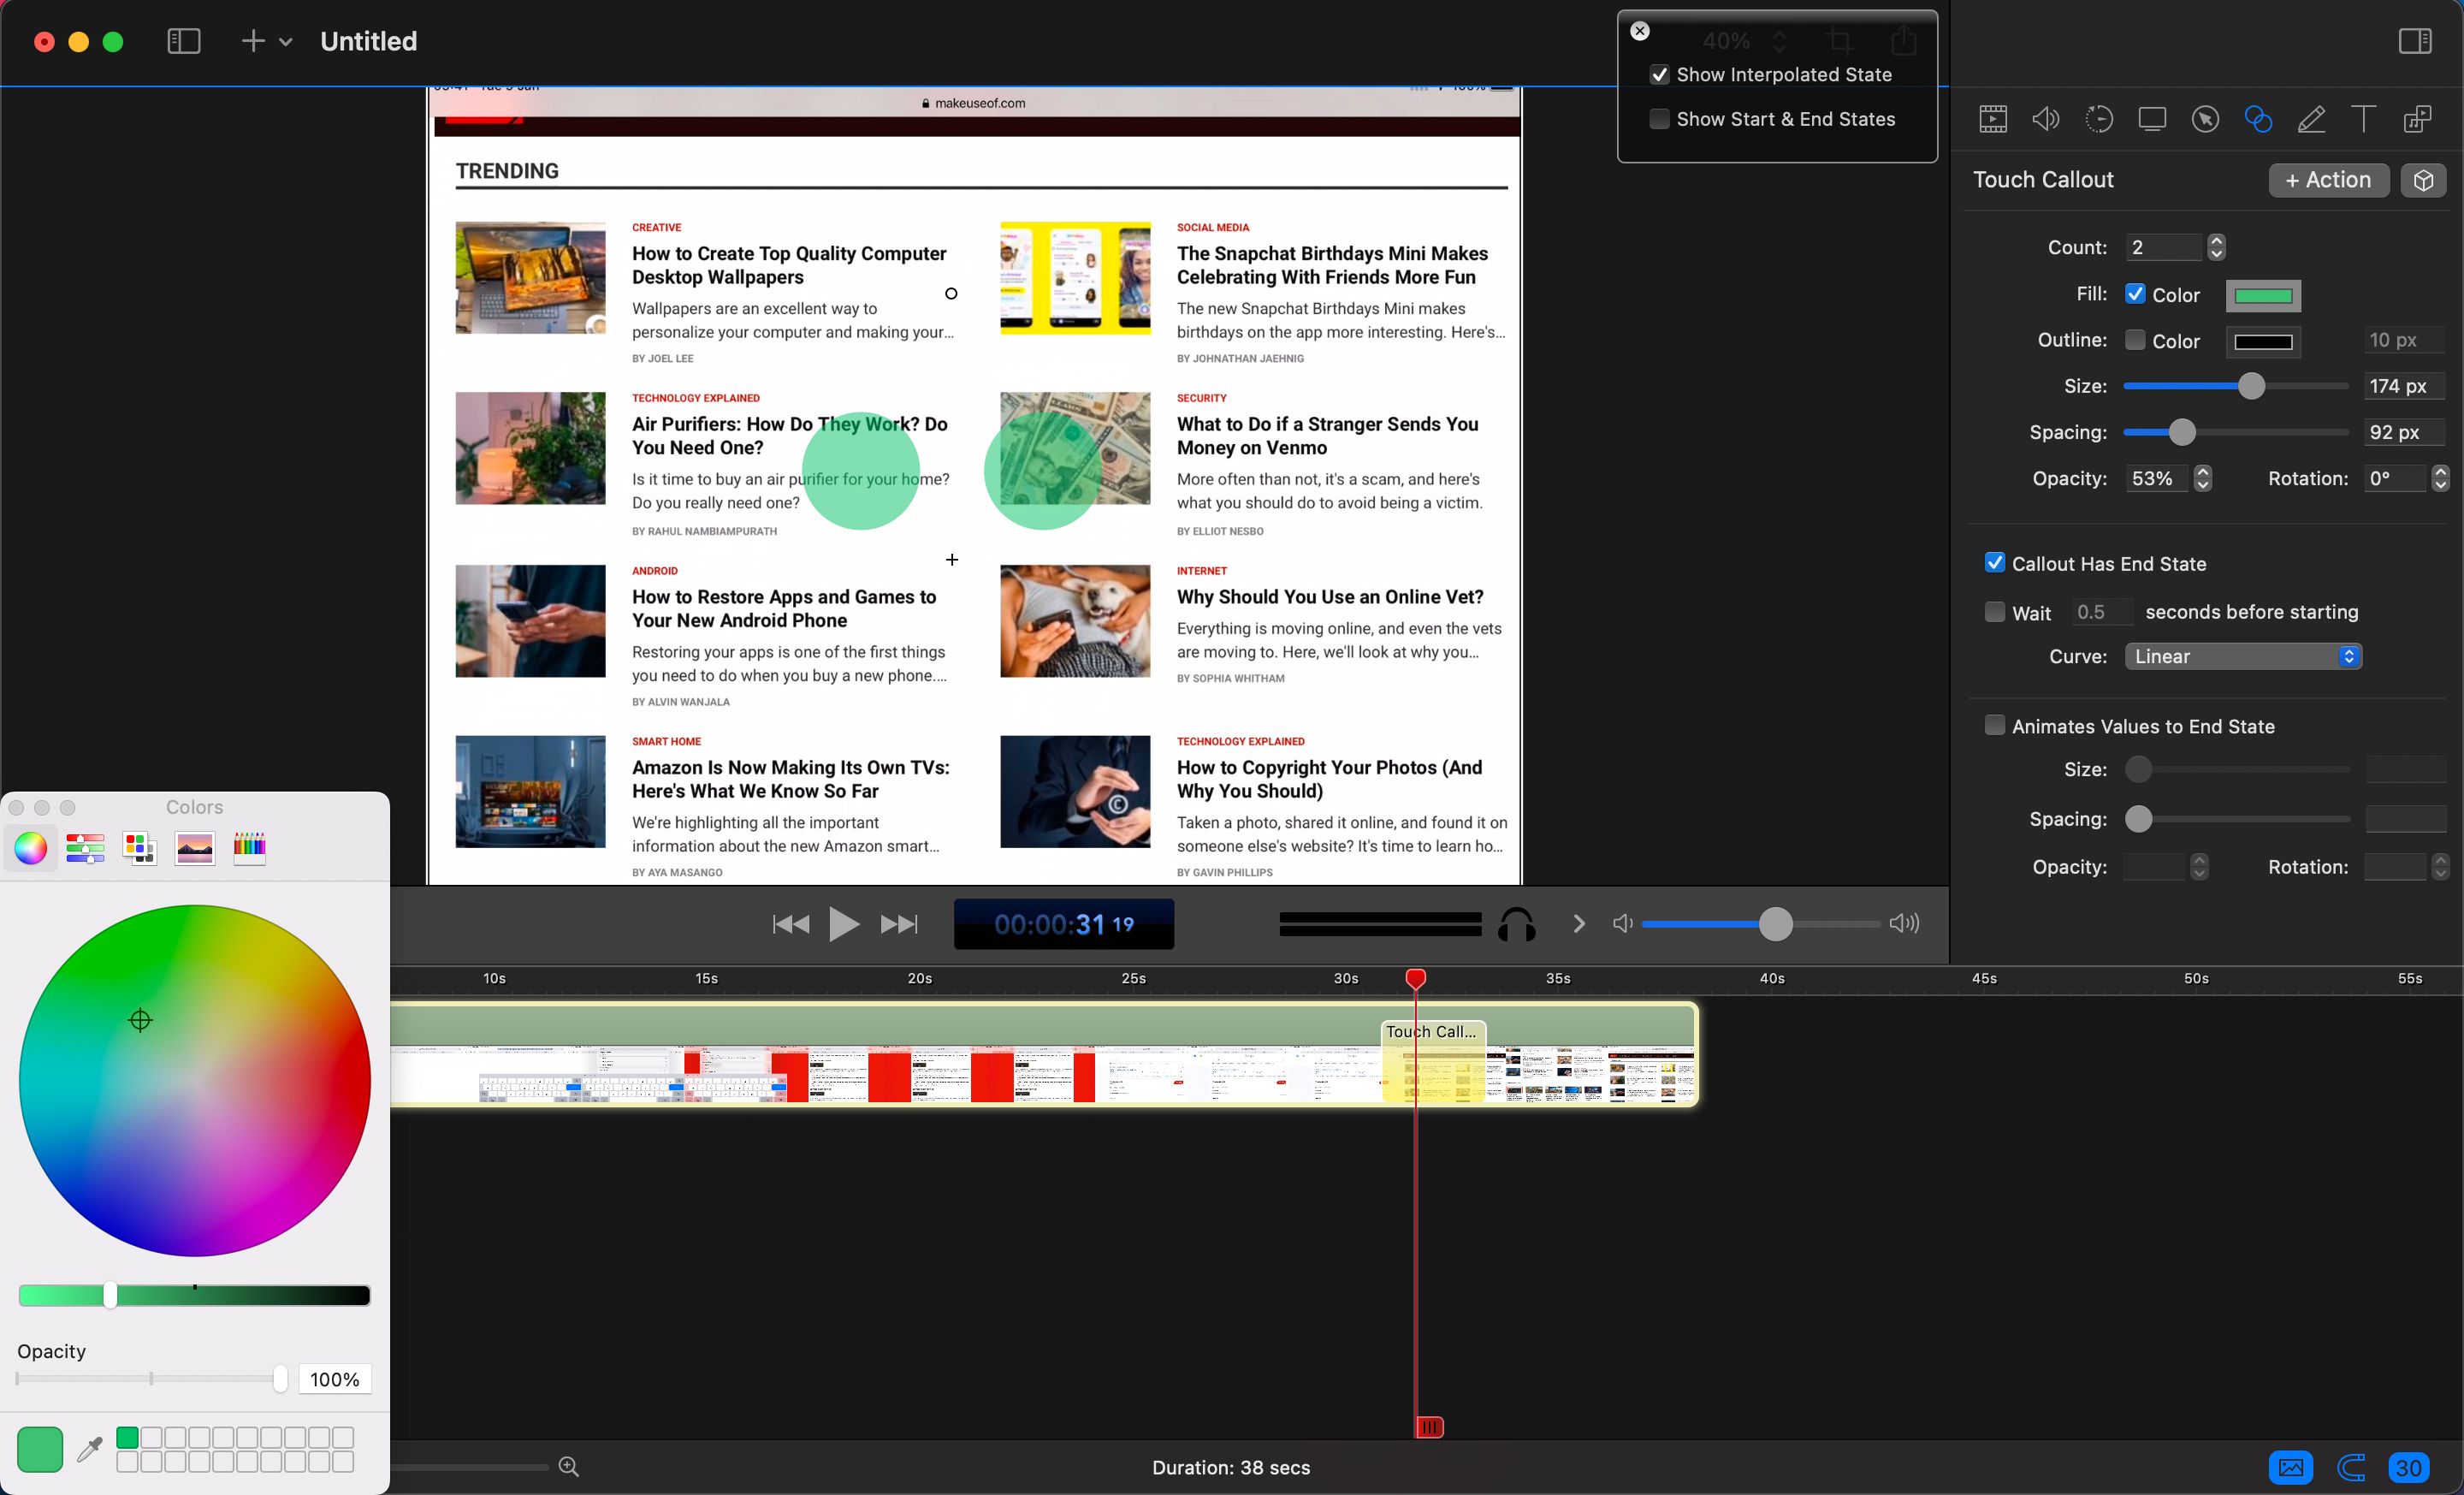
Similarly, for recordings of an iOS device screen, clicking the Touch Callout icon allows you to highlight touch gestures on the screen. Alter the Count for the number of fingers used, then adjust color, size, and spacing.
To animate it, tick Callout Has End State, then move the newly appeared circles to the final position of the gesture. Finally, untick Show Start & End States in the box at the top, and tick Show Interpolated State.
Annotation, Text & Titles
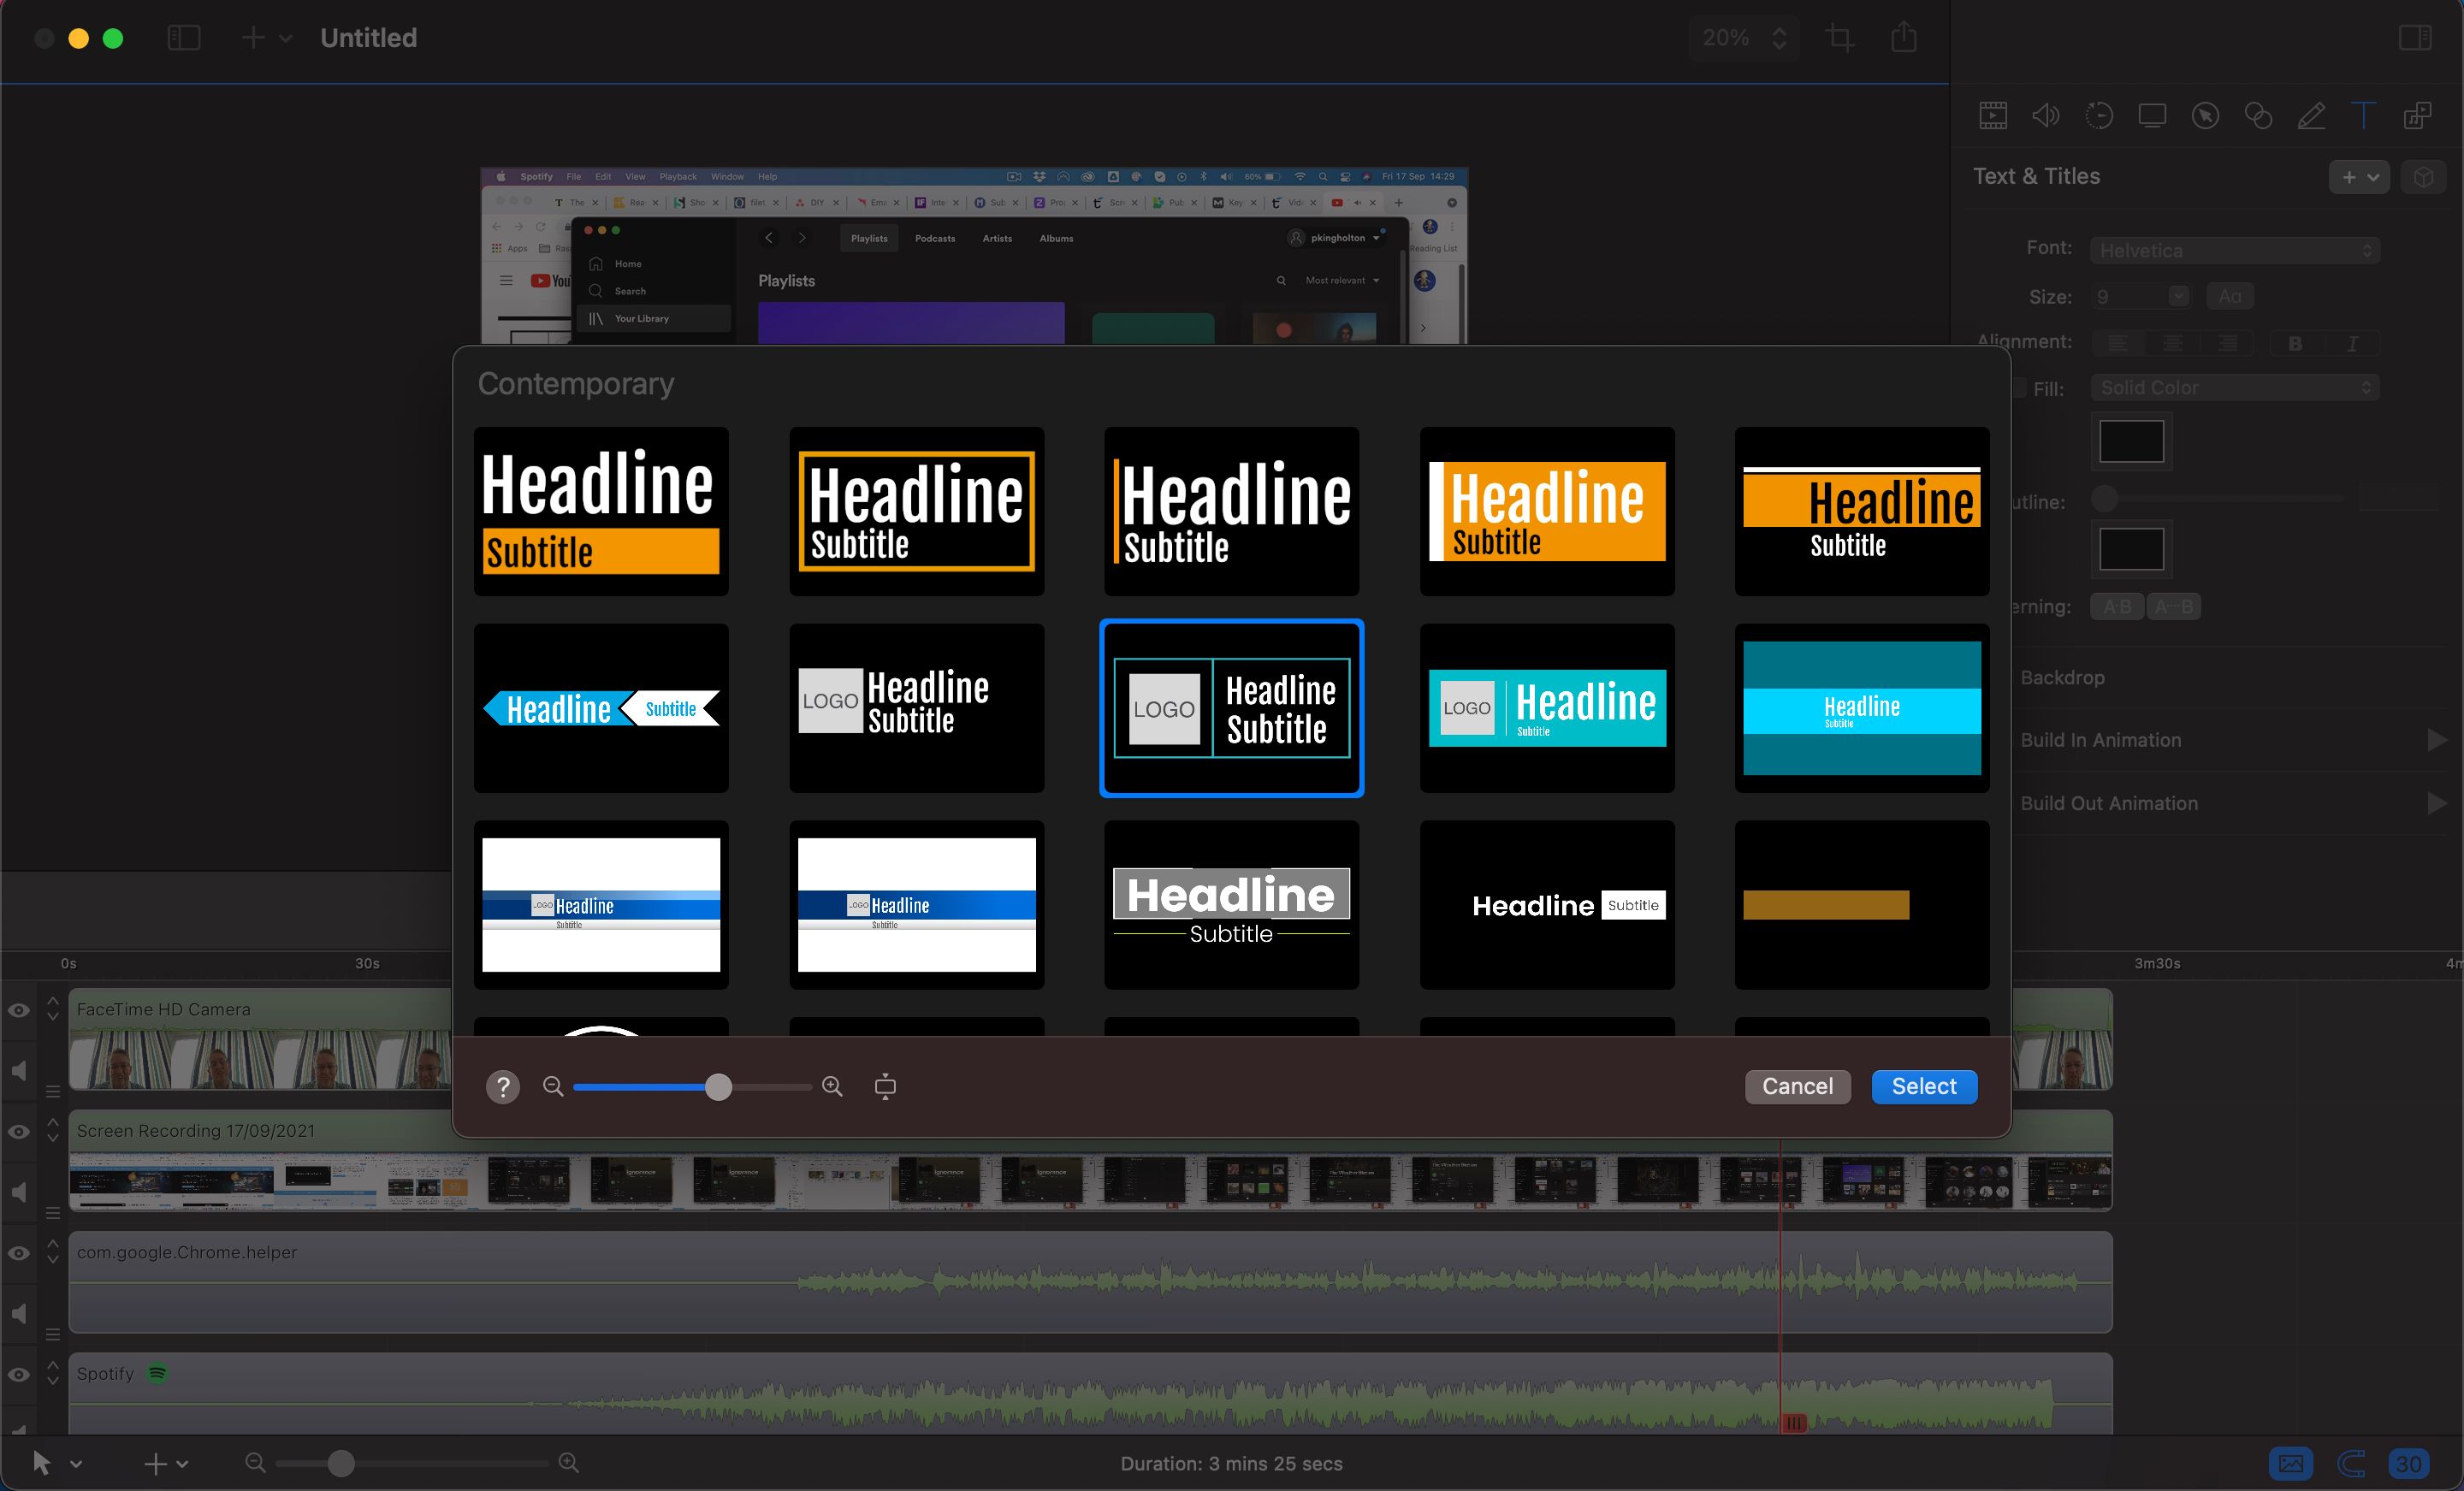
The Annotation section lets you draw lines and shapes on the canvas to point to certain aspects. The Text & Titles section enables you to add either text or one of the built-in TV news-style title animations. You can alter the colors, fonts, and even add your own logo to some of them. To extend the animation, just drag the right edge of the title clip in the timeline.
Media Library
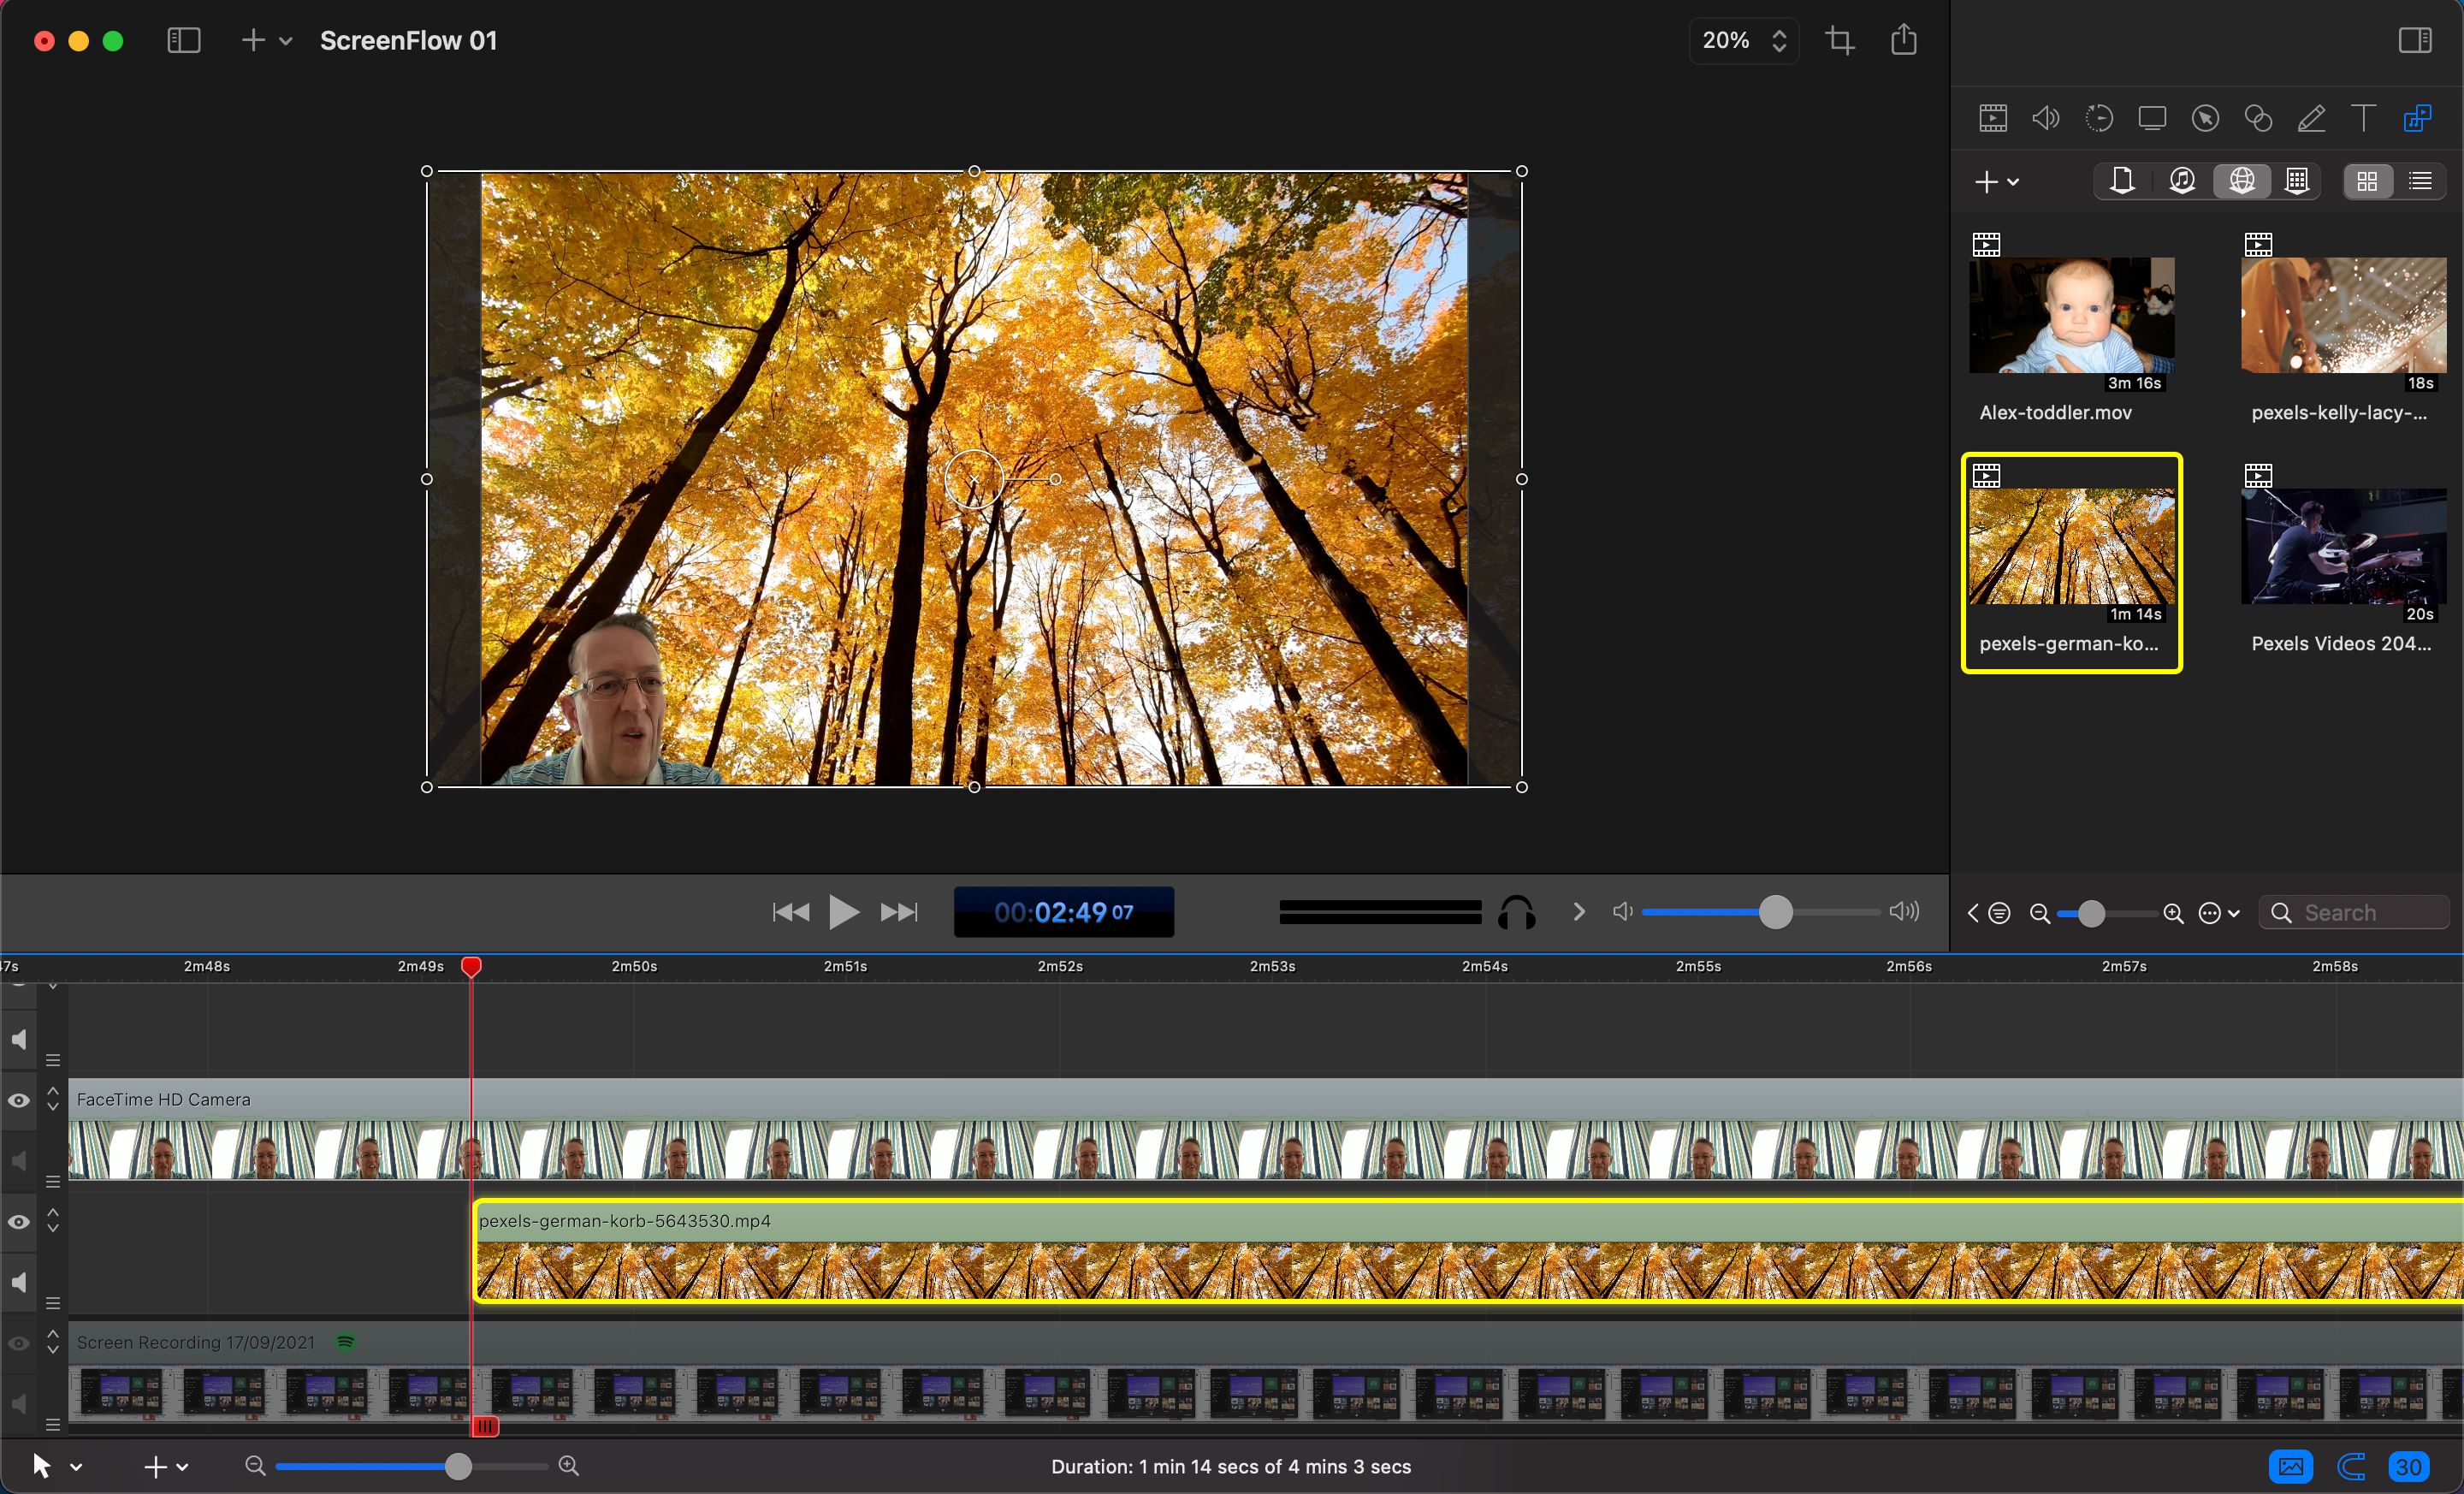
The final icon in the inspector enables you to view the media library for the current document, your iTunes library for adding music, the ScreenFlow Stock Media Library (for which you need a subscription), and the global library: the last of these is a handy place where you can add favorite clips to use in multiple documents.
Create Professional Screencasts With ScreenFlow: Success
That concludes our whistle-stop tour of ScreenFlow. You should now have a good idea of how to get started recording and editing your first screencast. With a bit of practice using the numerous options, you'll soon be creating slick screencasts and videos that you can export as a file or share directly to services such as YouTube and Vimeo.