A lot of amateur photographers face issues with blurry photos. Whether you're taking photos in a hurry, or you’ve found an image online that's too blurry, knowing how to unblur images can be quite helpful.
There are a couple of methods that can help you unblur an image. Here, we'll show you how to unblur an image using Photoshop and GIMP, as well as with online tools.
1. How to Unblur an Image Using Photoshop
Sometimes, our photos just don't come out as expected. Luckily, Adobe Photoshop allows you to sharpen your photos as much as you’d like.
The results might not be as perfect as an originally sharp photo, but it will give you much better results than what you started with. Here, we'll go over three different ways to sharpen a photo in Photoshop.
Using Unsharp Mask
You can easily unblur a photo in Photoshop using the Unsharp Mask feature. To get started, just follow the steps below:
- Open your image in Photoshop by choosing File > Open.
- Navigate to the Layers panel on the right side of your screen. If you don't see the panel, you can open it by clicking on Window > Layers.
- Right-click on the layer that contains the picture you want to unblur. Then, click on Convert to Smart Object.
- From here, click on Filter > Sharpen > Unsharp Mask.
In the new window that pops up, you have three options you can adjust:
- Amount slider: allows you to set the strength of the sharpening effect.
- Radius slider: allows you to set the width of the sharpening effect.
- Threshold slider: lets you control the general sharpness of the photo.
If you want to see the changes you're making in real-time, make sure that the checkbox beside Preview is selected. Once you are satisfied with the results, simply click on OK.

Using the Smart Sharpen Tool
The Smart Sharpen tool has a couple of unique features that the Unsharp Mask feature doesn't offer. While both are designed to help you sharpen your photos, Smart Sharpen is typically used for targeted sharpening, as it helps minimize the noise in low-contrast, soft areas.
Here's how to use the Smart Sharpen tool:
- Open your photo in Photoshop.
- In the Layers panel, click on the image layer, and then press Ctrl + J to duplicate it.
- Right-click the layer that was duplicated, and choose the Convert to Smart Object option.
- Click on Filter > Sharpen > Smart Sharpen. A dialogue box will open.
- Make sure that in the Preset menu, you choose Default.
Here, you are given more options to control the sharpness of your photo. In the Sharpen tab, you have two main options: the Amount value for the strength of your sharpening and the Radius value that impacts the width of the sharpening effect.
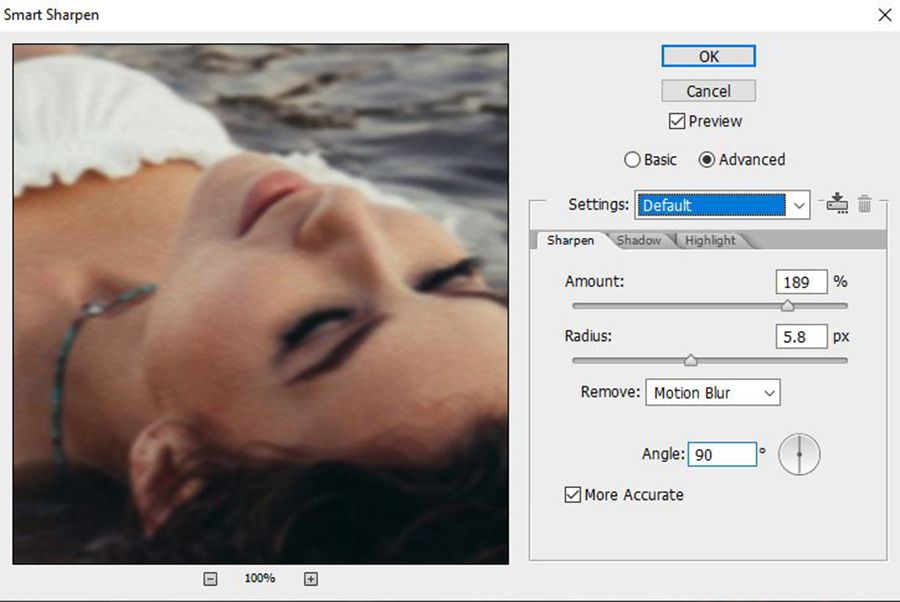
You can also choose to remove Motion Blur, Lens Blur, and Gaussian Blur.
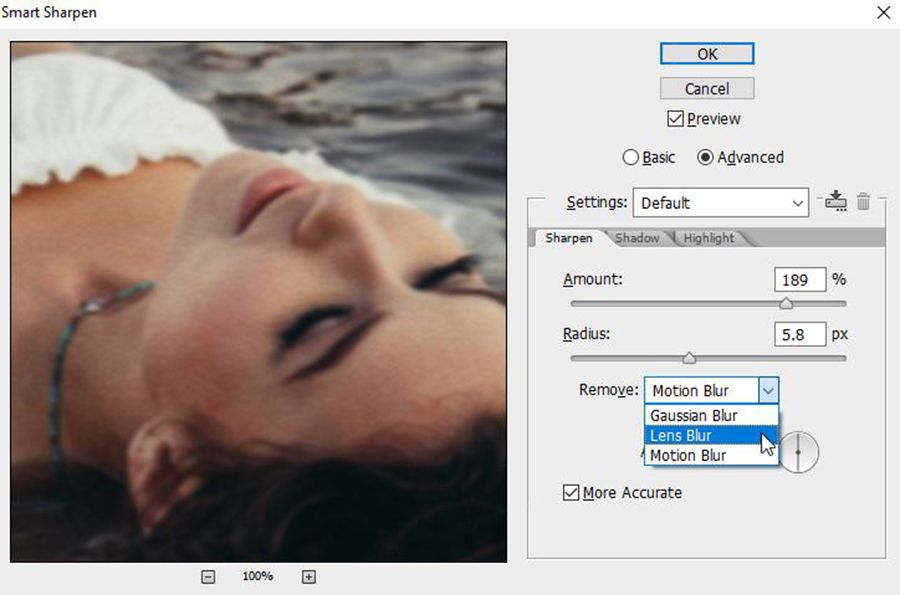
In the Shadow and Highlight tabs, you can tweak your image by playing with Radius, Fade Amount, and Tonal Width. Once you are satisfied with the results, simply click on OK.

Using the Sharpen Tool
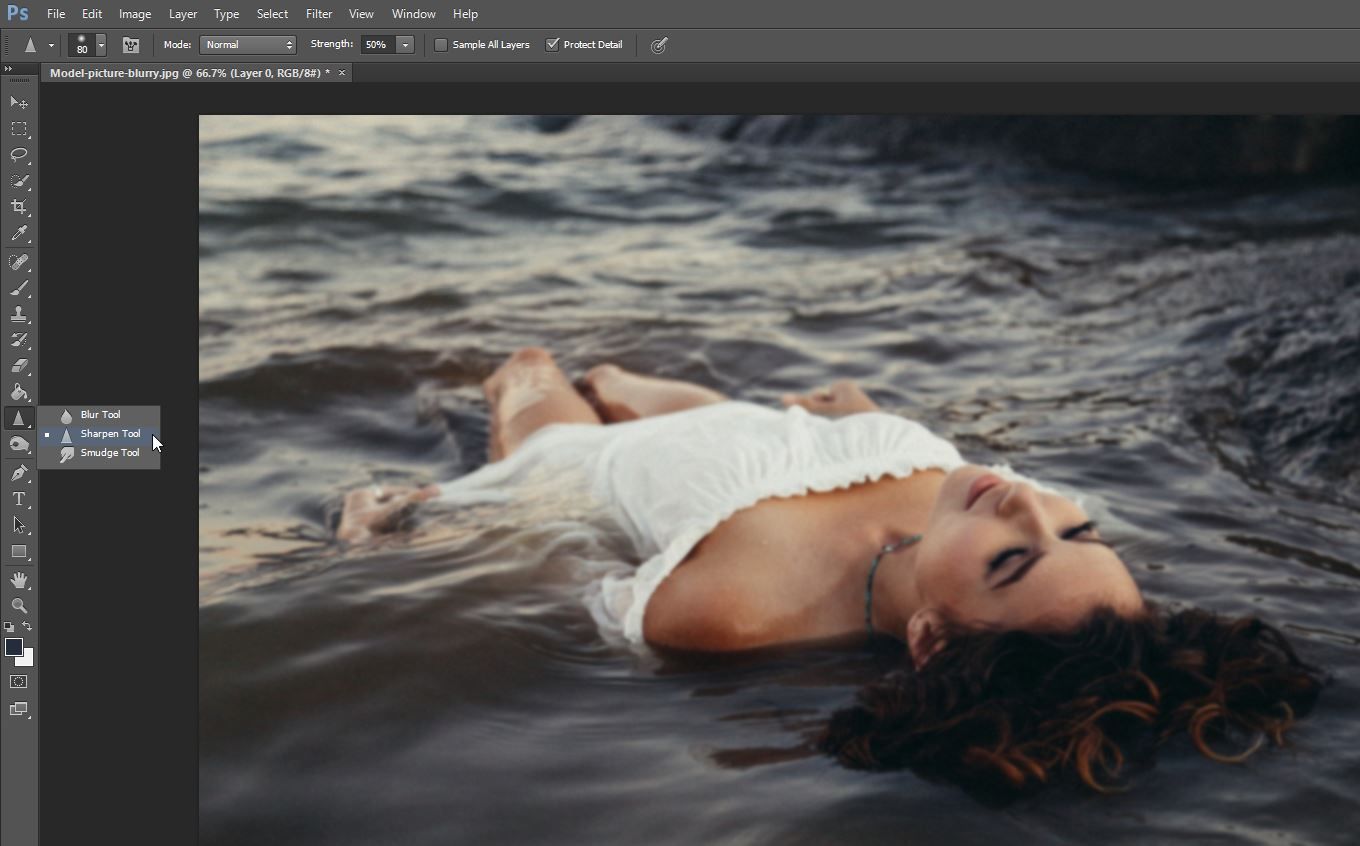
You can also use the Sharpen tool to selectively sharpen the photo however you’d like. Simply select the Sharpen tool (nested beneath the Blur tool), and then click and drag over the areas you want to sharpen.
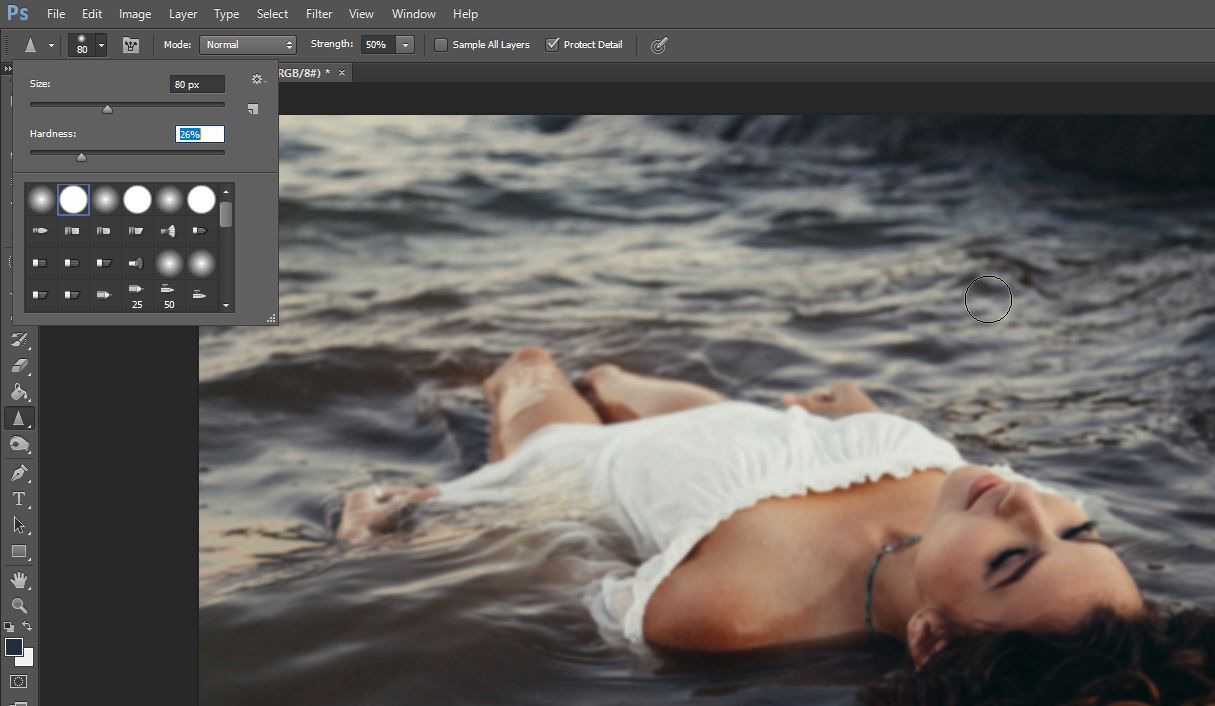
You can also use the menu at the top of the screen to adjust the brush and the hardness of the Sharpen tool.
2. How to Unblur a Picture Using GIMP
If you don't have Photoshop, you can simply download GIMP. This program is free, and it has a lot of similar options as Photoshop. However, GIMP does have a bit of a learning curve.
To unblur a photo in GIMP, just follow these simple steps:
- Open GIMP, and press Ctrl + O to open the image you want to edit.
- Select the Blur/Sharpen tool, which you can find in the Toolbox.
- From the options that appear on the left, make sure to select Sharpen.
- Once you do that, adjust the brush size and other options, and simply click and drag over the parts of the photo you want to sharpen.
3. How to Fix Blurry Photos Online
Did you know that there are many online tools that allow you to fix blurry photos as well? In case you don't want to pay for Photoshop or download GIMP, these online tools can help you out.
Fotor
Fotor is an online image editor that lets you apply a number of edits and effects to your pictures. It also includes an option for you to unblur your photos.
To access it, head to the Basic Adjust dropdown in the menu on the left side of your screen, and then adjust the Sharpness slider.
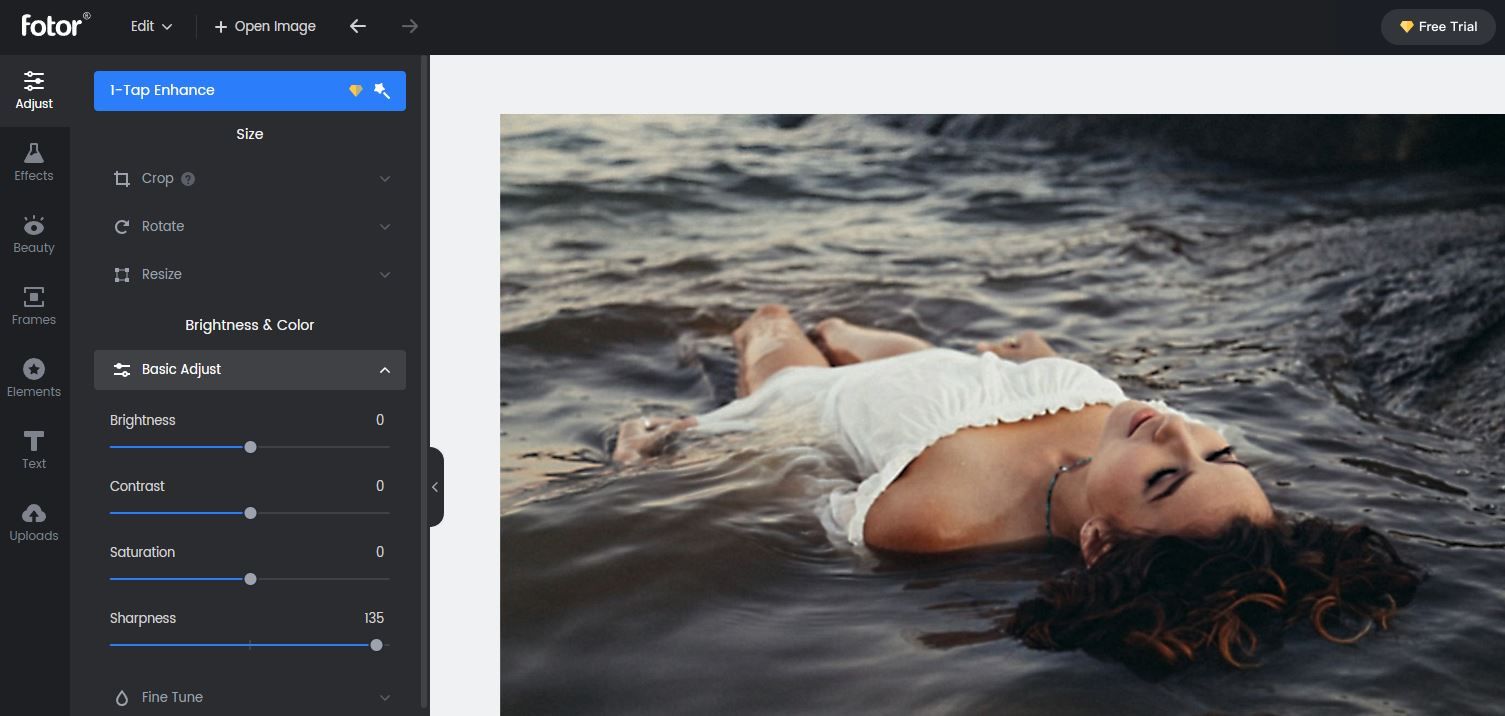
While basic edits like sharpness are free, you'll have to pay if you want to use more advanced features.
Pine Tools
Pine Tools offers one of the simplest ways to unblur photos online. Once you import your picture, you can adjust the strength of the sharpening tool, and simply click on Sharpen to see the results.
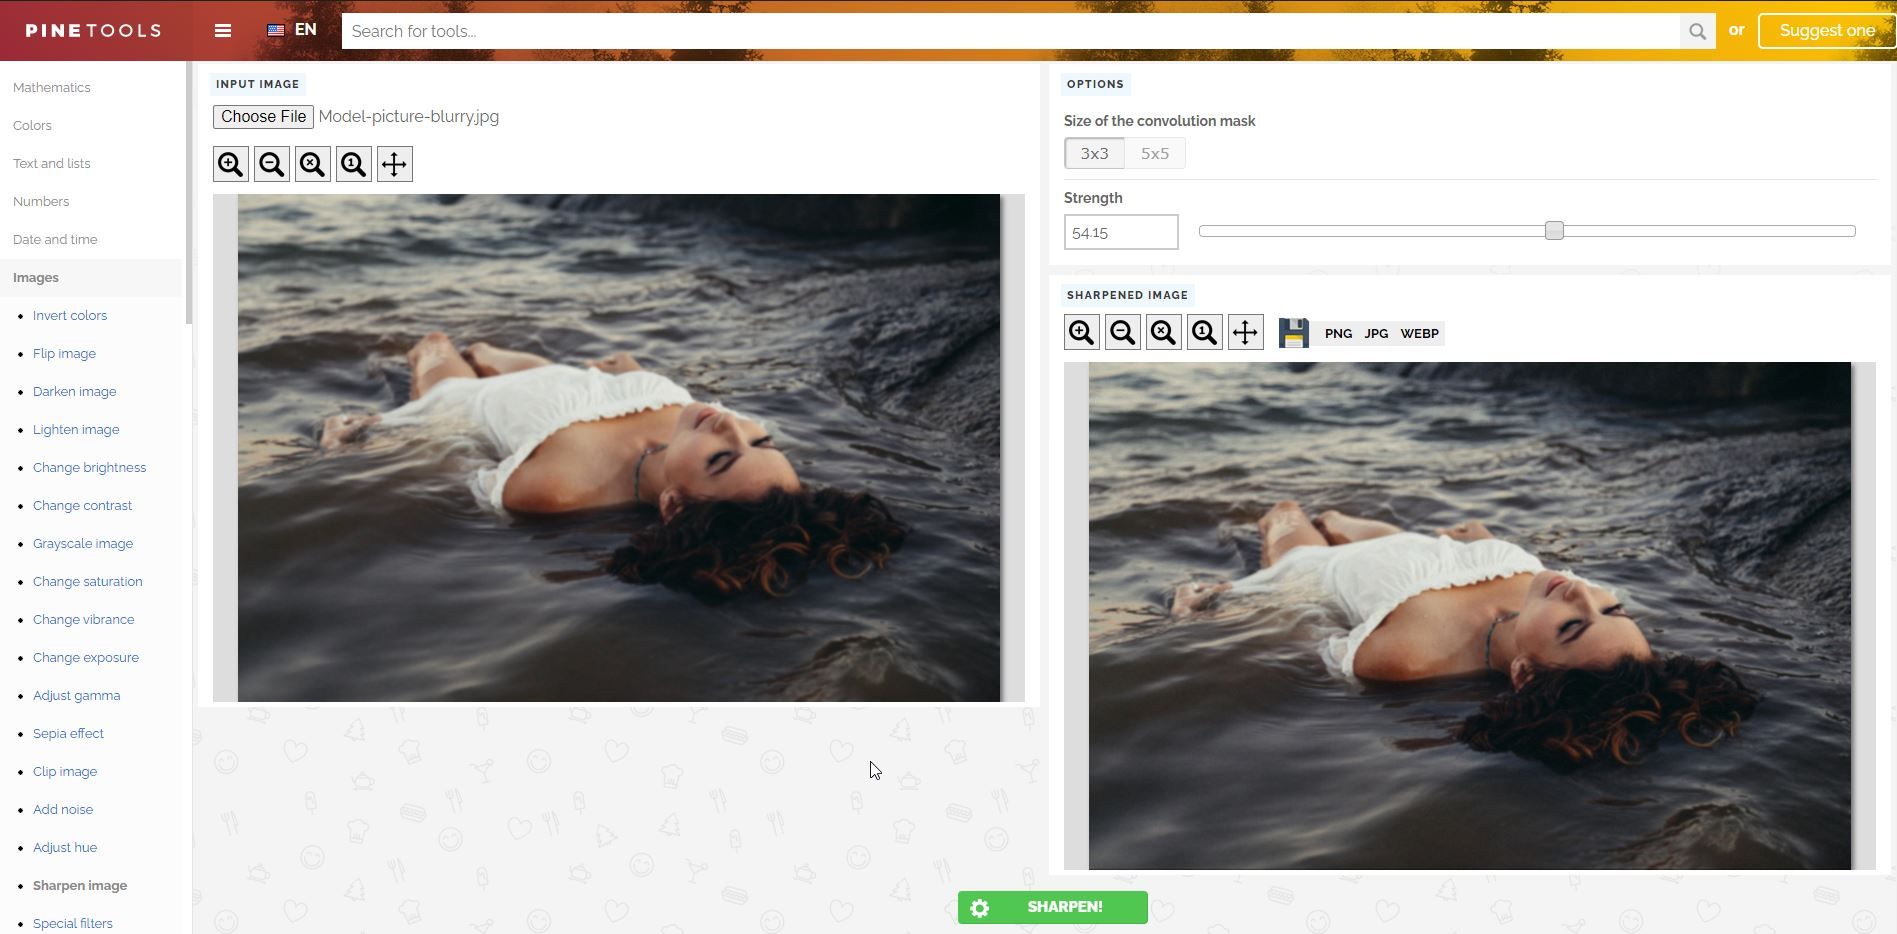
Best of all, it's completely free!
Vance AI
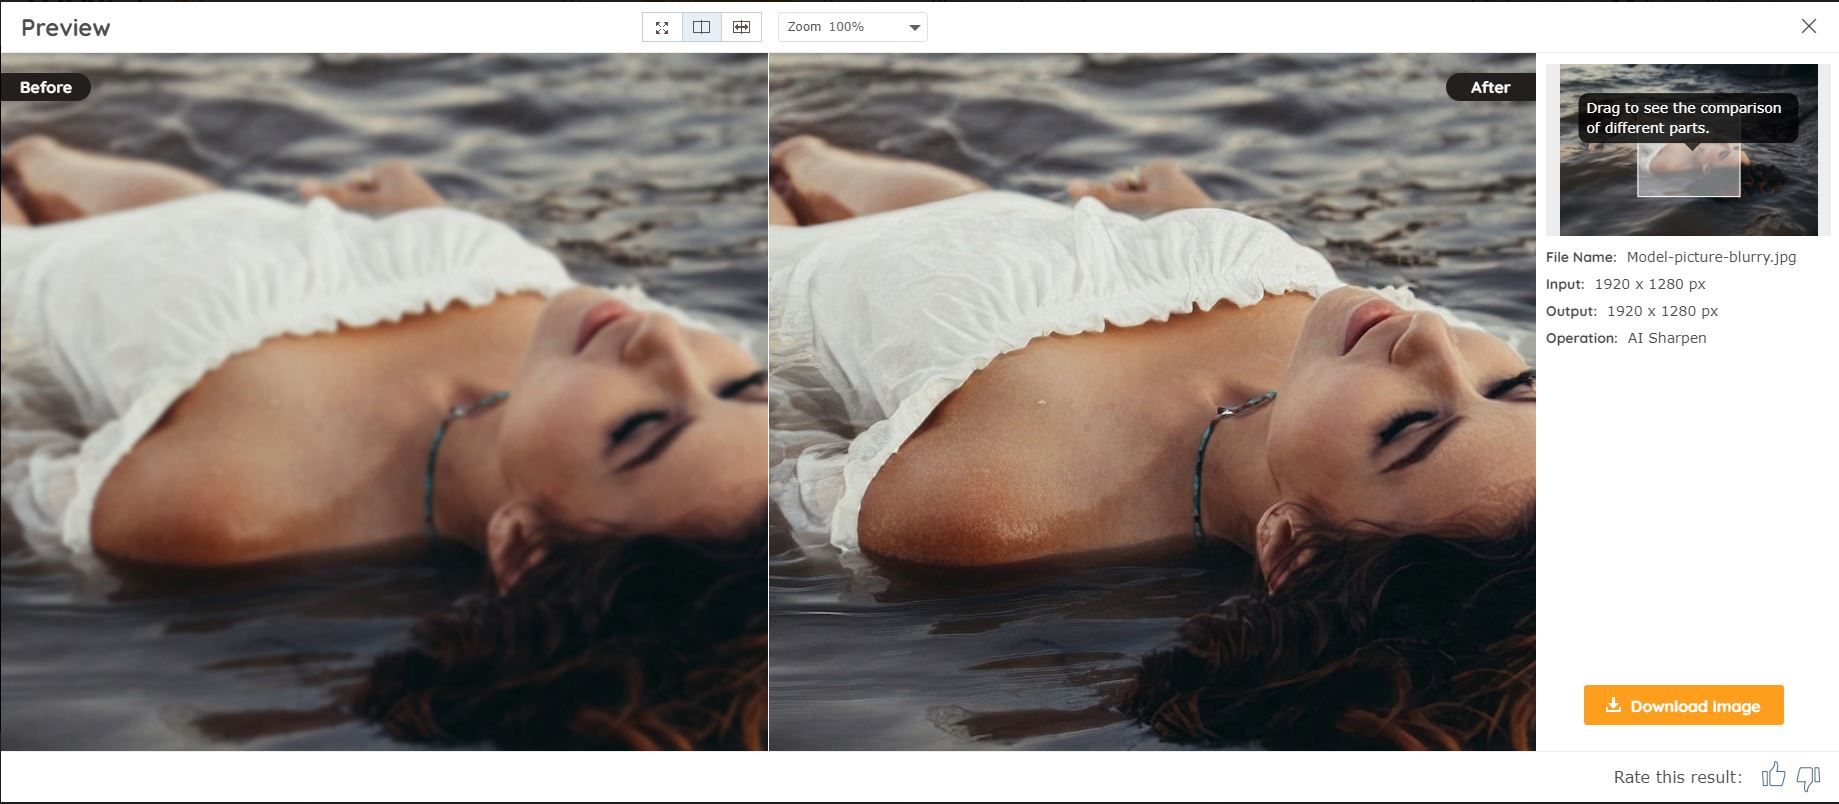
Vance AI does a great job at unblurring images. This tool will automatically sharpen your image using AI.
To access the AI Sharpener, select AI Solutions > AI Image Sharpener from the site's homepage.

After that, simply upload your photo, and if you are satisfied with the results, you can download the newly sharpened photo for free.
Photopea
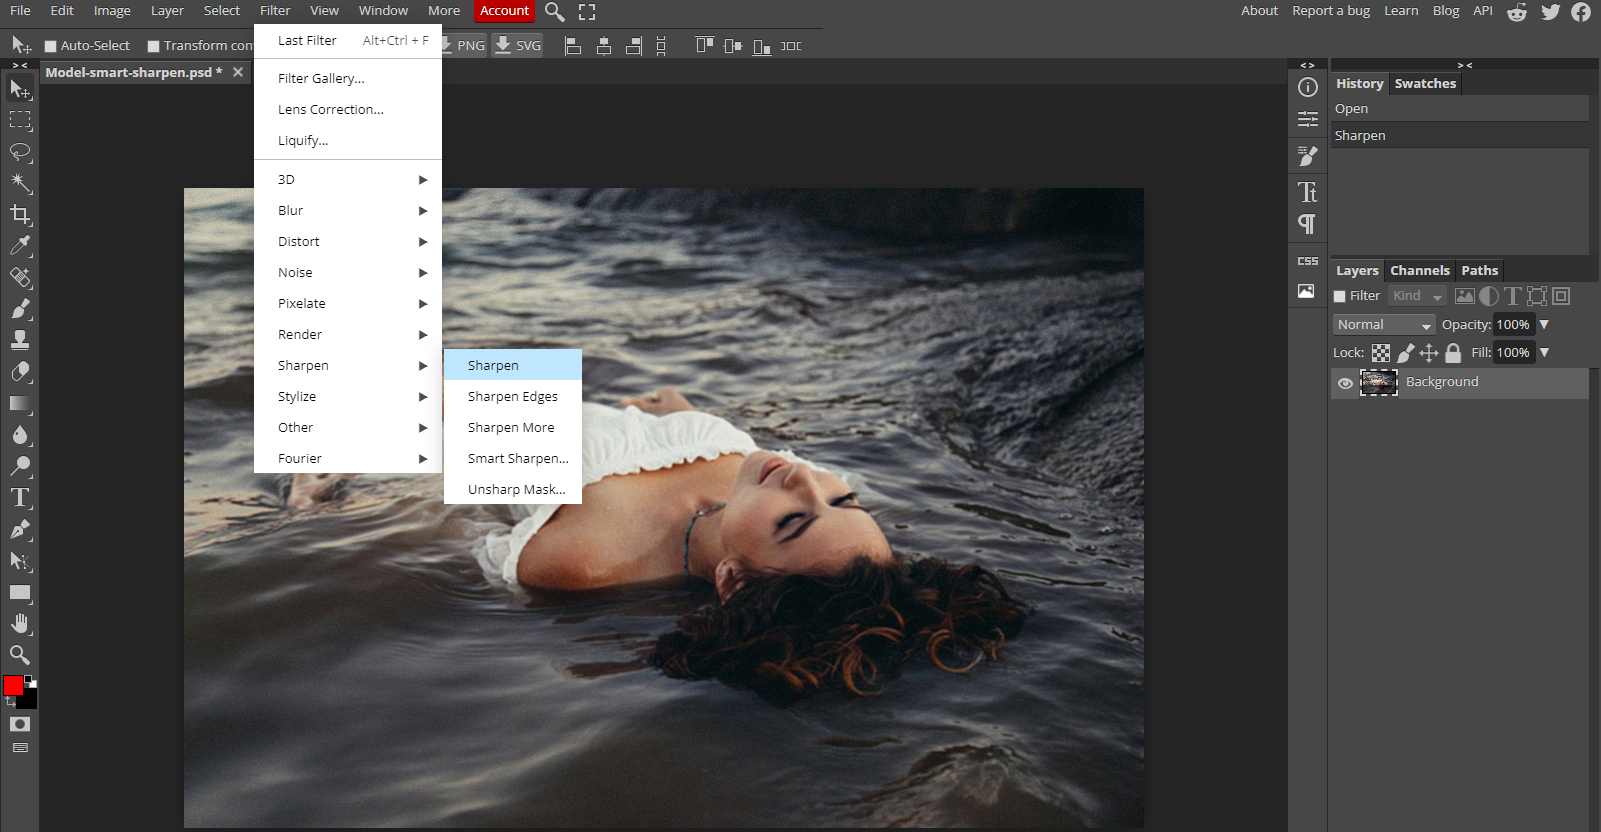
Photopea is like an online, scaled-down version of Photoshop. Plus, it works great when it comes to sharpening a photo. All you have to do is upload the photo, go to Filters, and check out all the Sharpen tools.
Sharpen Your Photos With Ease
Not only are there many different programs that allow you to unblur pictures, but there are also tons of online tools that will allow you to do the same for free.
Remember, Photoshop and GIMP are not the only programs that allow you to unblur images, but they are some of the simplest programs to work with.
![How to Find IMSI Number on iPhone [Helps with iOS Unlock][Updated] data:post.title](https://blogger.googleusercontent.com/img/b/R29vZ2xl/AVvXsEjLjHwhnfUXNJTuiylqmlurhLRVAEVi803j6xcnvN8EZwF5_XUynz1y0Ko-vwpx6O3nT5hogTELahedGzgQpXM5Y99fcBliinyBu8ACw8_DVV3FpPLkIqR0u7v_HM39rAkpV5MyJiG1h5s/s72-c/find+imsi+iphone.jpg)